Chapter 2 | IN MOTION
In this chapter, I’ll show you various ways to learn to draw a moving human figure.
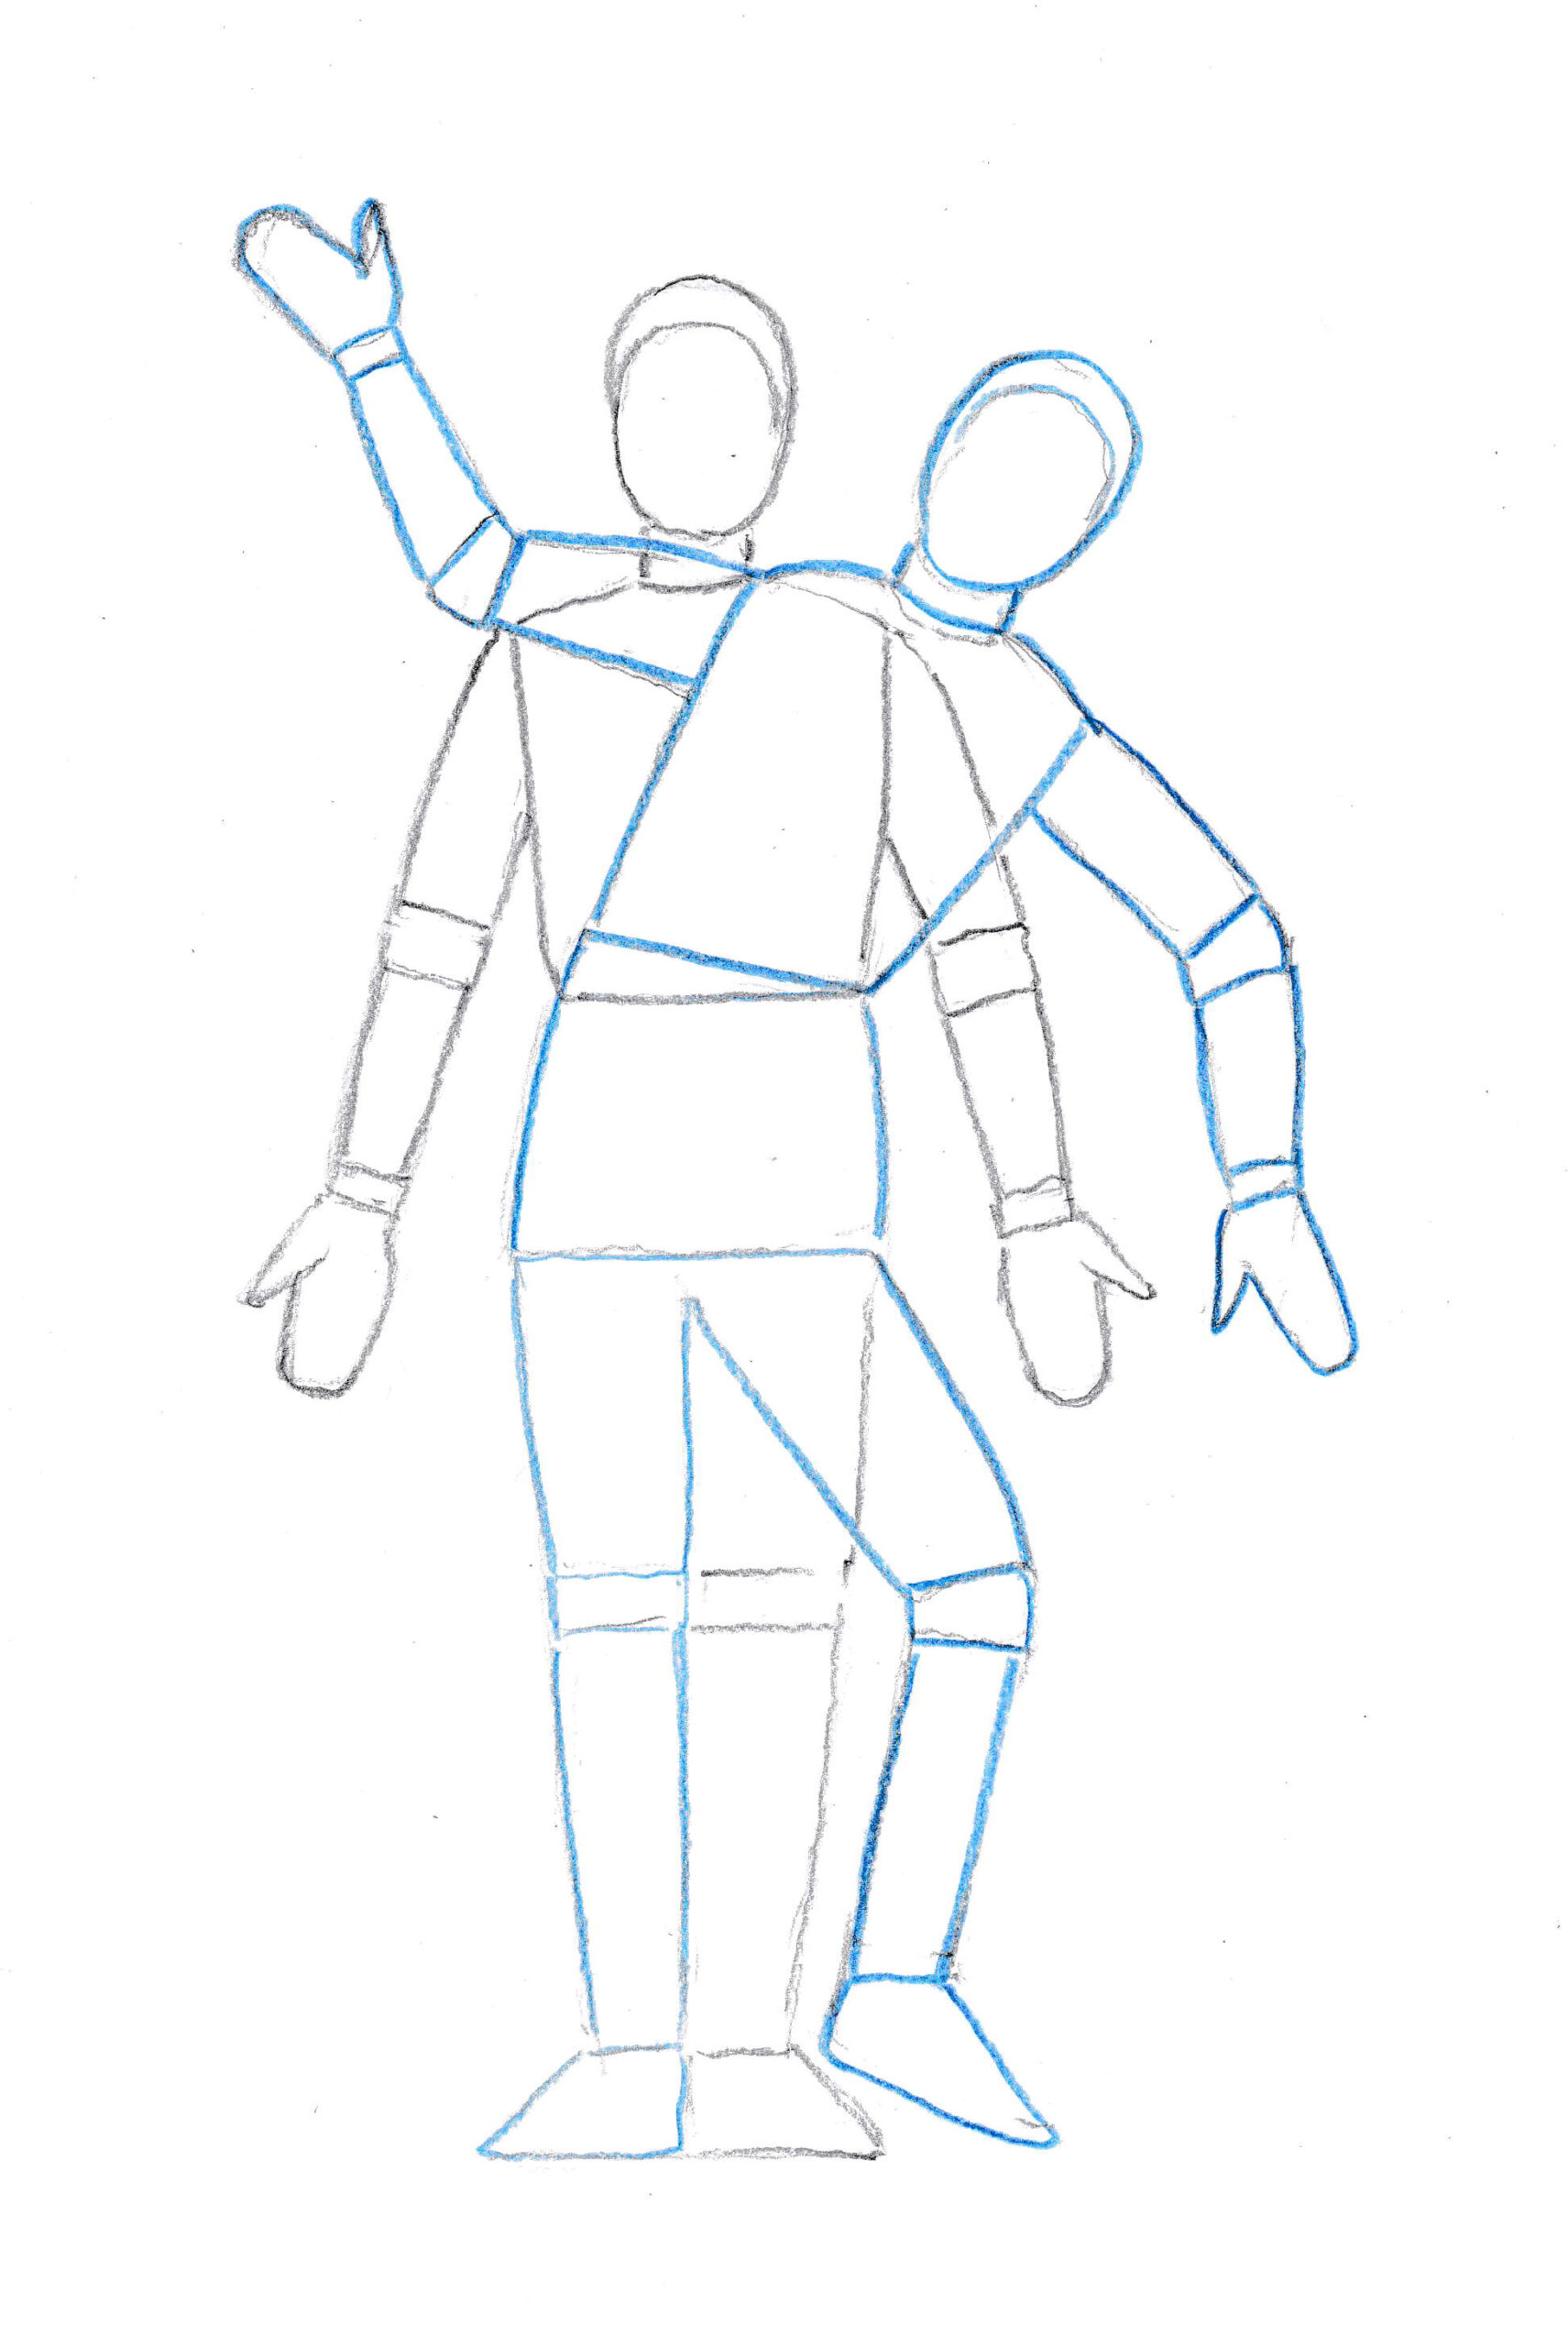
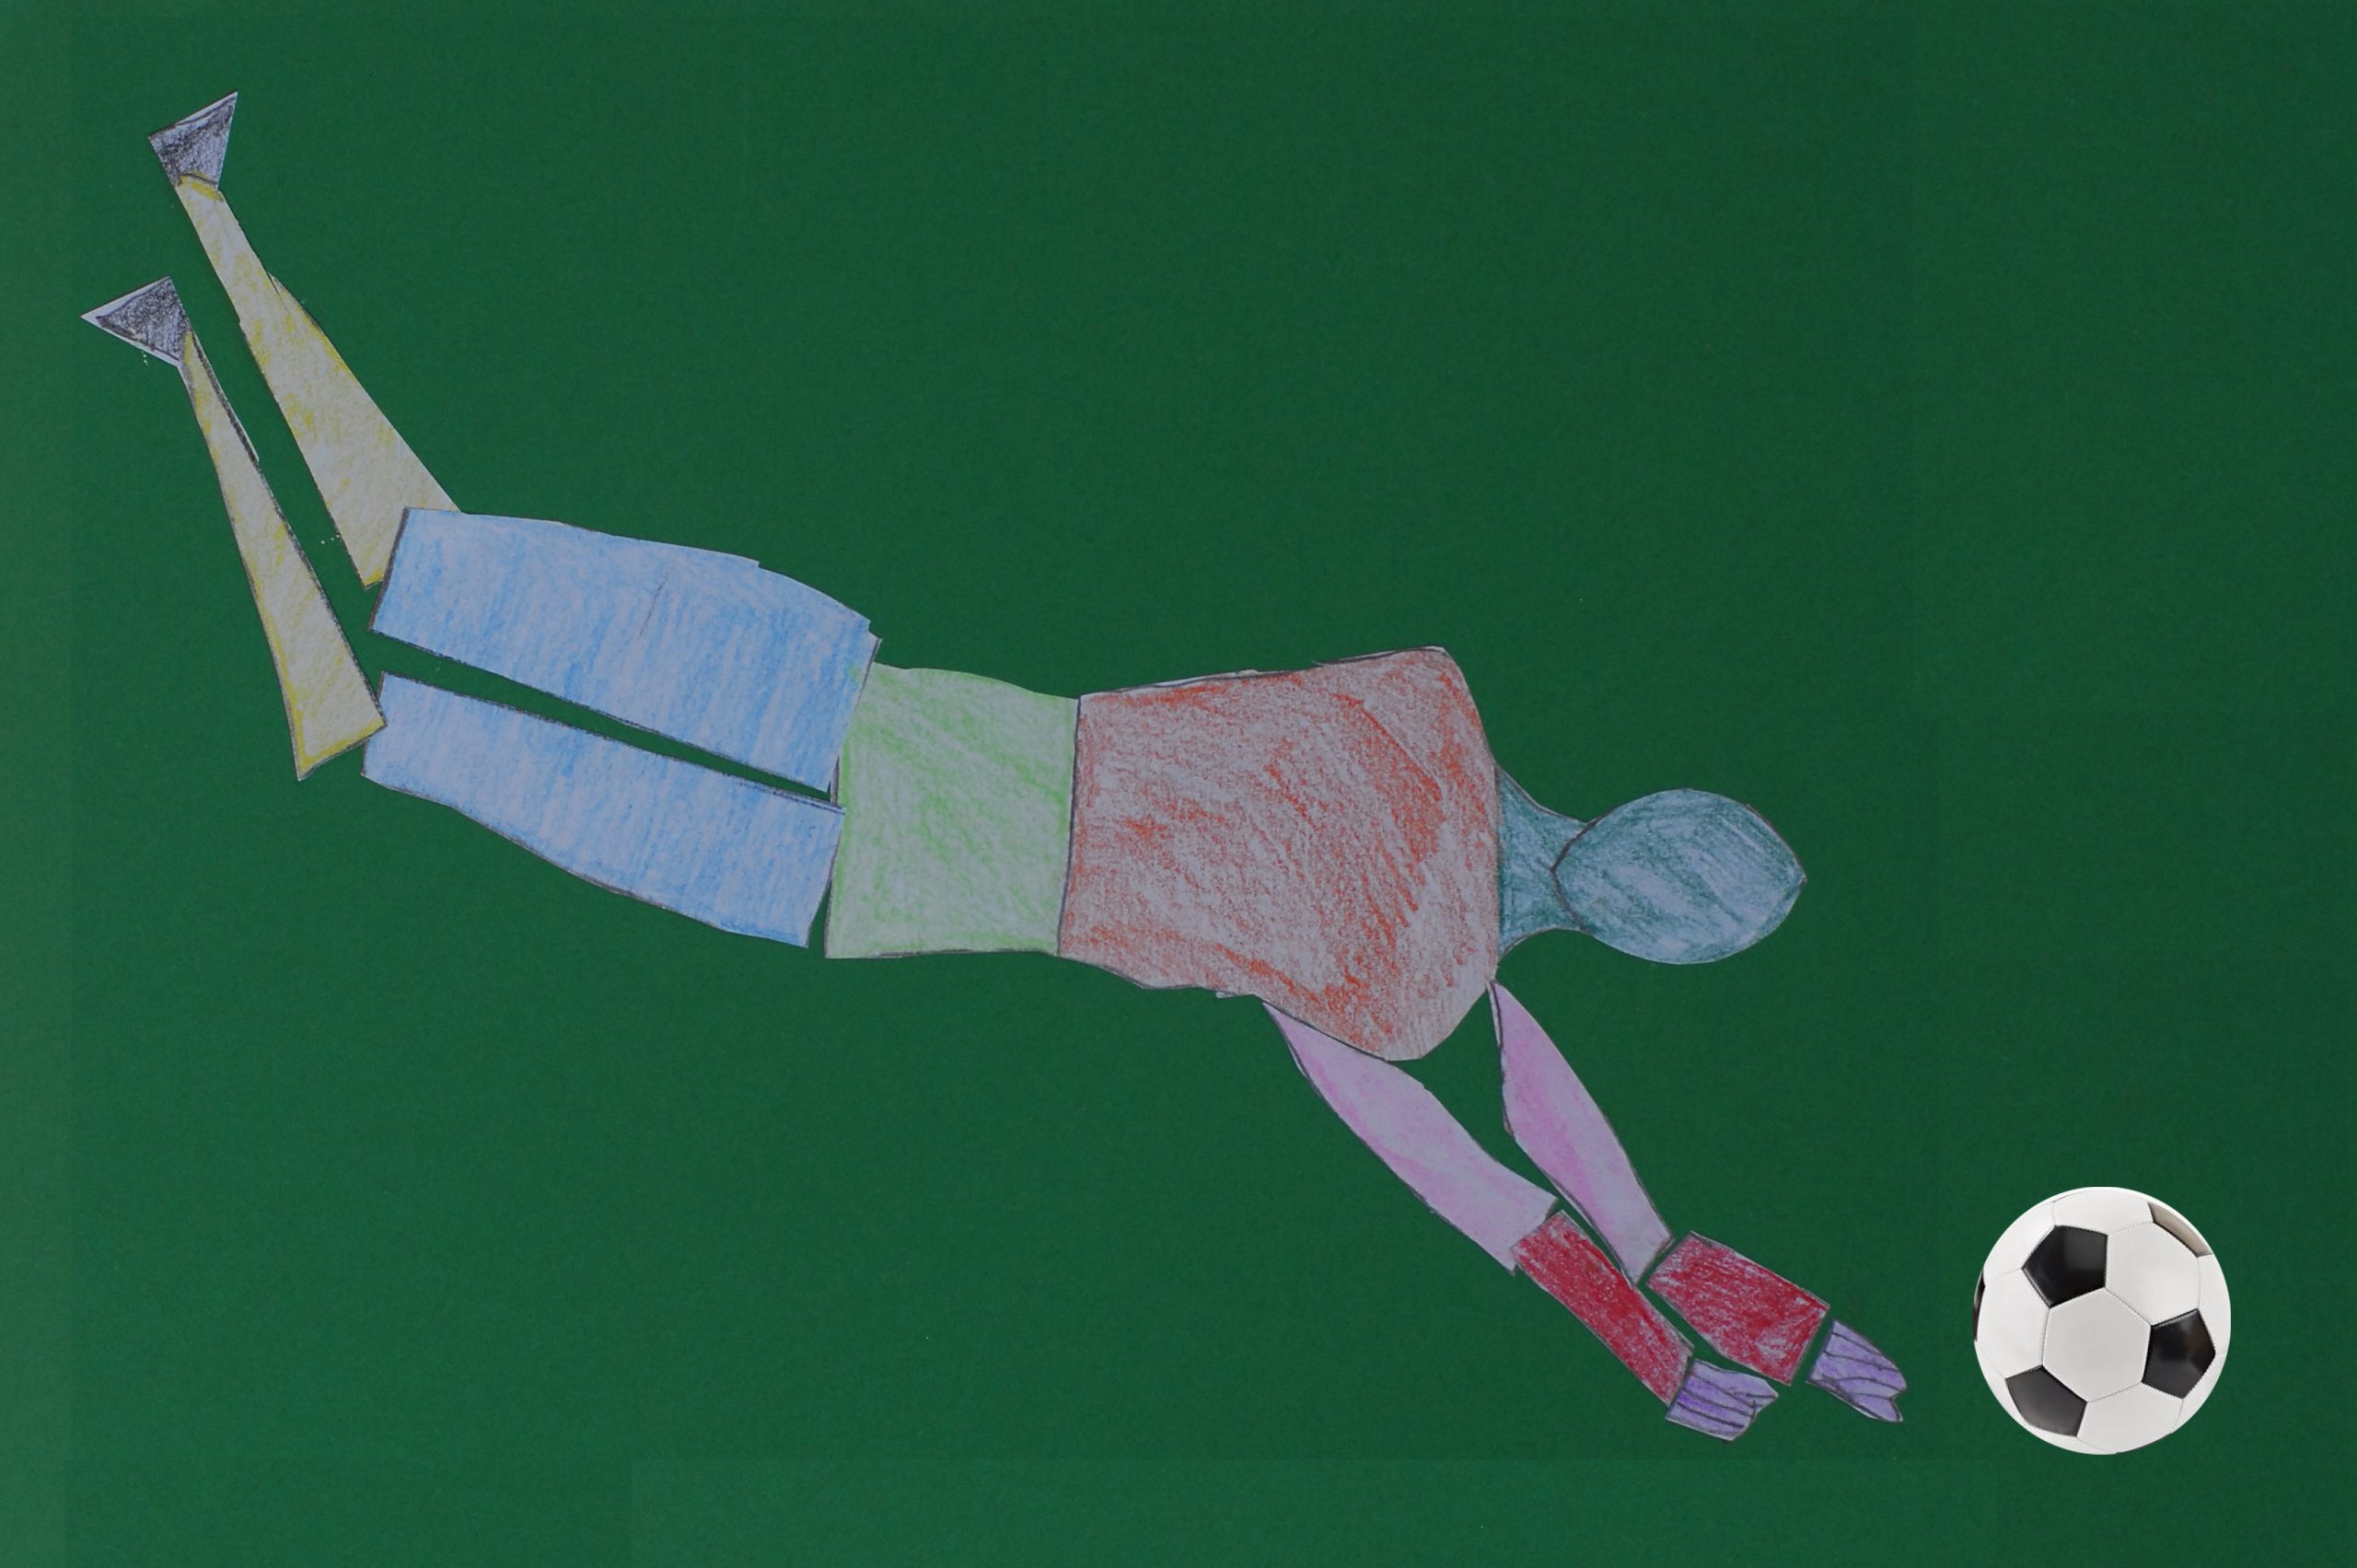
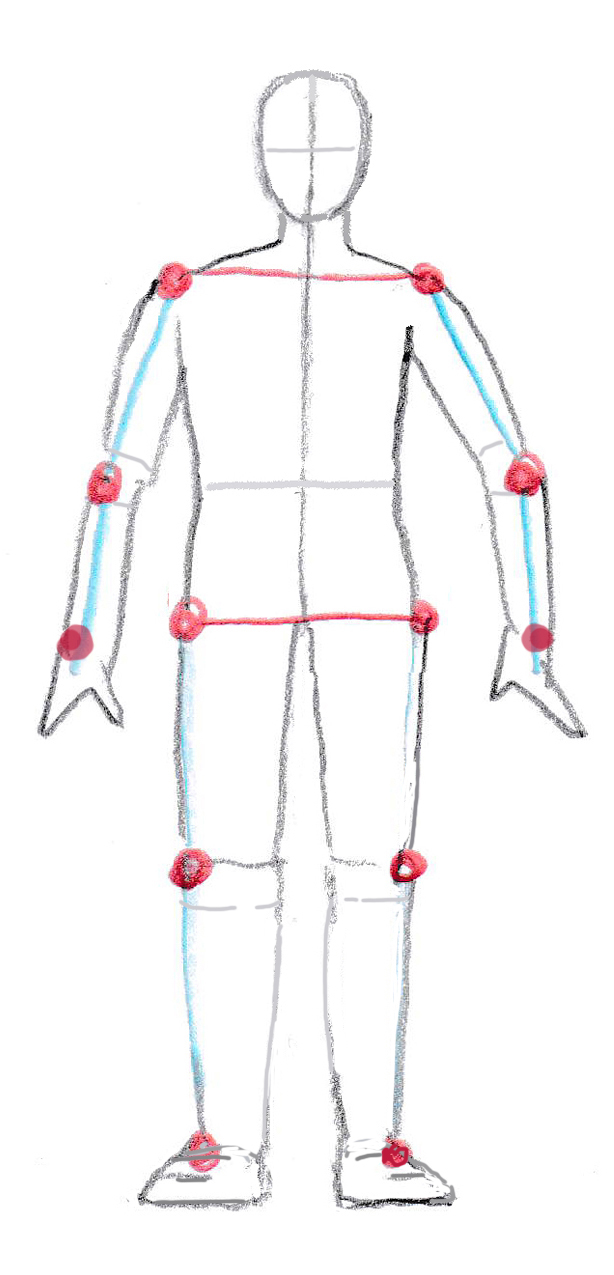
When drawing a realistically moving human figure, pivot points like shoulders, knees, and elbows are crucial. In this model, the limbs have been cut out to clearly see these pivot points.
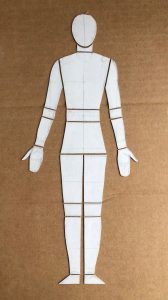
1.Cut-out figures (specially for primary school)
Exercise 1: Draw a standing model figure of at least 20 cm tall on heavy paper. Cut out the body parts separately and place them on a colored sheet of paper so that a clear action/movement is visible. Glue the cutouts and color them.
2.Stick Figures
A faster and easier way to come up with all kinds of movements is with stick figures. Here too, the pivot points are essential, indicated here with dots. In a basic standing pose, the line between the shoulders and the pelvis are horizontal.

Exercise 2: Create active poses using black and white or colored stick figures. You can have them do anything. If one leg passes in front of the other (left figure below), draw that leg more clearly.
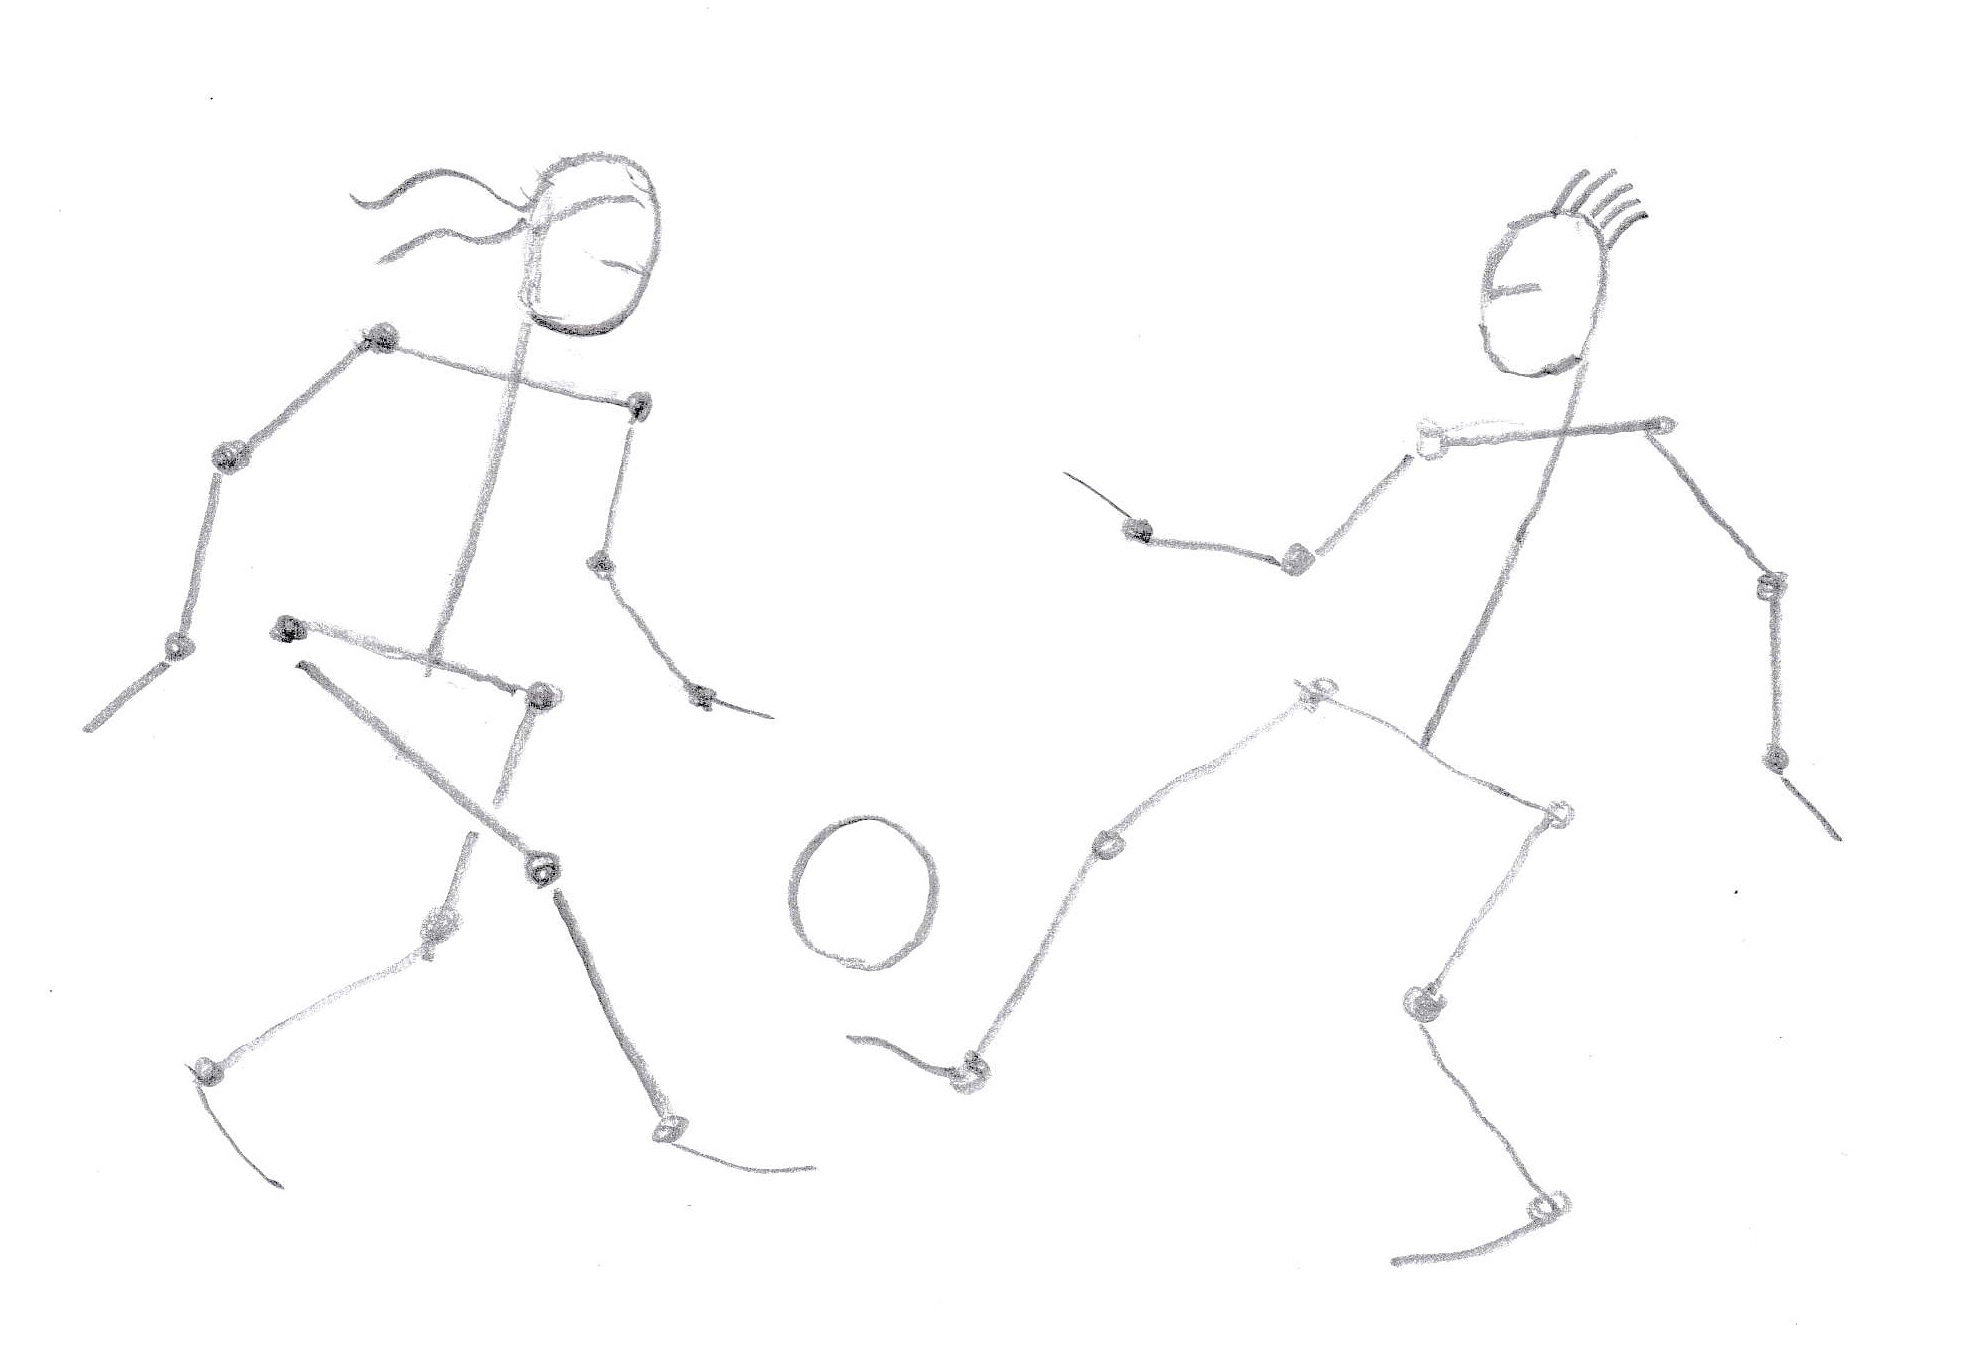
The spine may be drawn curved. A line can be used to indicate the direction of the head’s gaze.
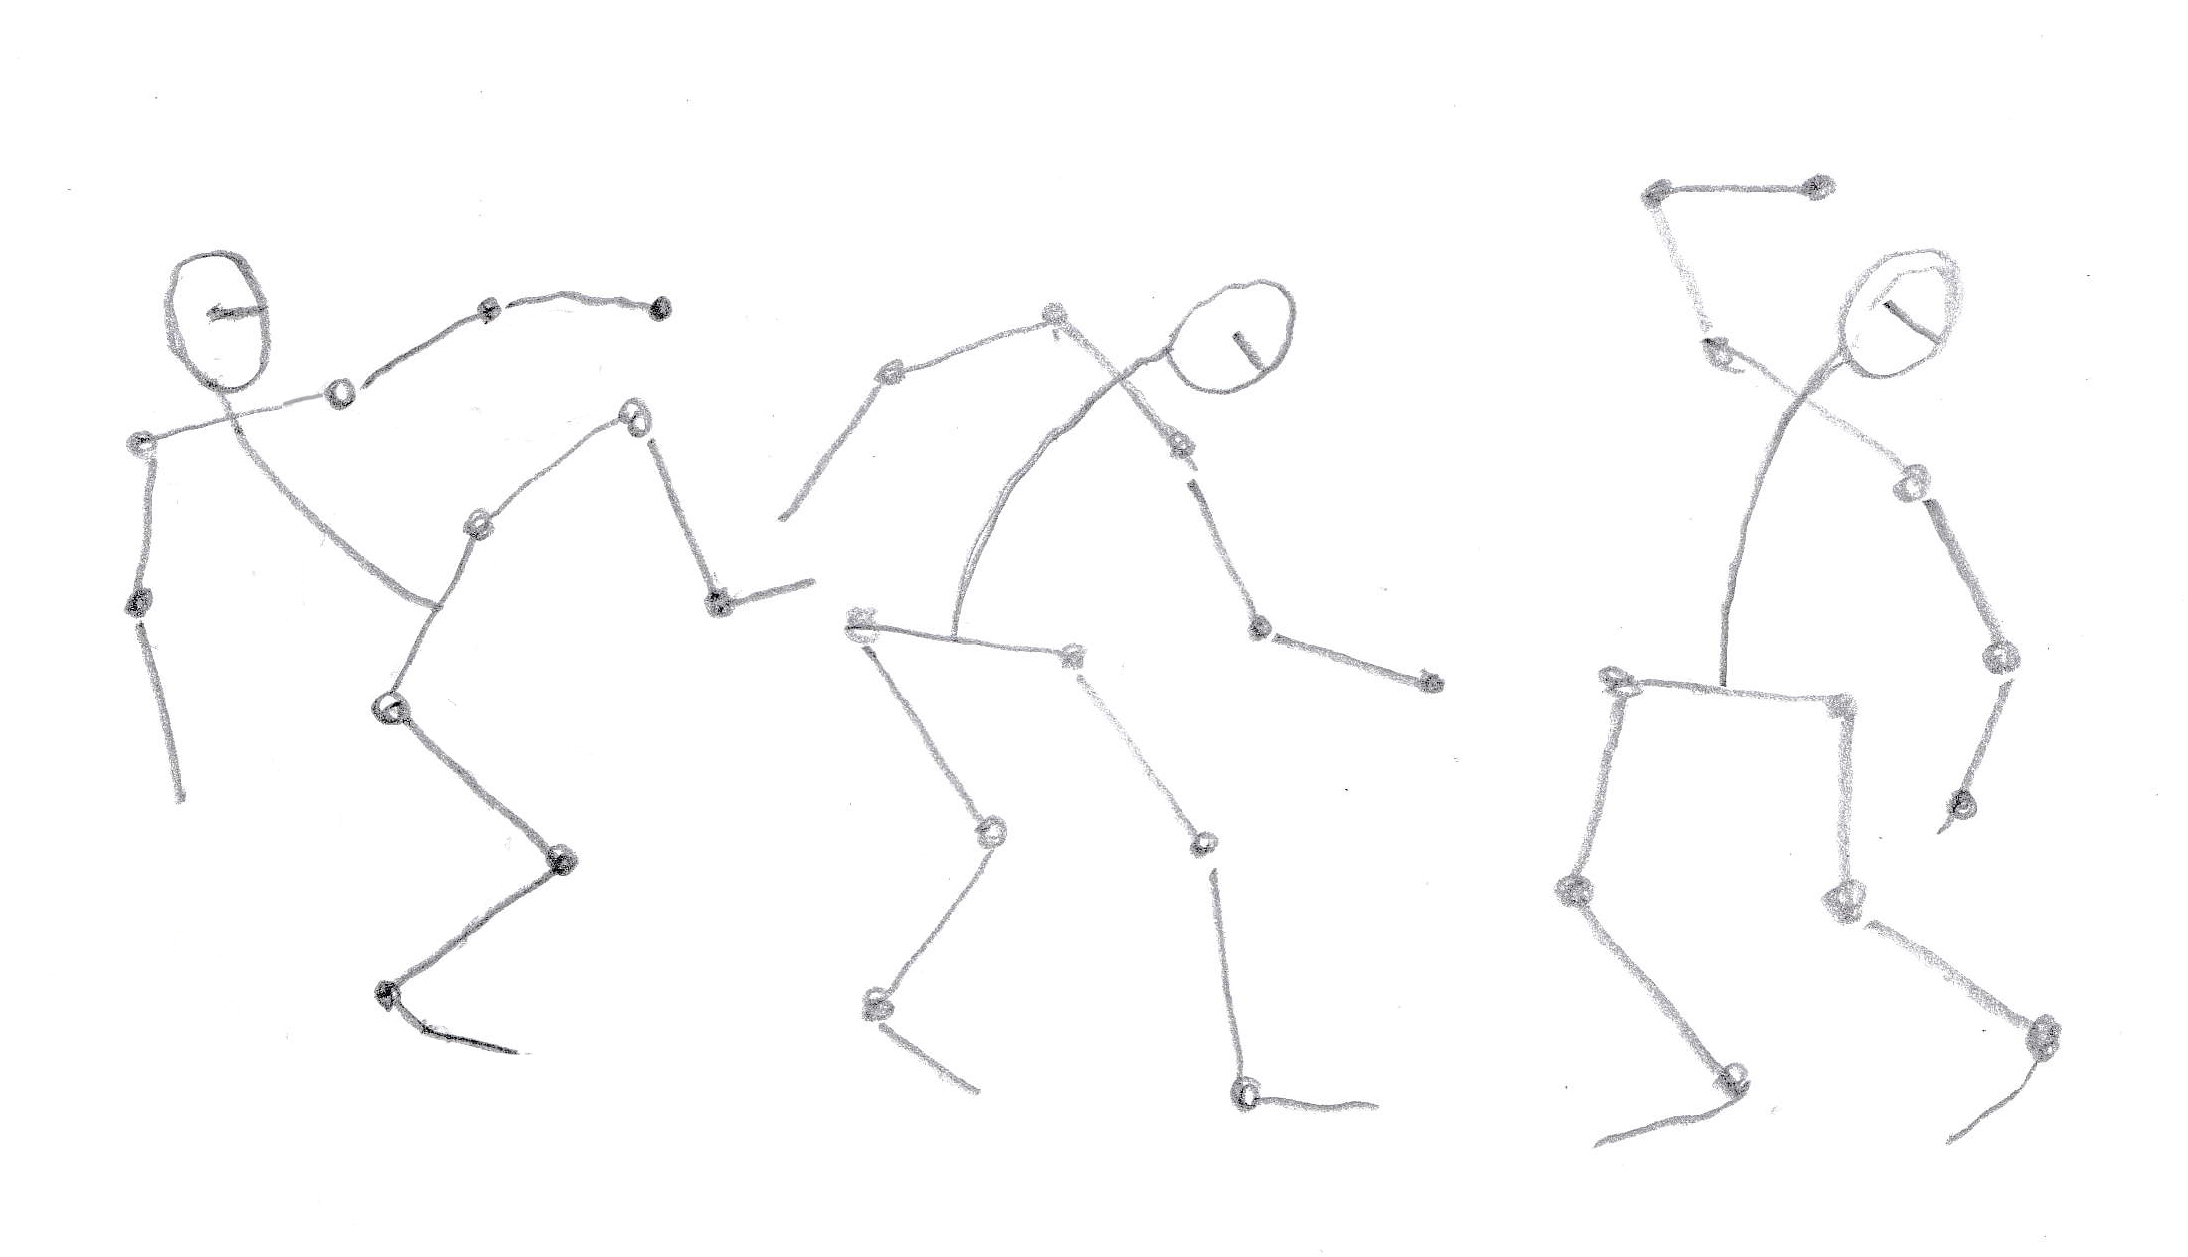
Once you’ve drawn some stick figures, giving them bodies is pretty easy.
Exercise 3: Give one or more of your stick figures a body.
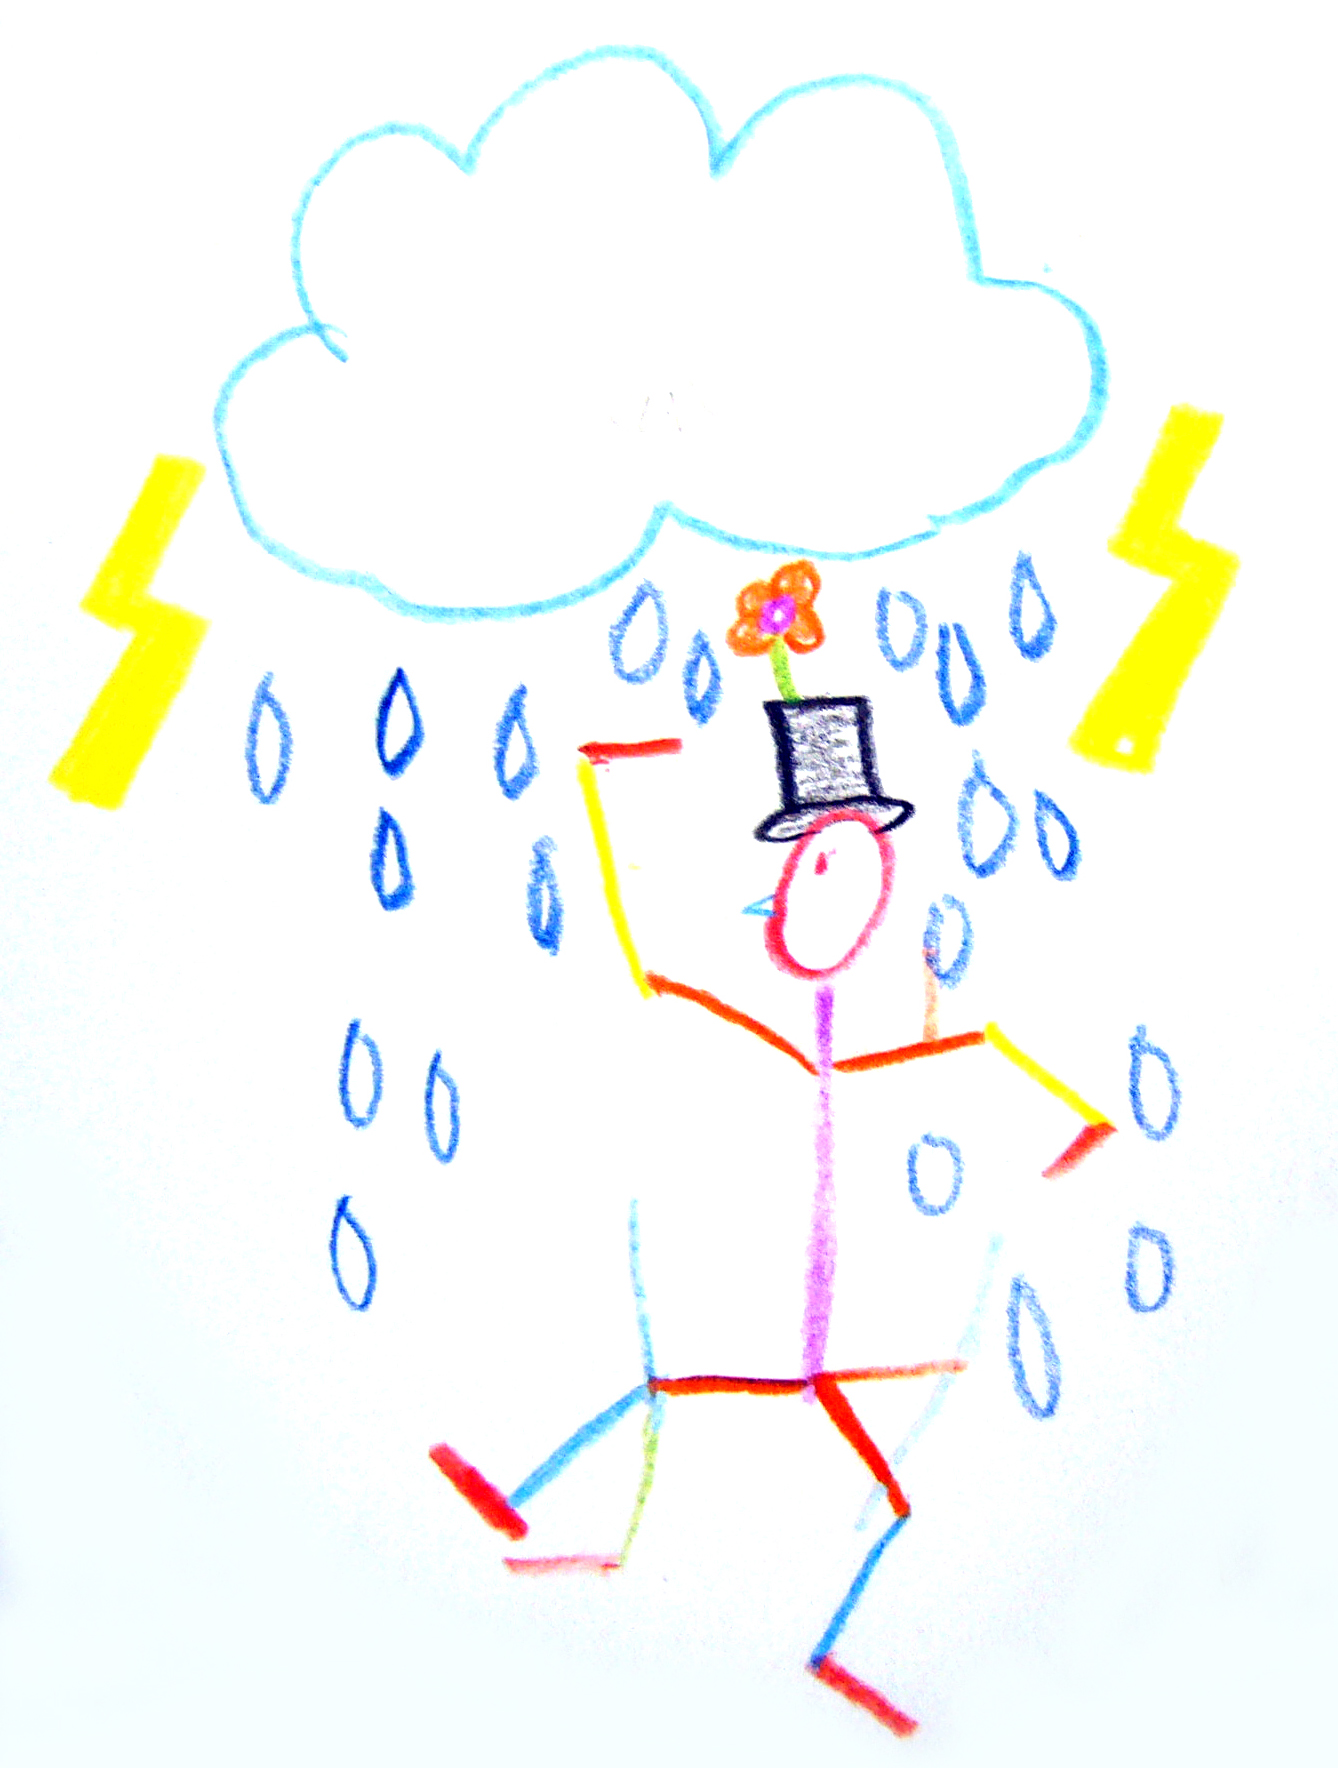
3.Shadow figures
Exercise 4: Draw “shadow figures” with soft (colored) pencils. Draw these figures without outlines! Always pay attention to the structure of the body. This exercise also lends itself well to brushes with ink or watercolor.

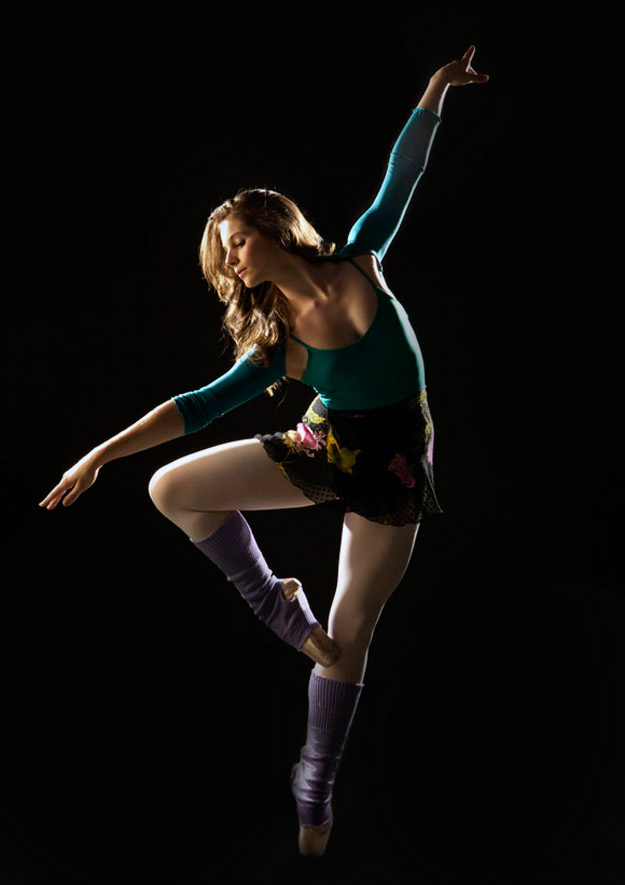
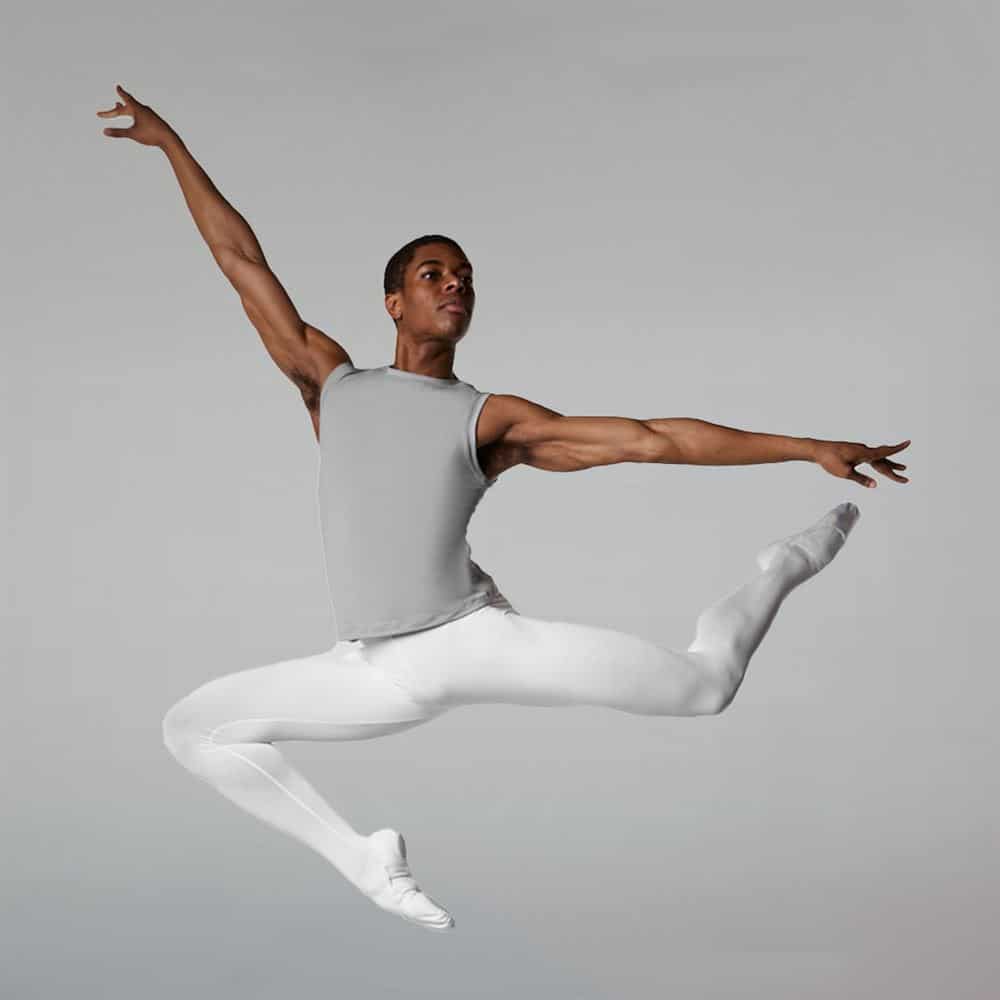
EXTRA: You’ve now seen some different ways to draw moving human figures. Try using one of these methods to draw the dancers in the photos. Use guide lines where needed for directions