Chapter 1 | EVERYDAY OBJECTS
Still lifes in art are drawn, painted, or photographed motionless objects, often in a group.
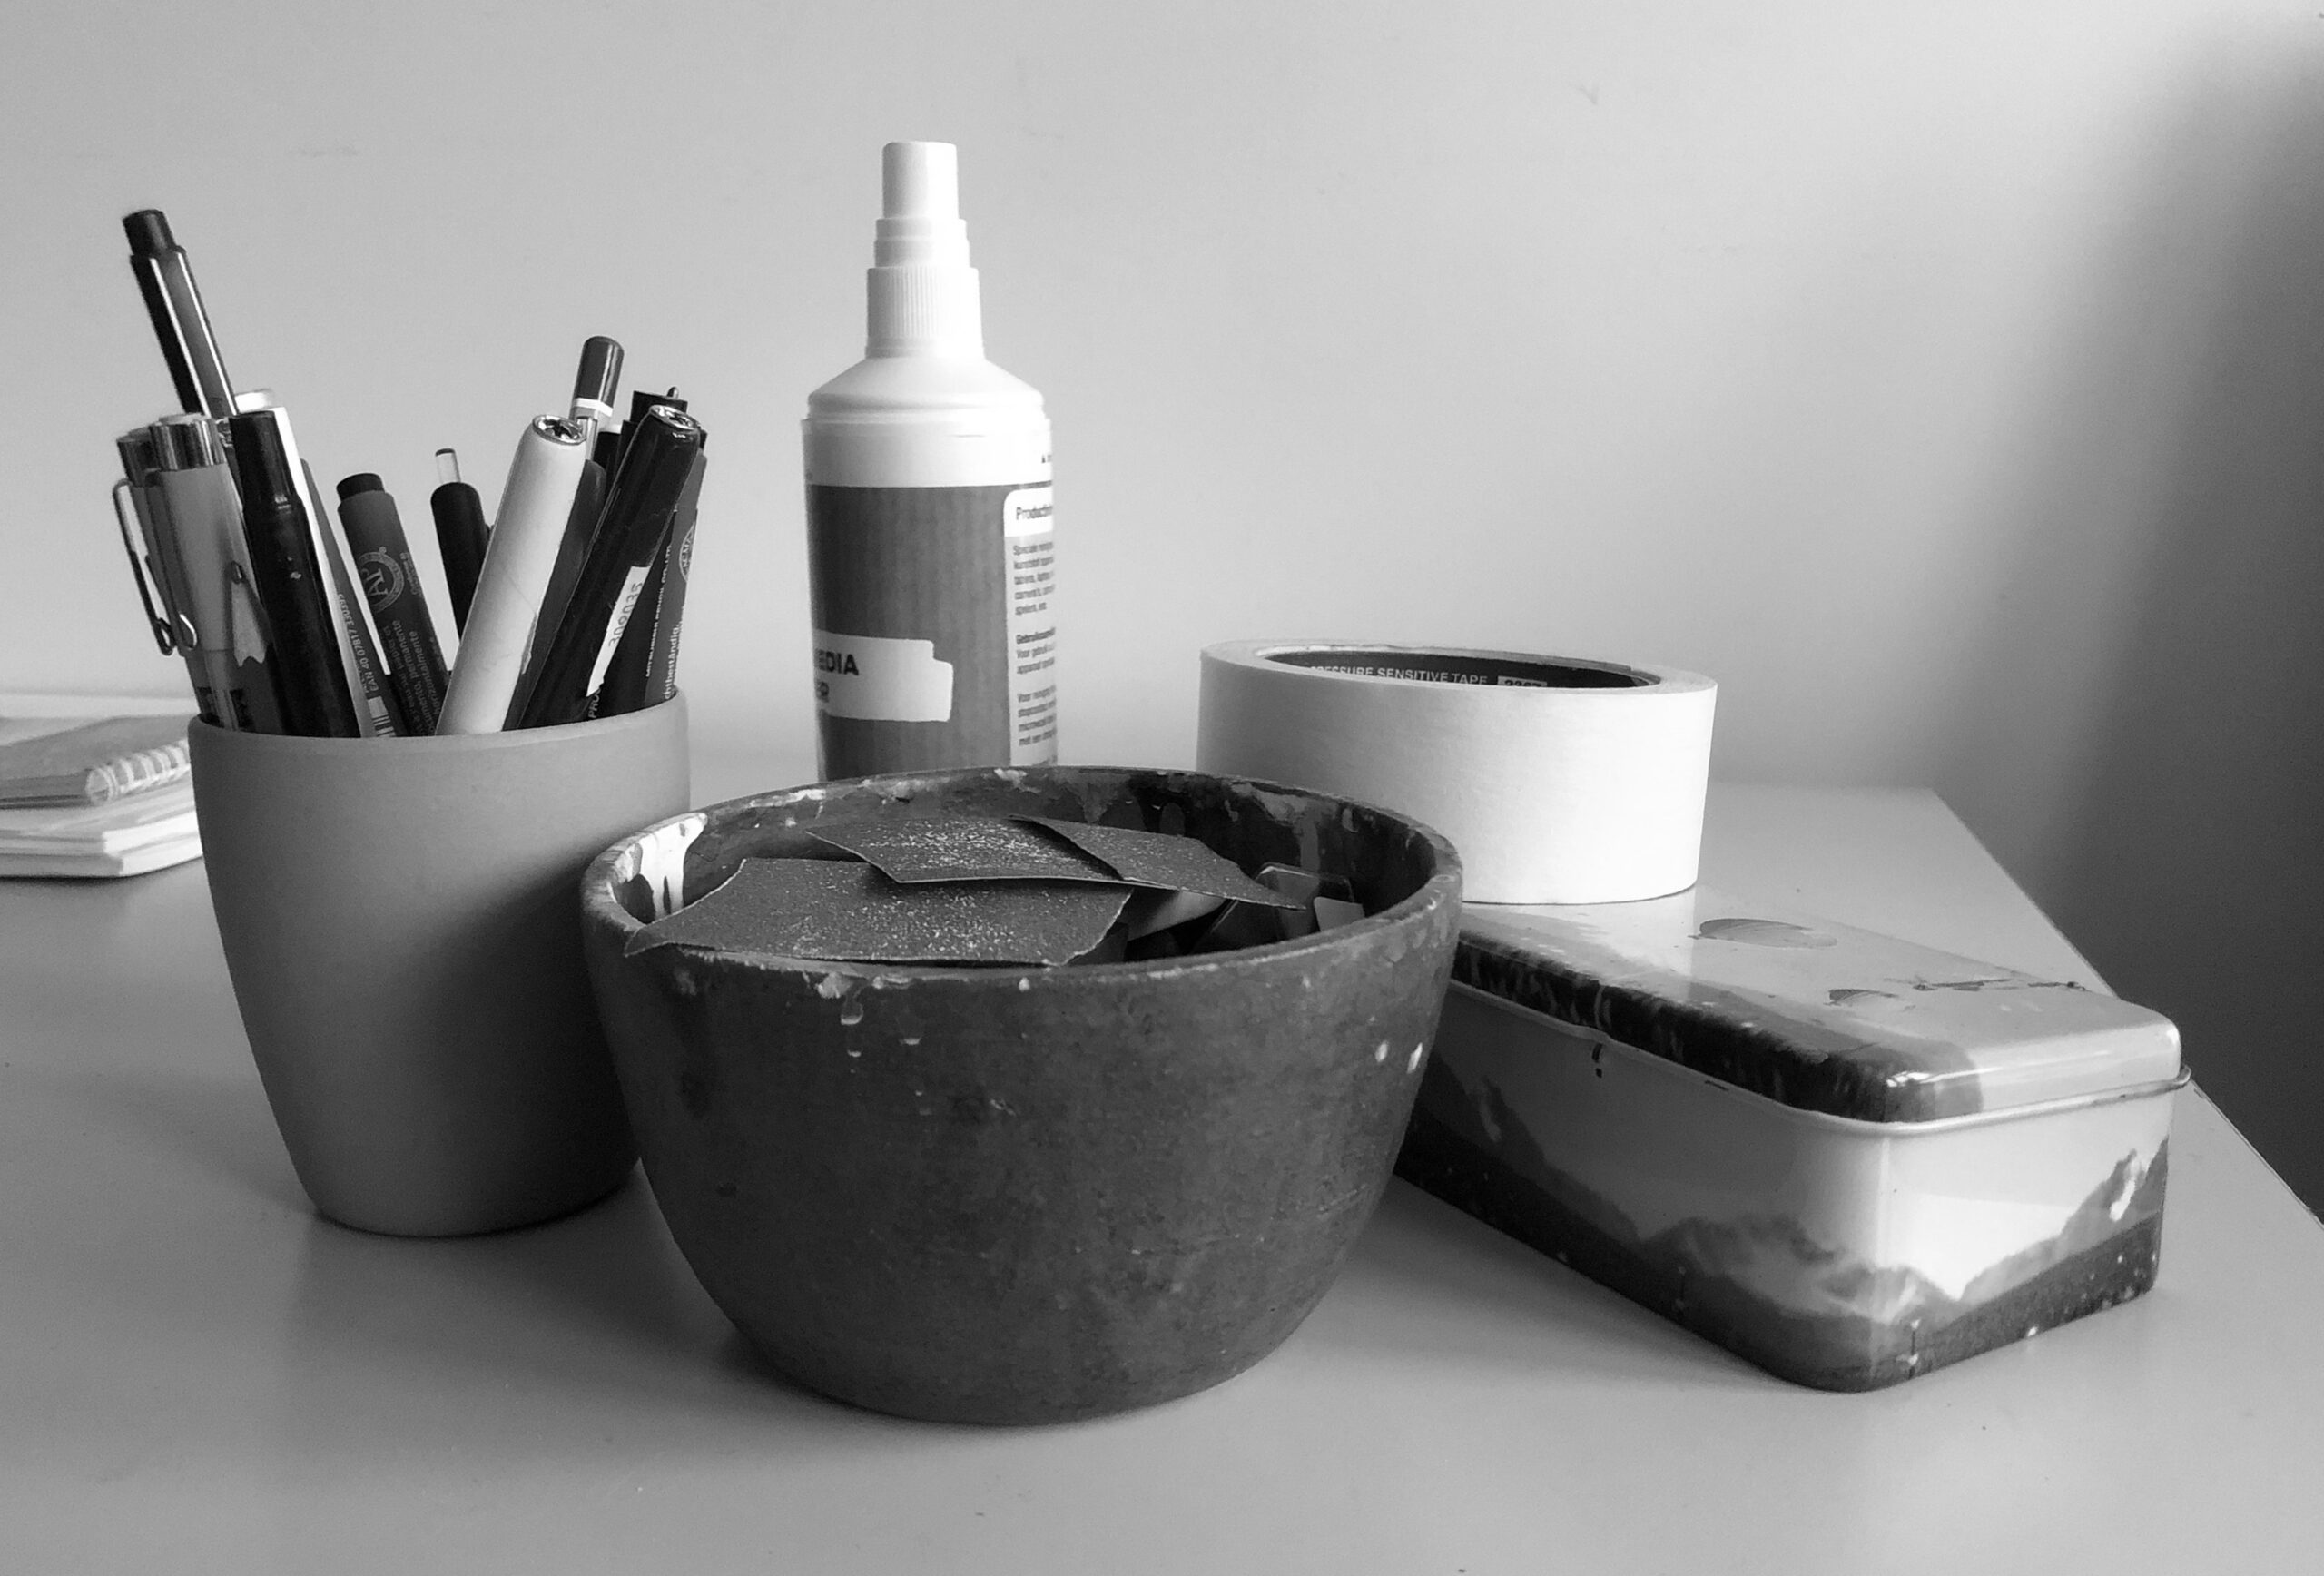
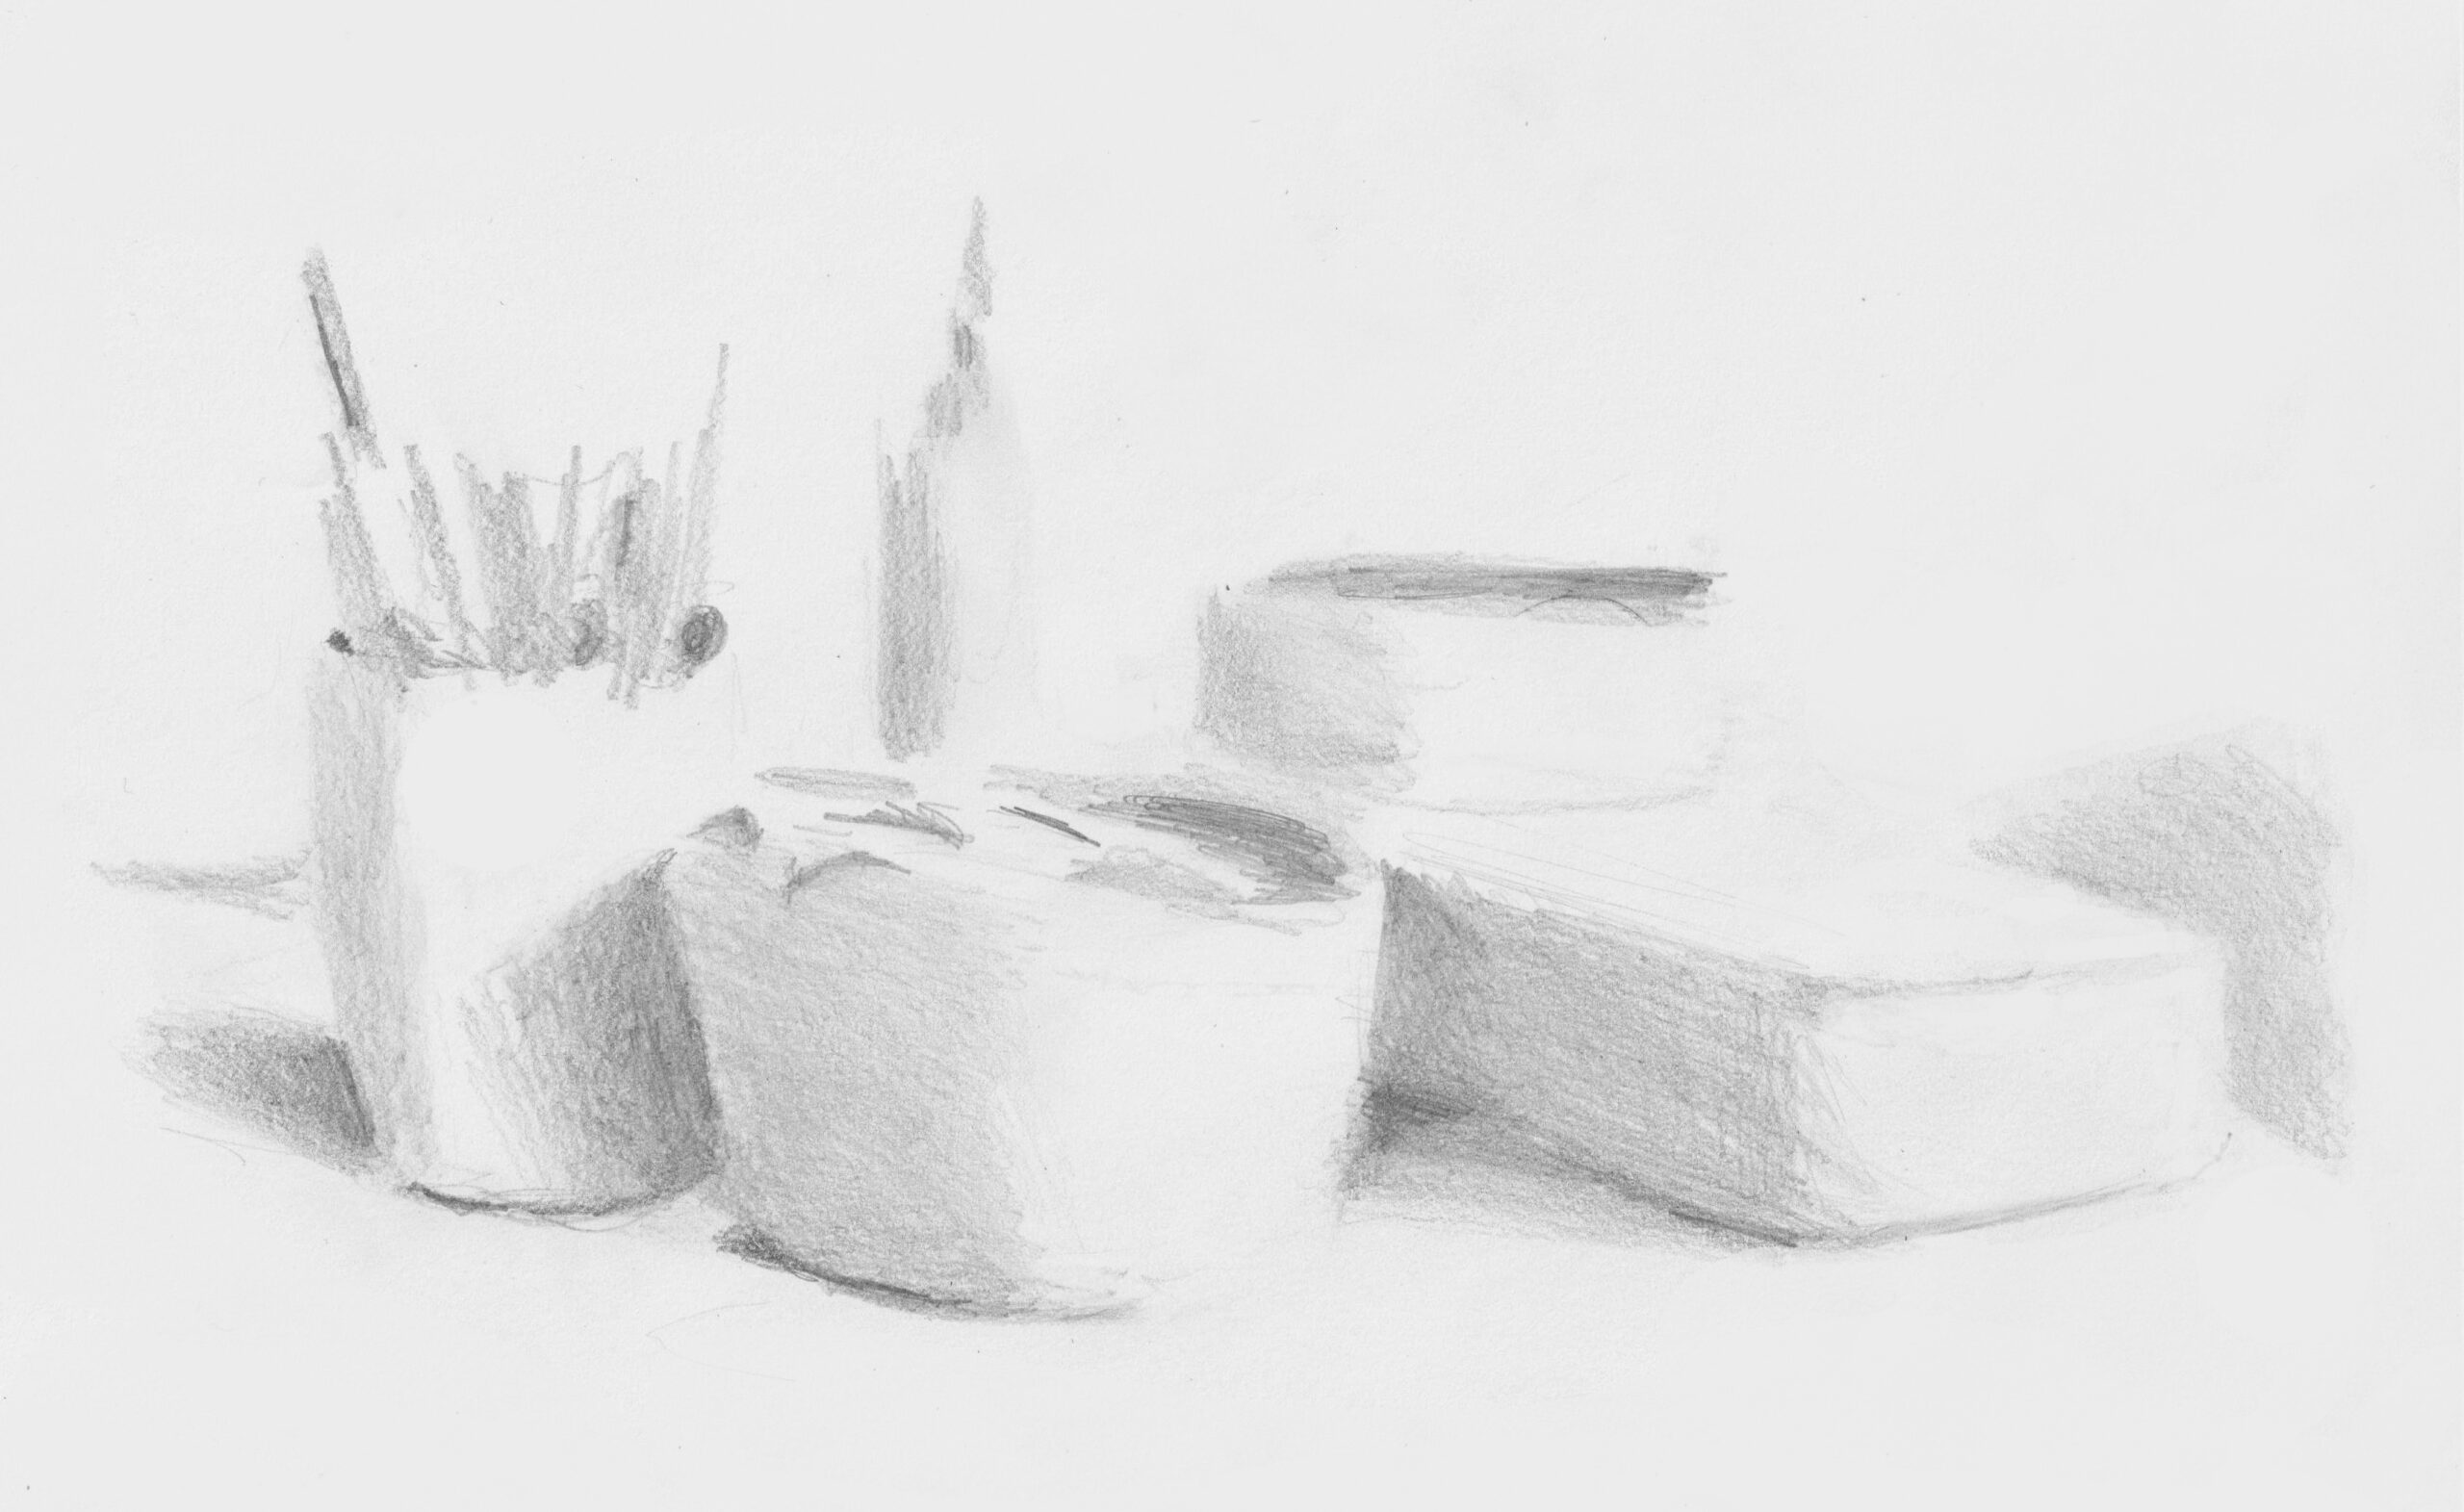
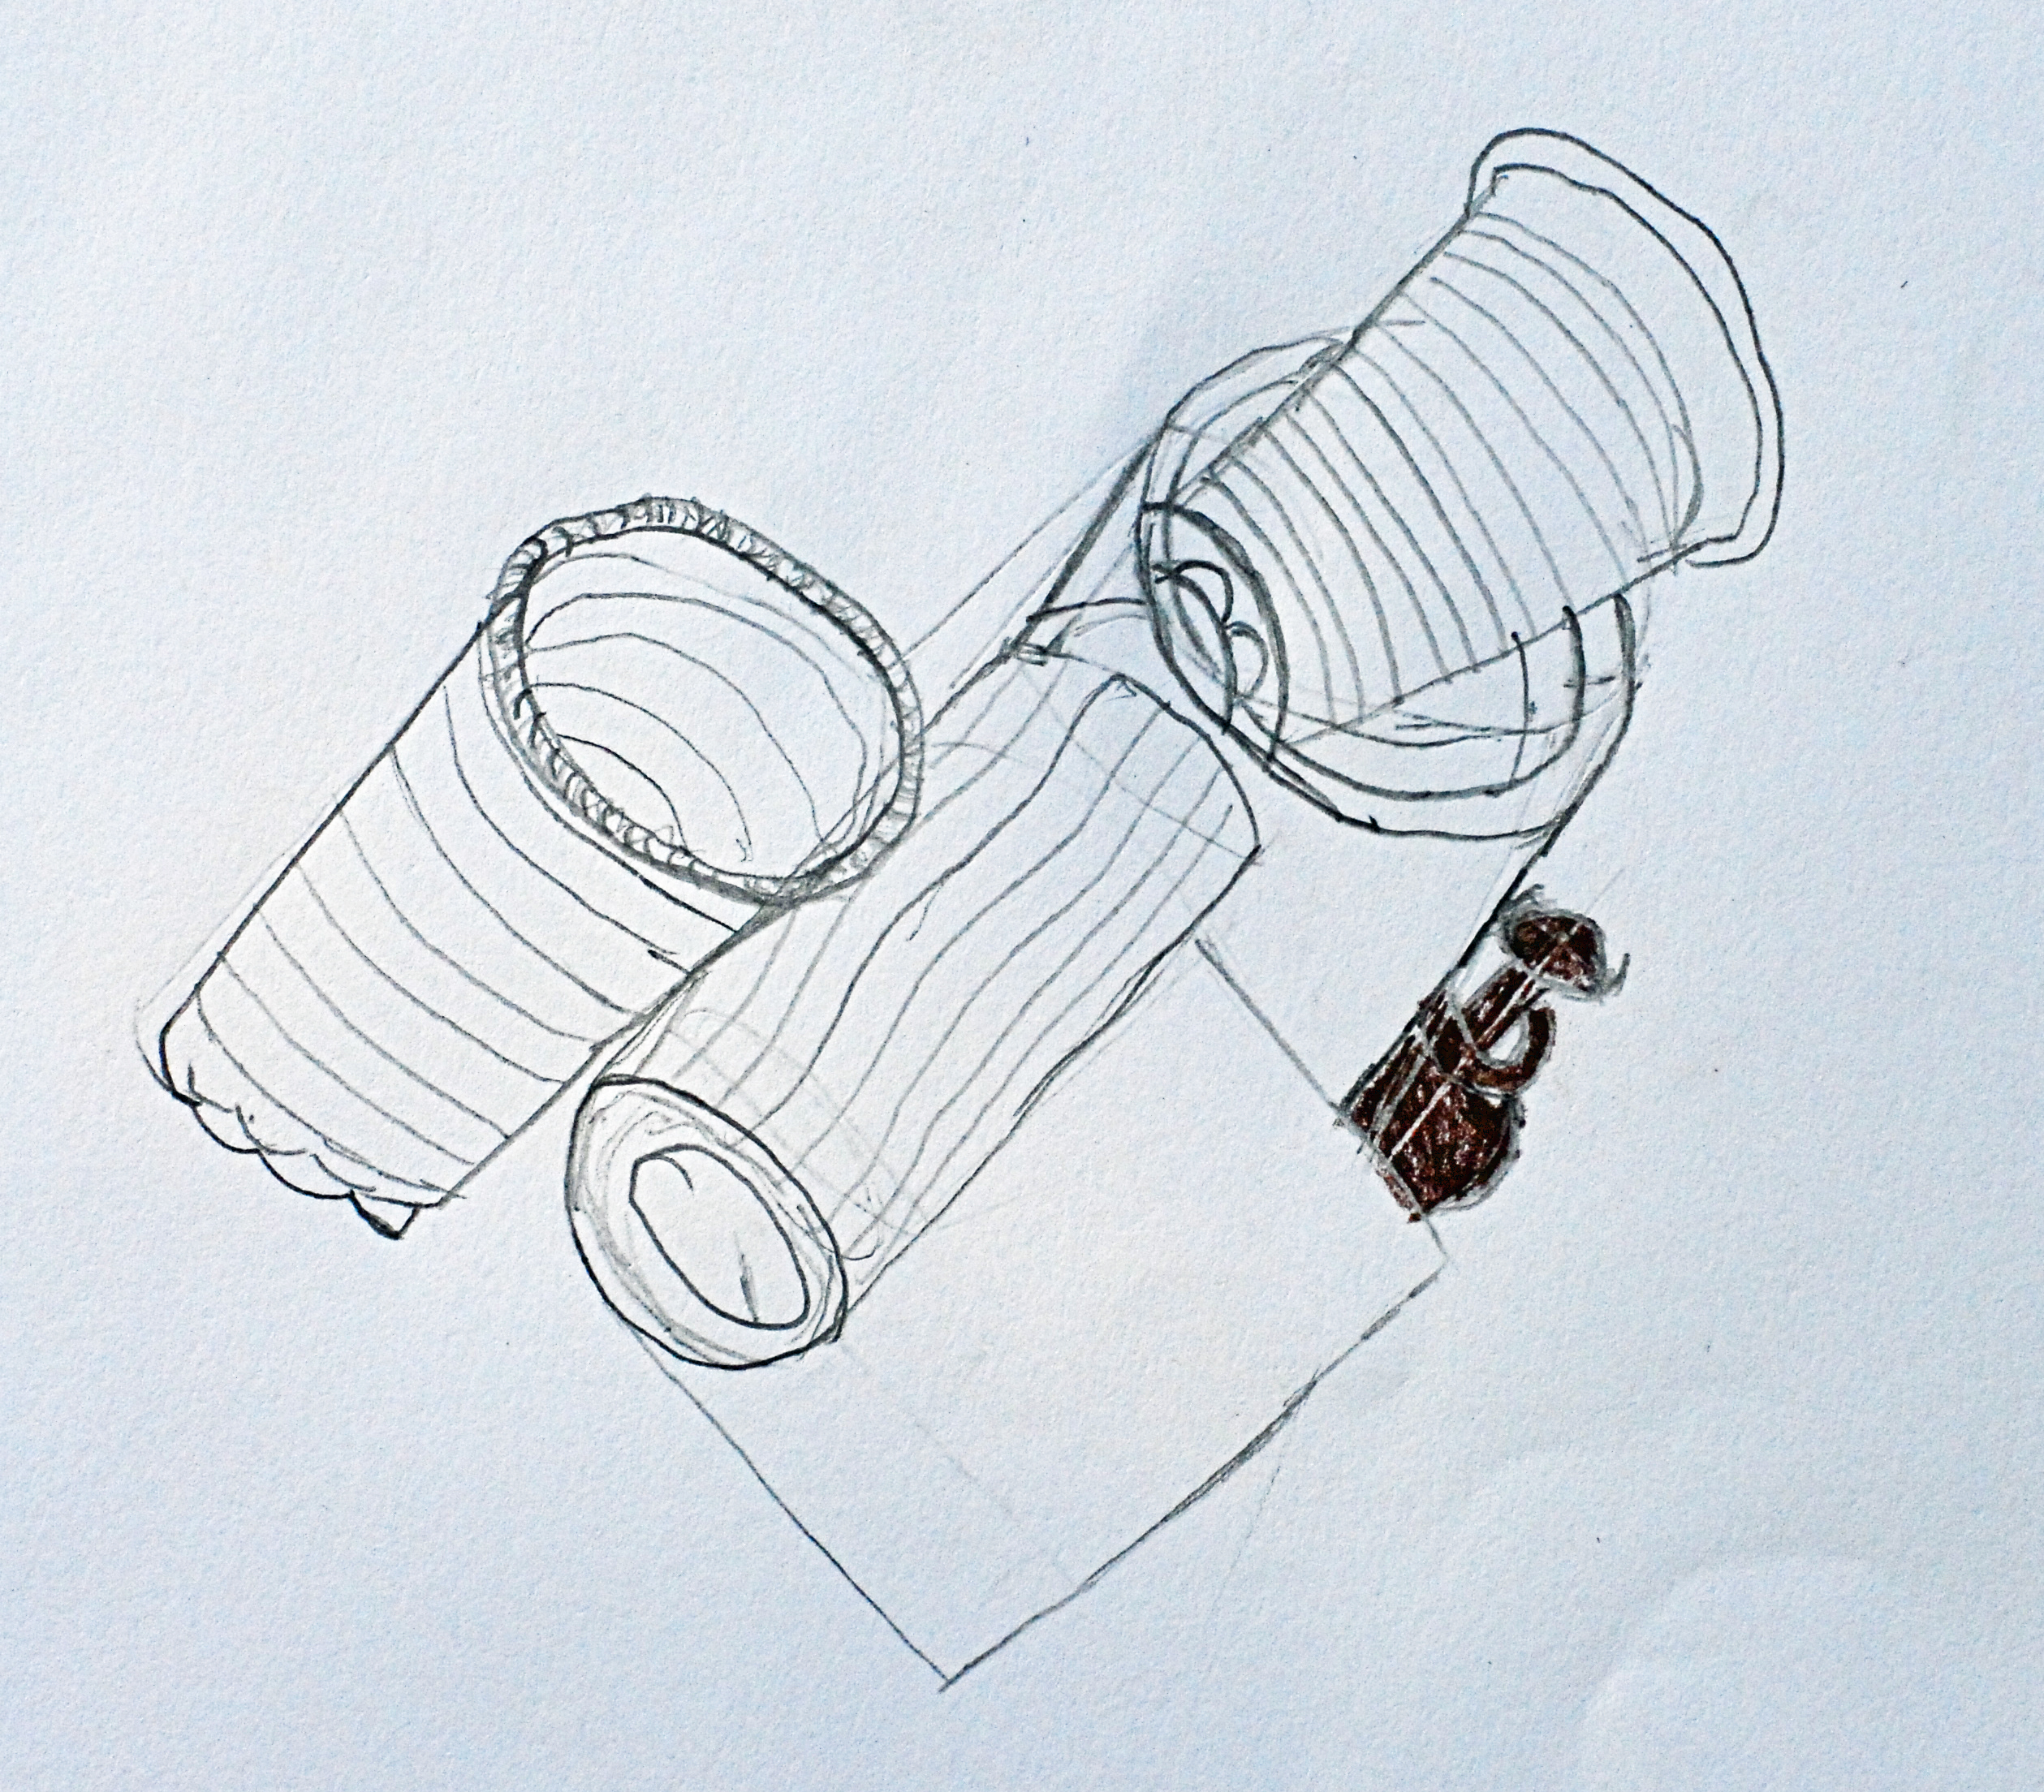
Exercise 1: With just one full roll of toilet paper you can come up with variations by placing the ‘loose’ paper in different positions. Start lightly with the basic shape of the roll. Keep an eye on the right directions*.
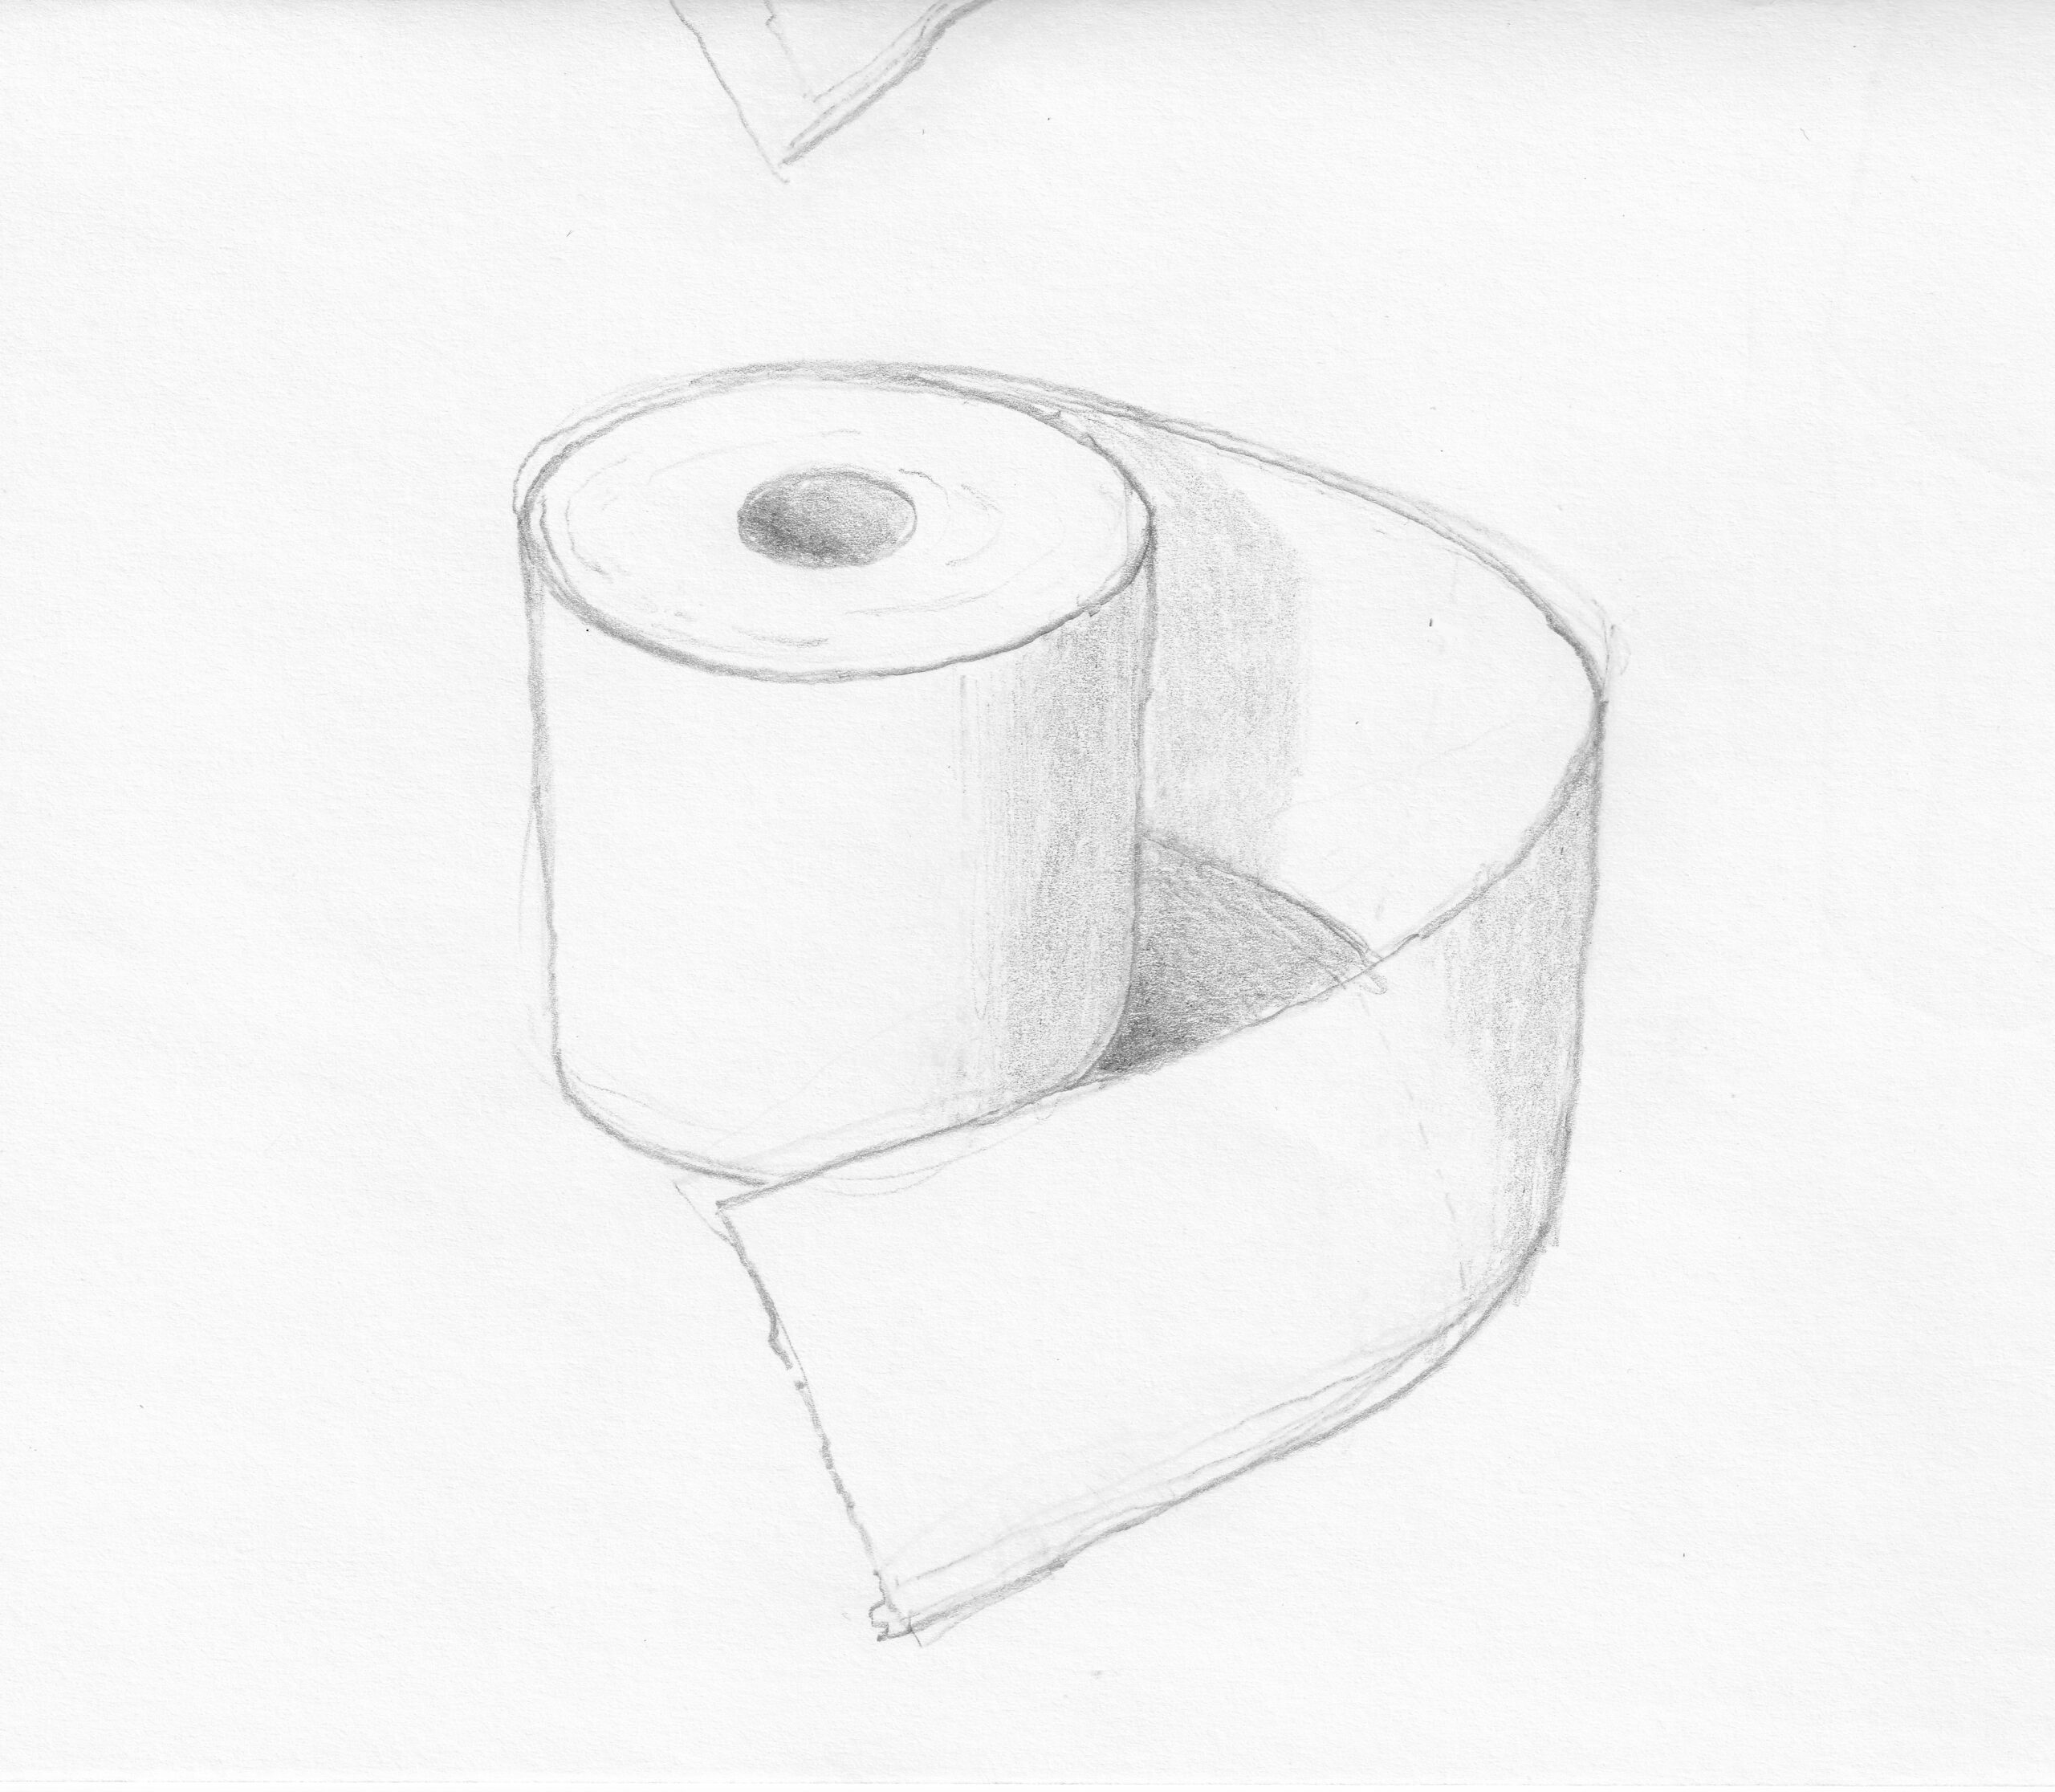
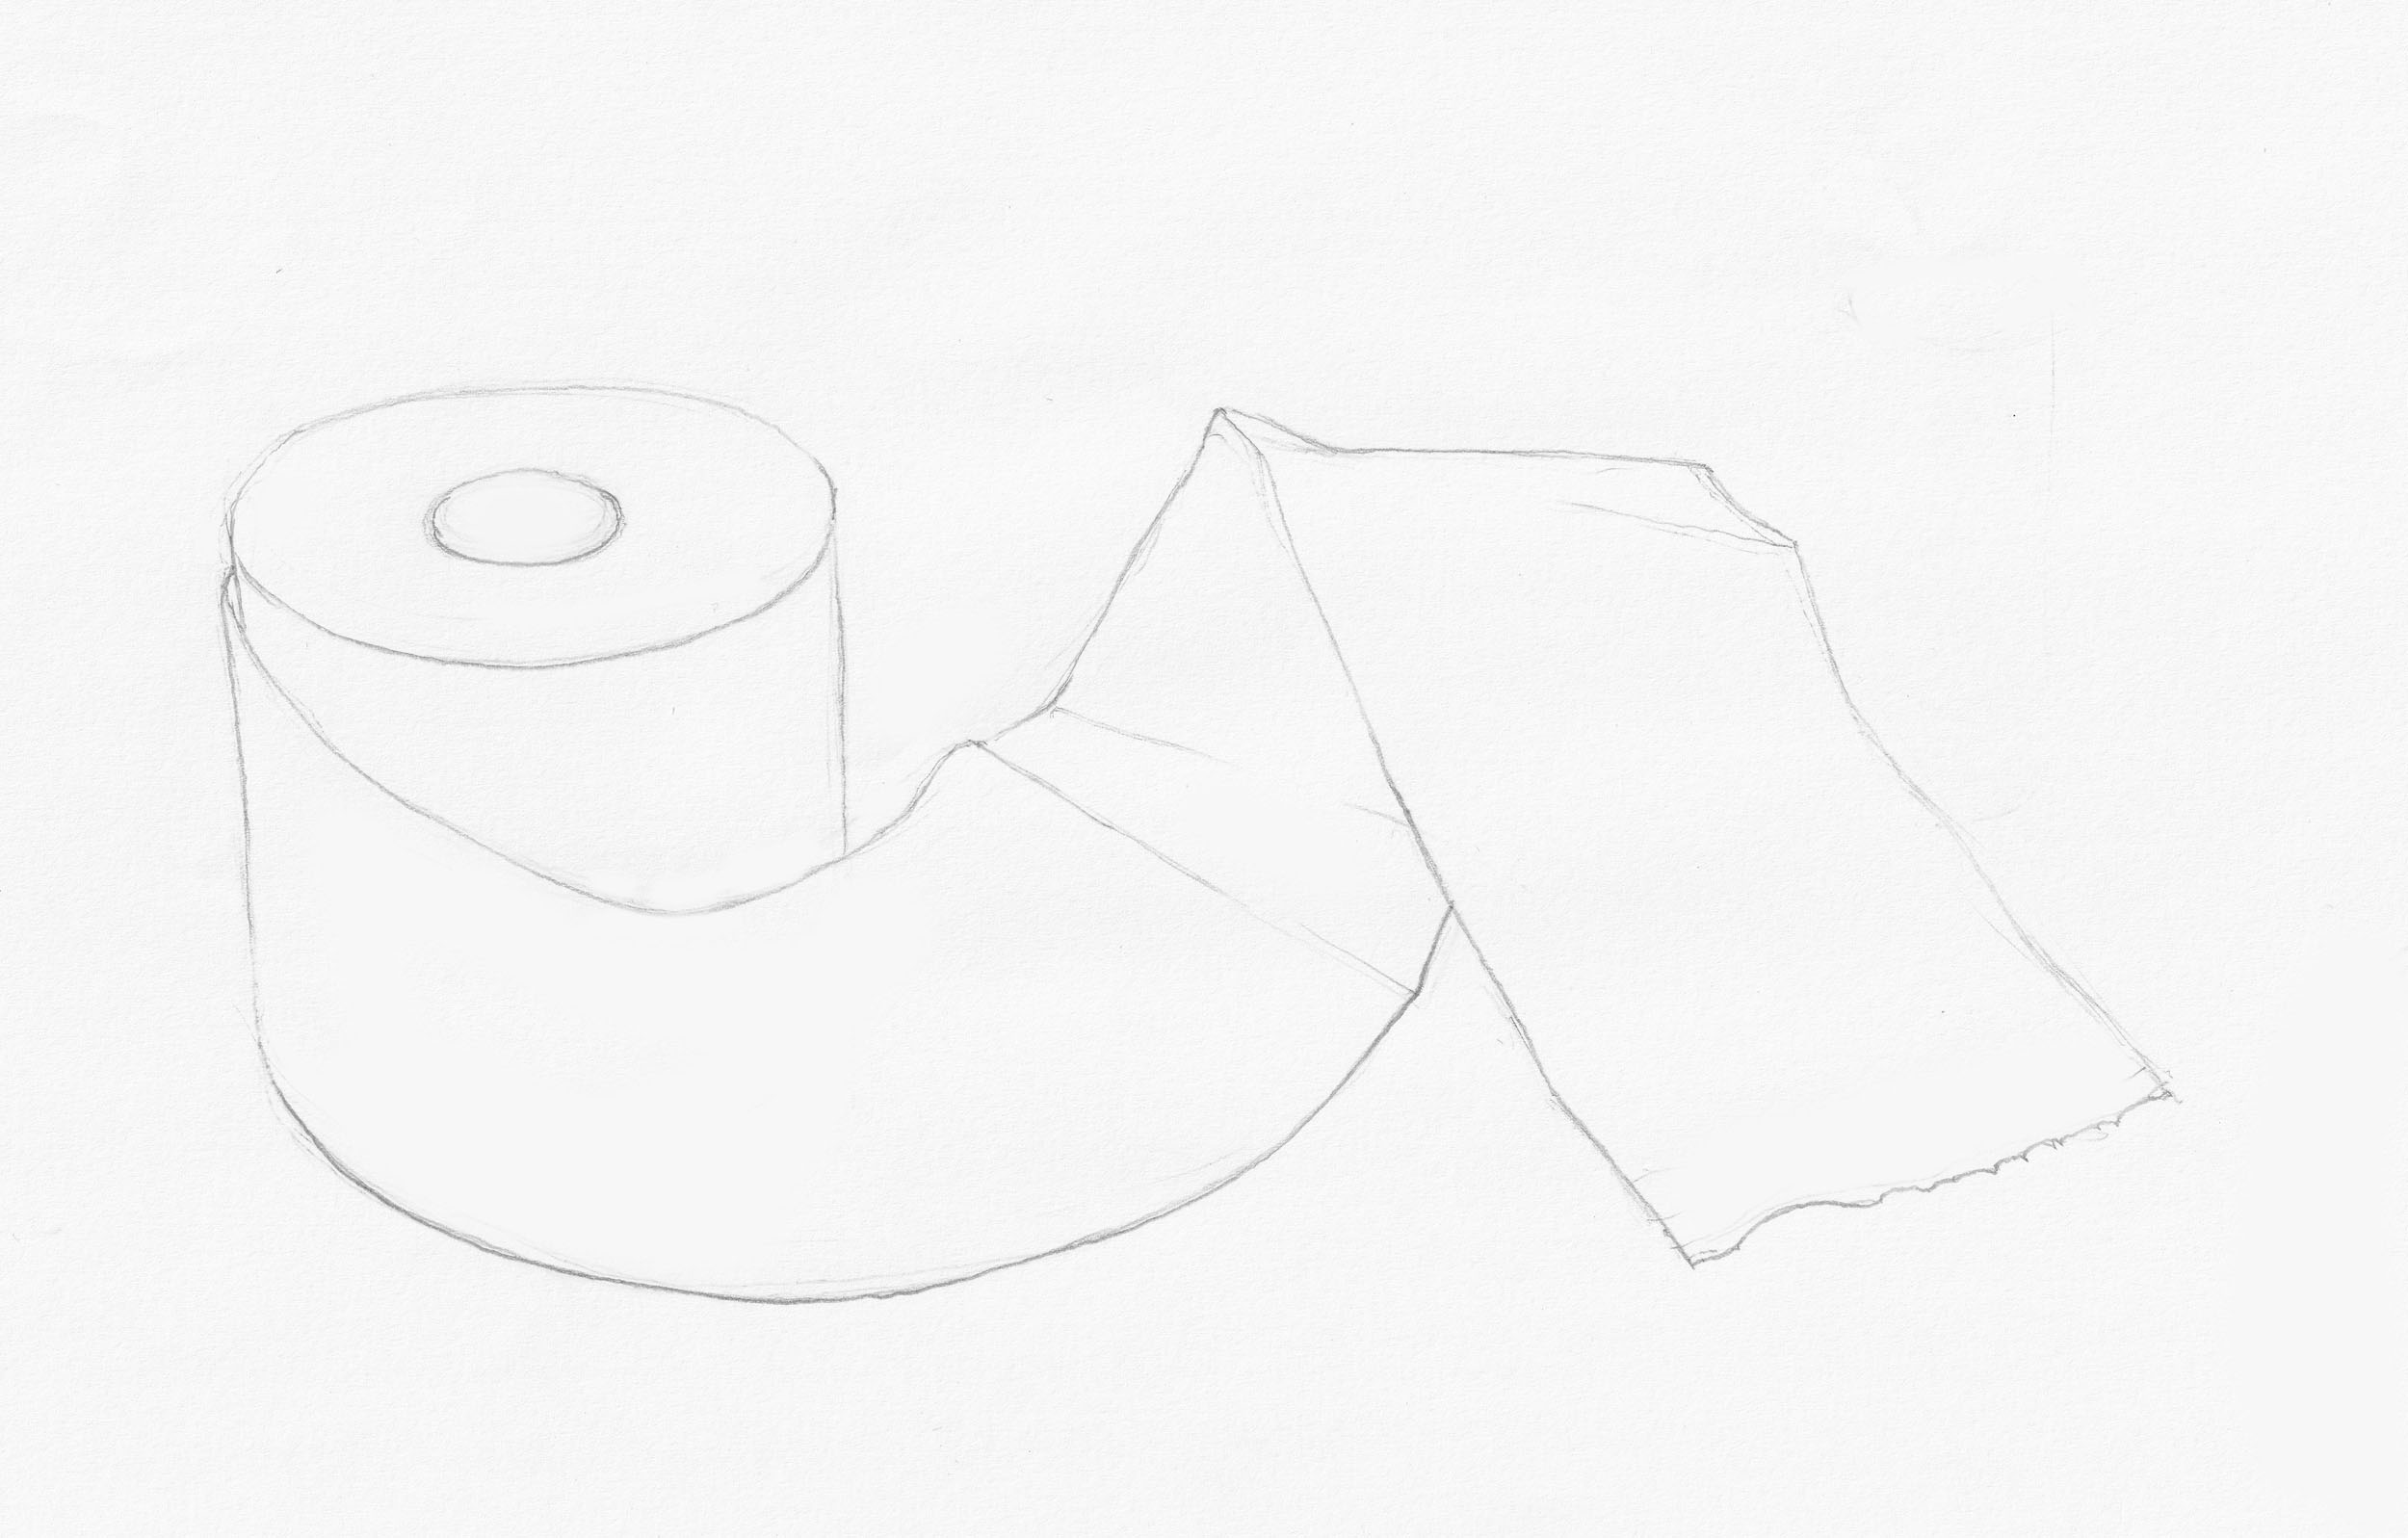
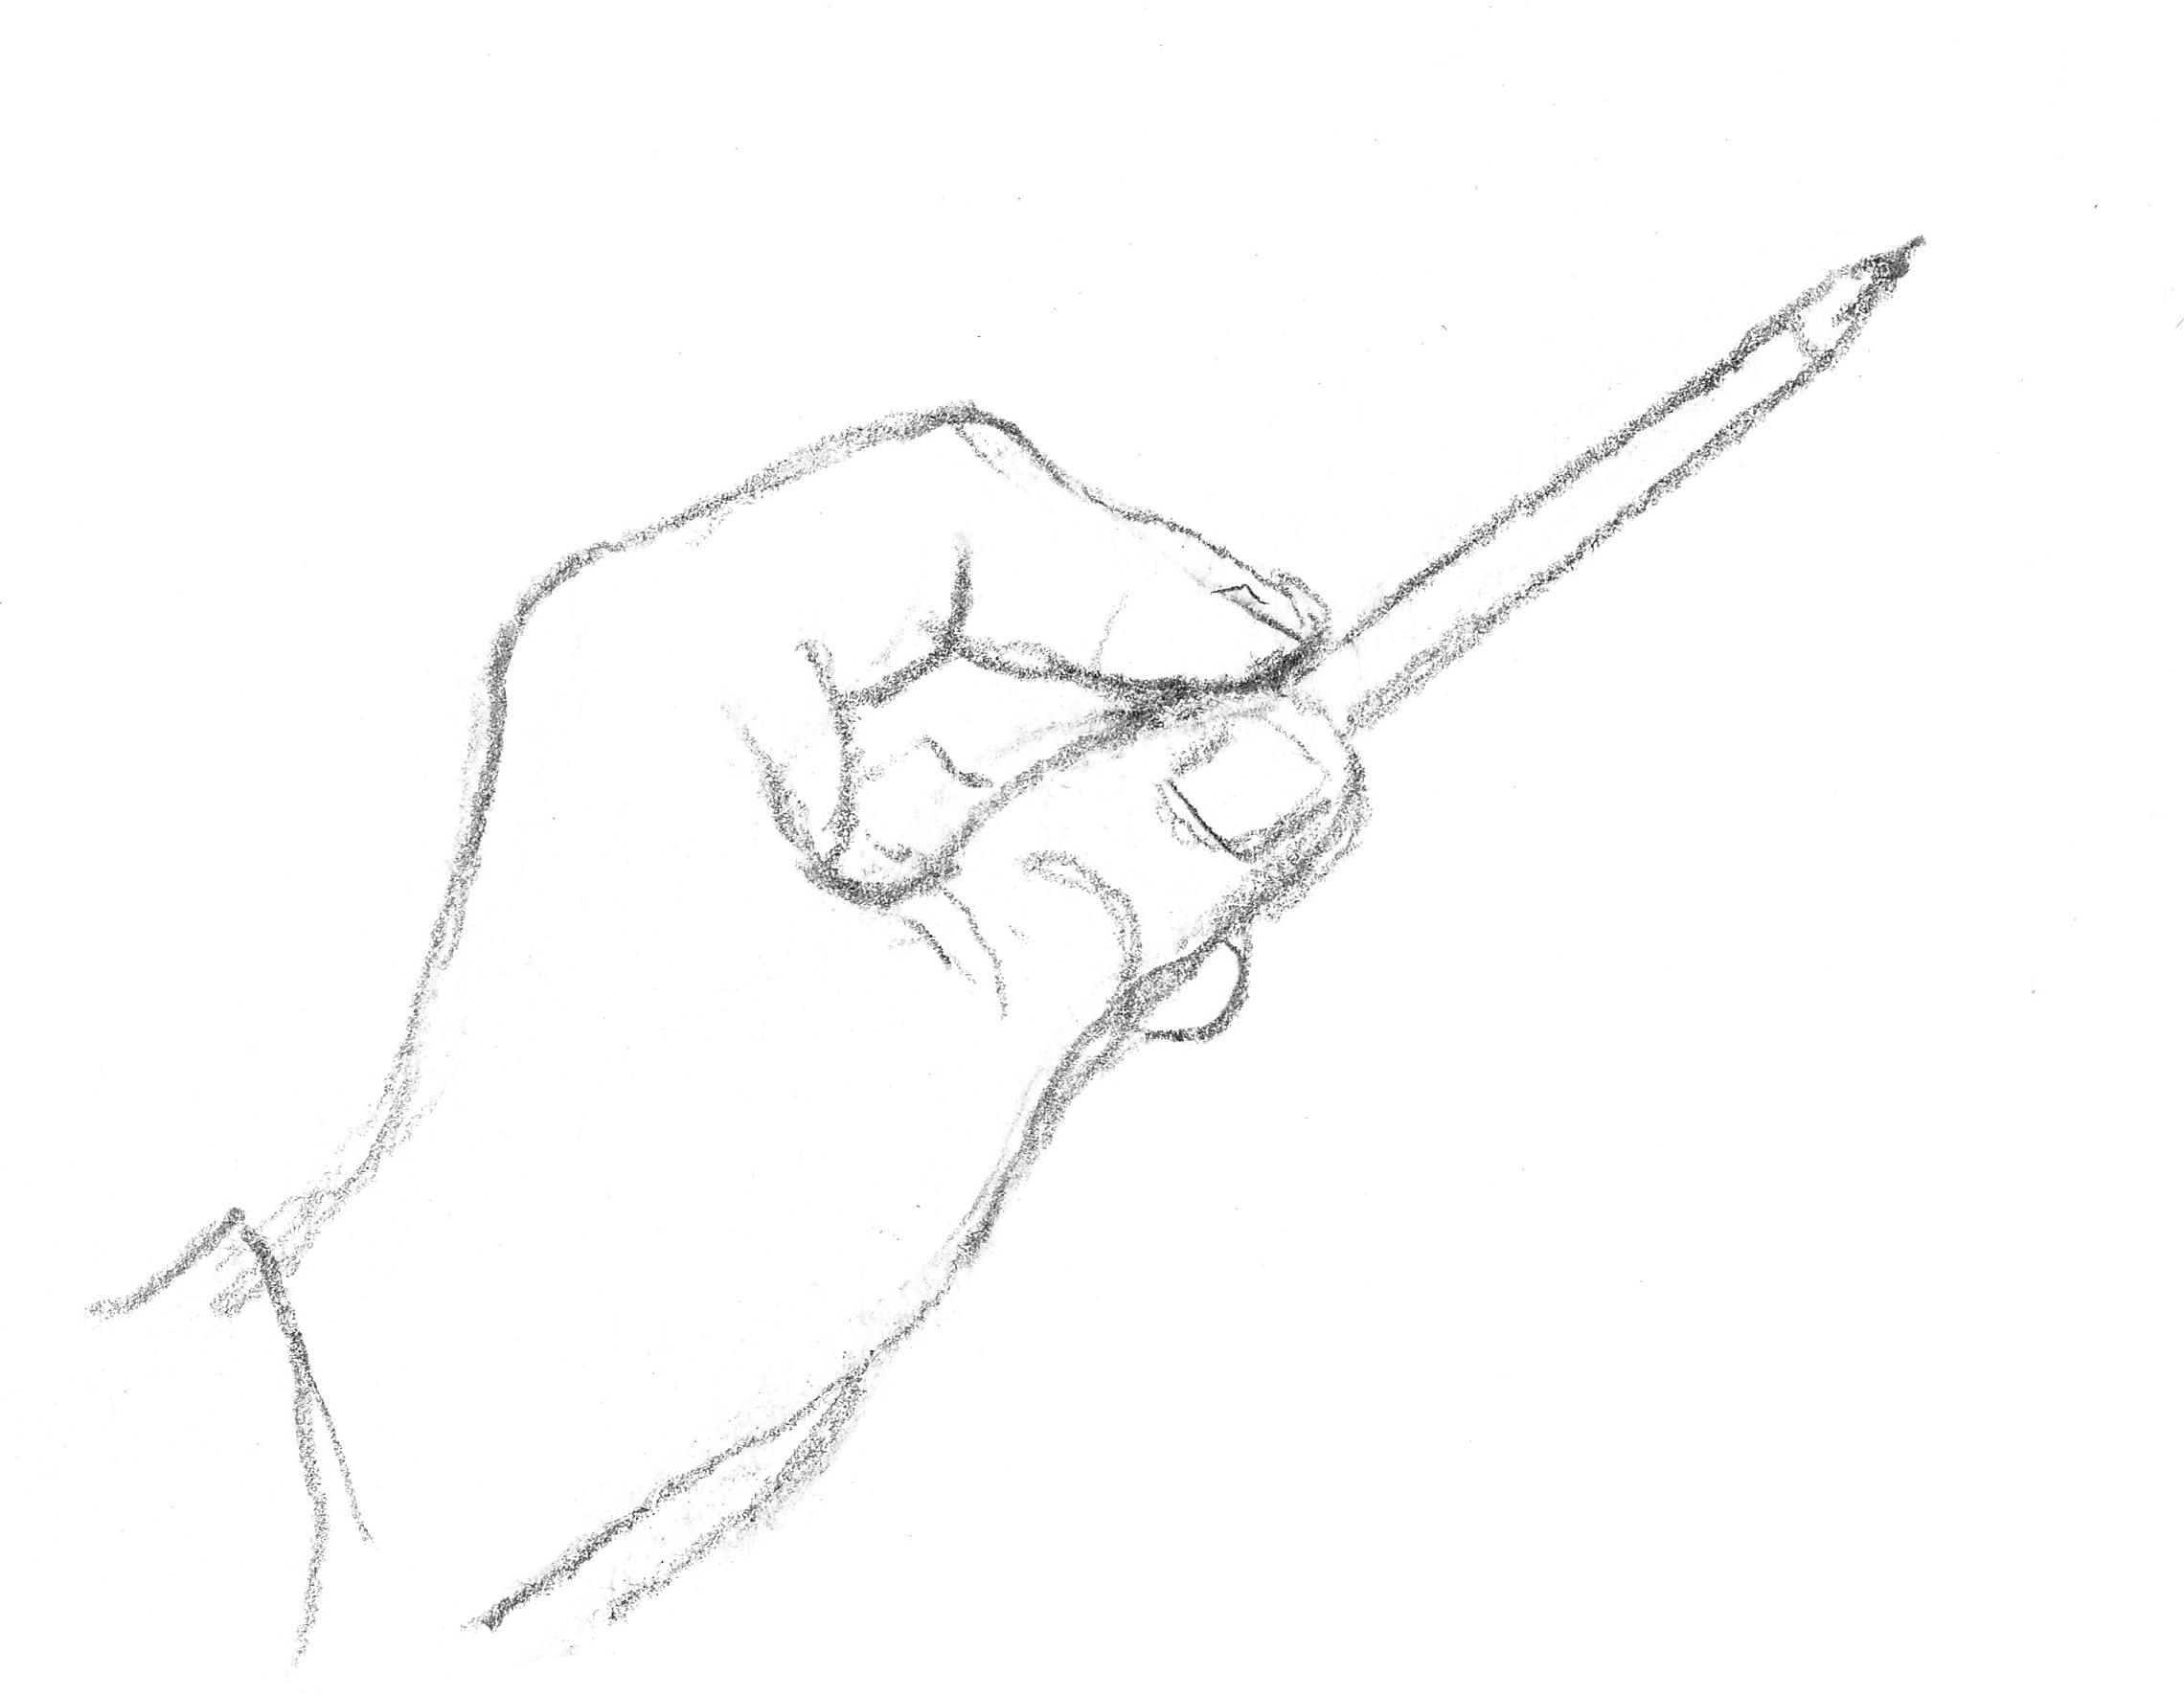
*Tip: To determine the right directions (horizontal, vertical, diagonal) hold your pencil along a certain part of your still life. Close one eye and look at the position of your pencil (picture). This will help you check directions.
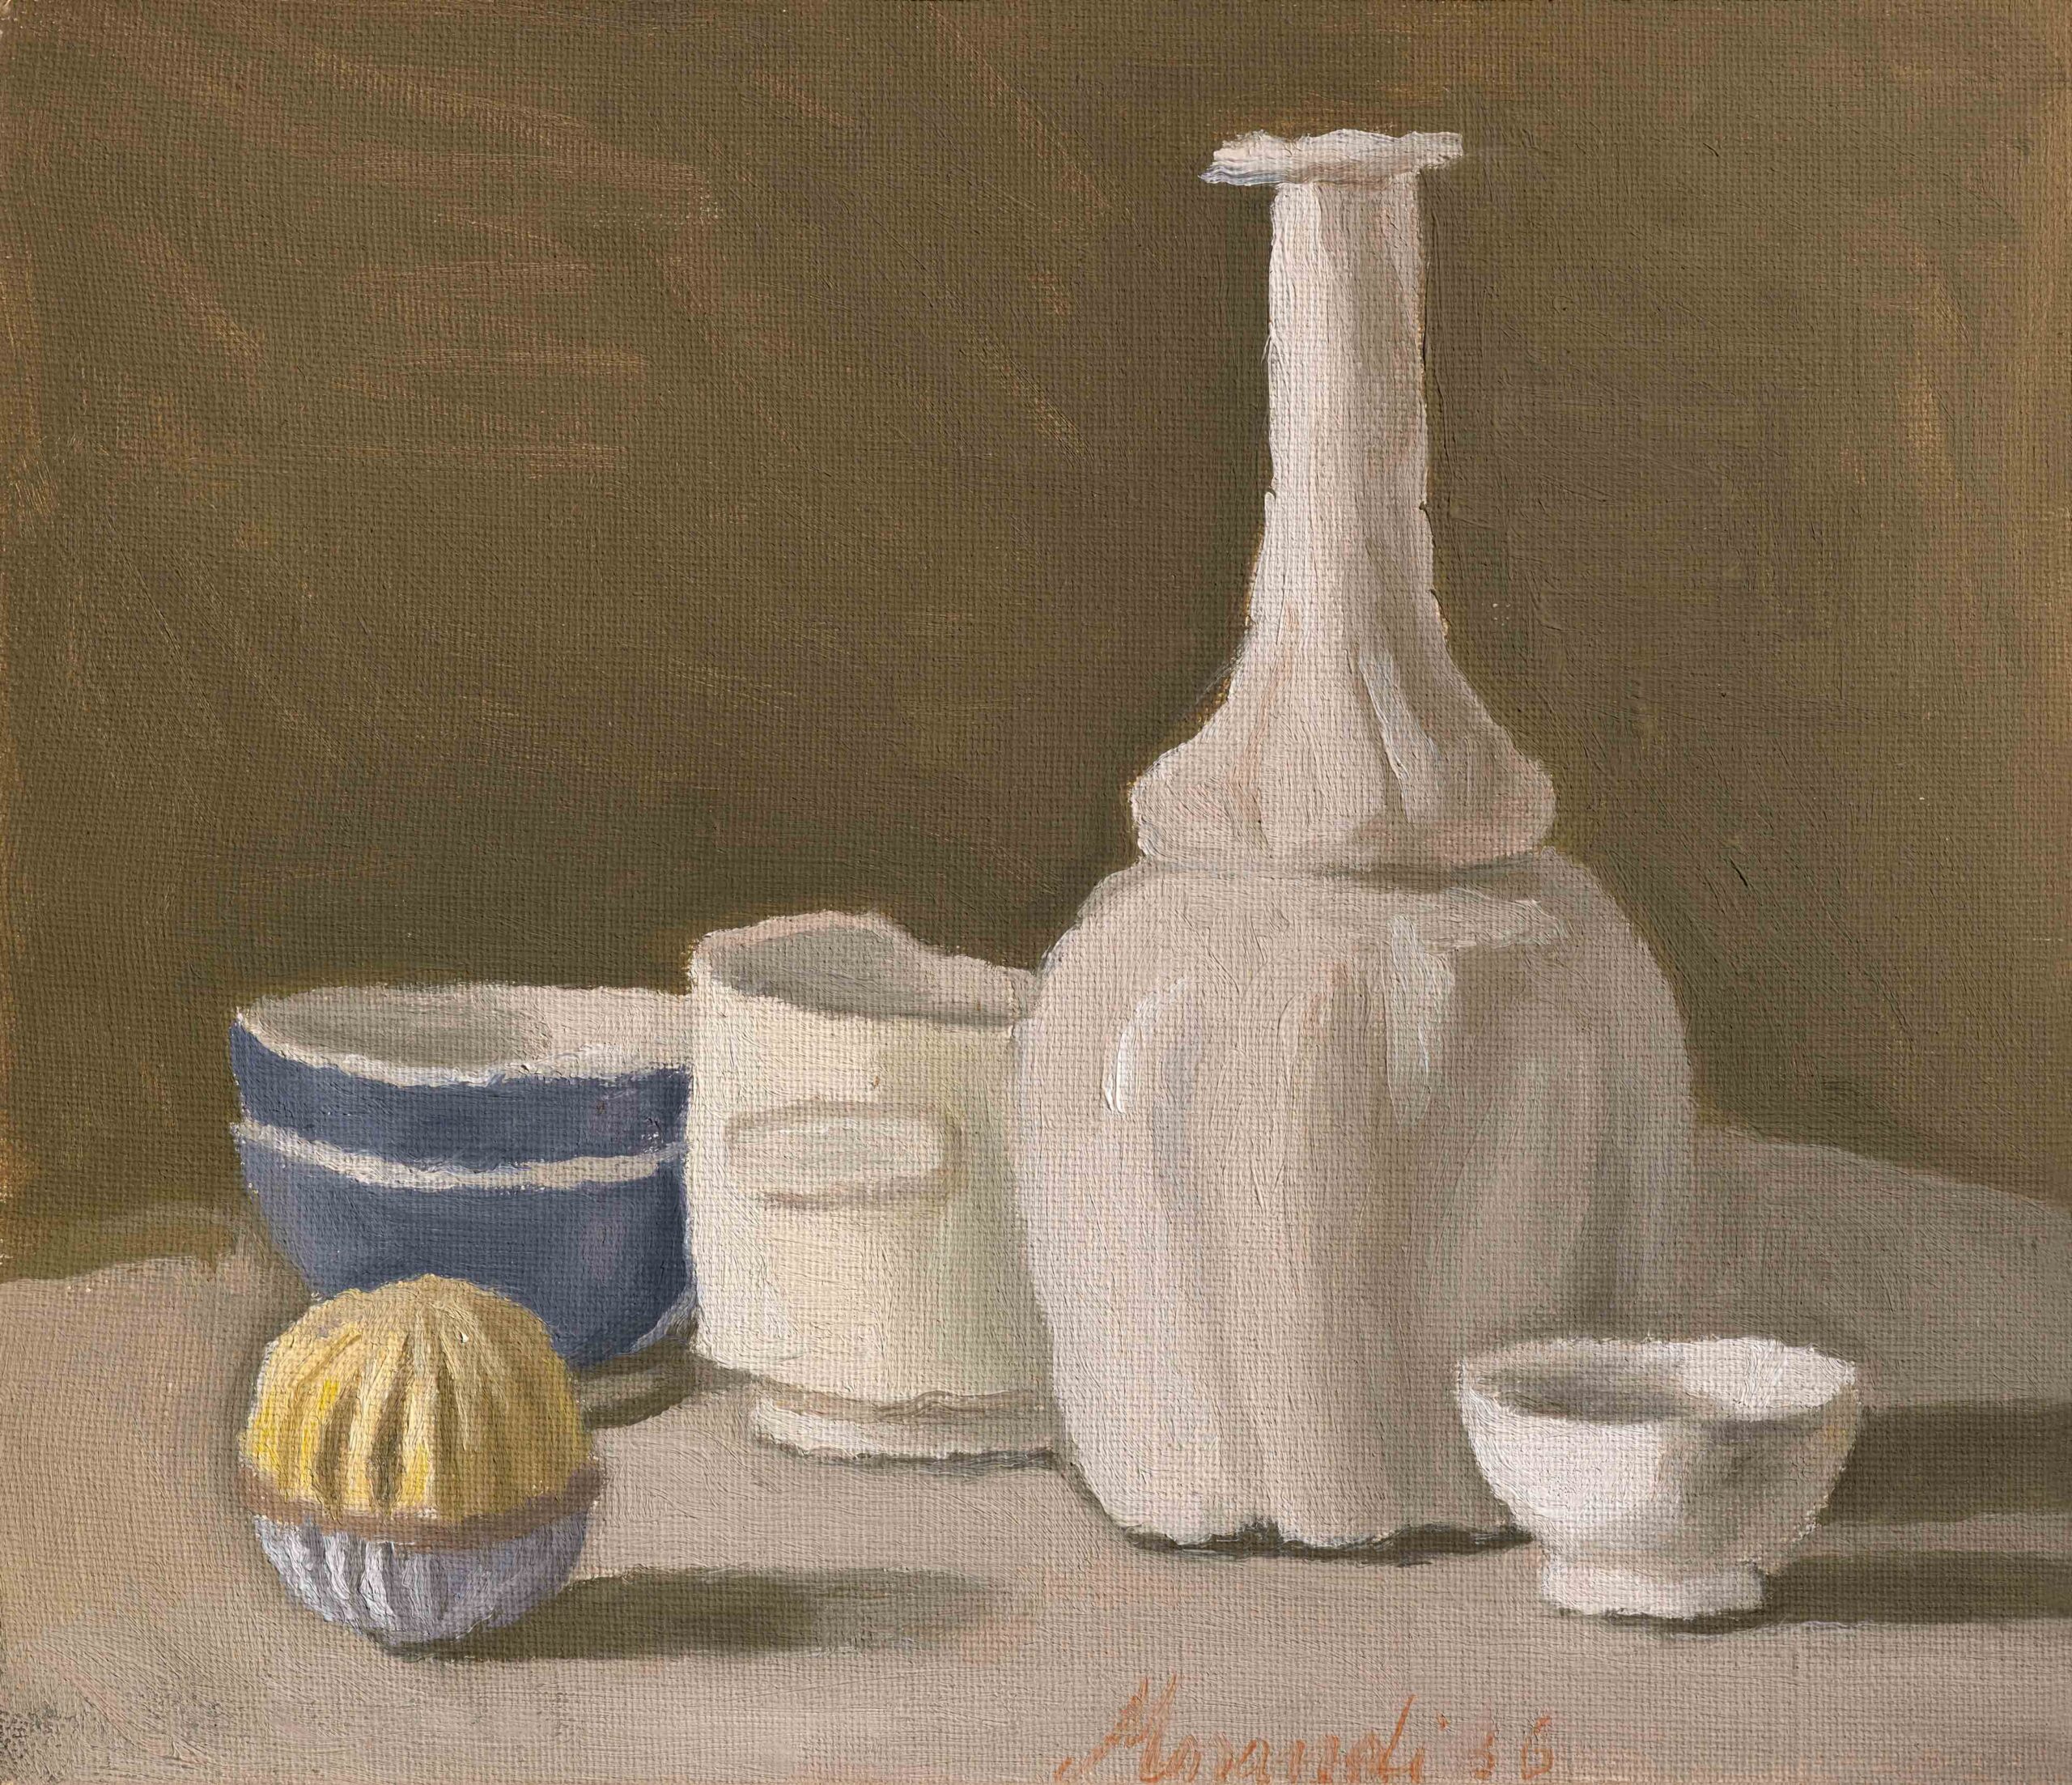
The Italian artist Giorgio Morandi painted still lifes of everyday objects throughout his life. He paid a lot of attention to the composition, or how he could place the objects in such a way that they form a nice compact group: from the right to the left the objects are half behind each other . On the left side this is compensated by the small ribbed pot. Morandi chooses objects without too many decorations. The contours are nowhere very tight. This gives the hard earthenware objects something soft. The shadows are created by side light from the left and make the objects beautifully plastic (= suggestion of curves, convex and concave parts).
Exercise 3: A good exercise is to draw only the shadow shapes of a still life, without lines. Even a completely unattractive still life (photo) can still be a reason for a drawing. Place a still life in front of you, make sure there is sufficient light from the side and only draw the shadow shapes. If necessary, first take a photo and convert it into black and white.