Chapter 6 | ON THE ROAD
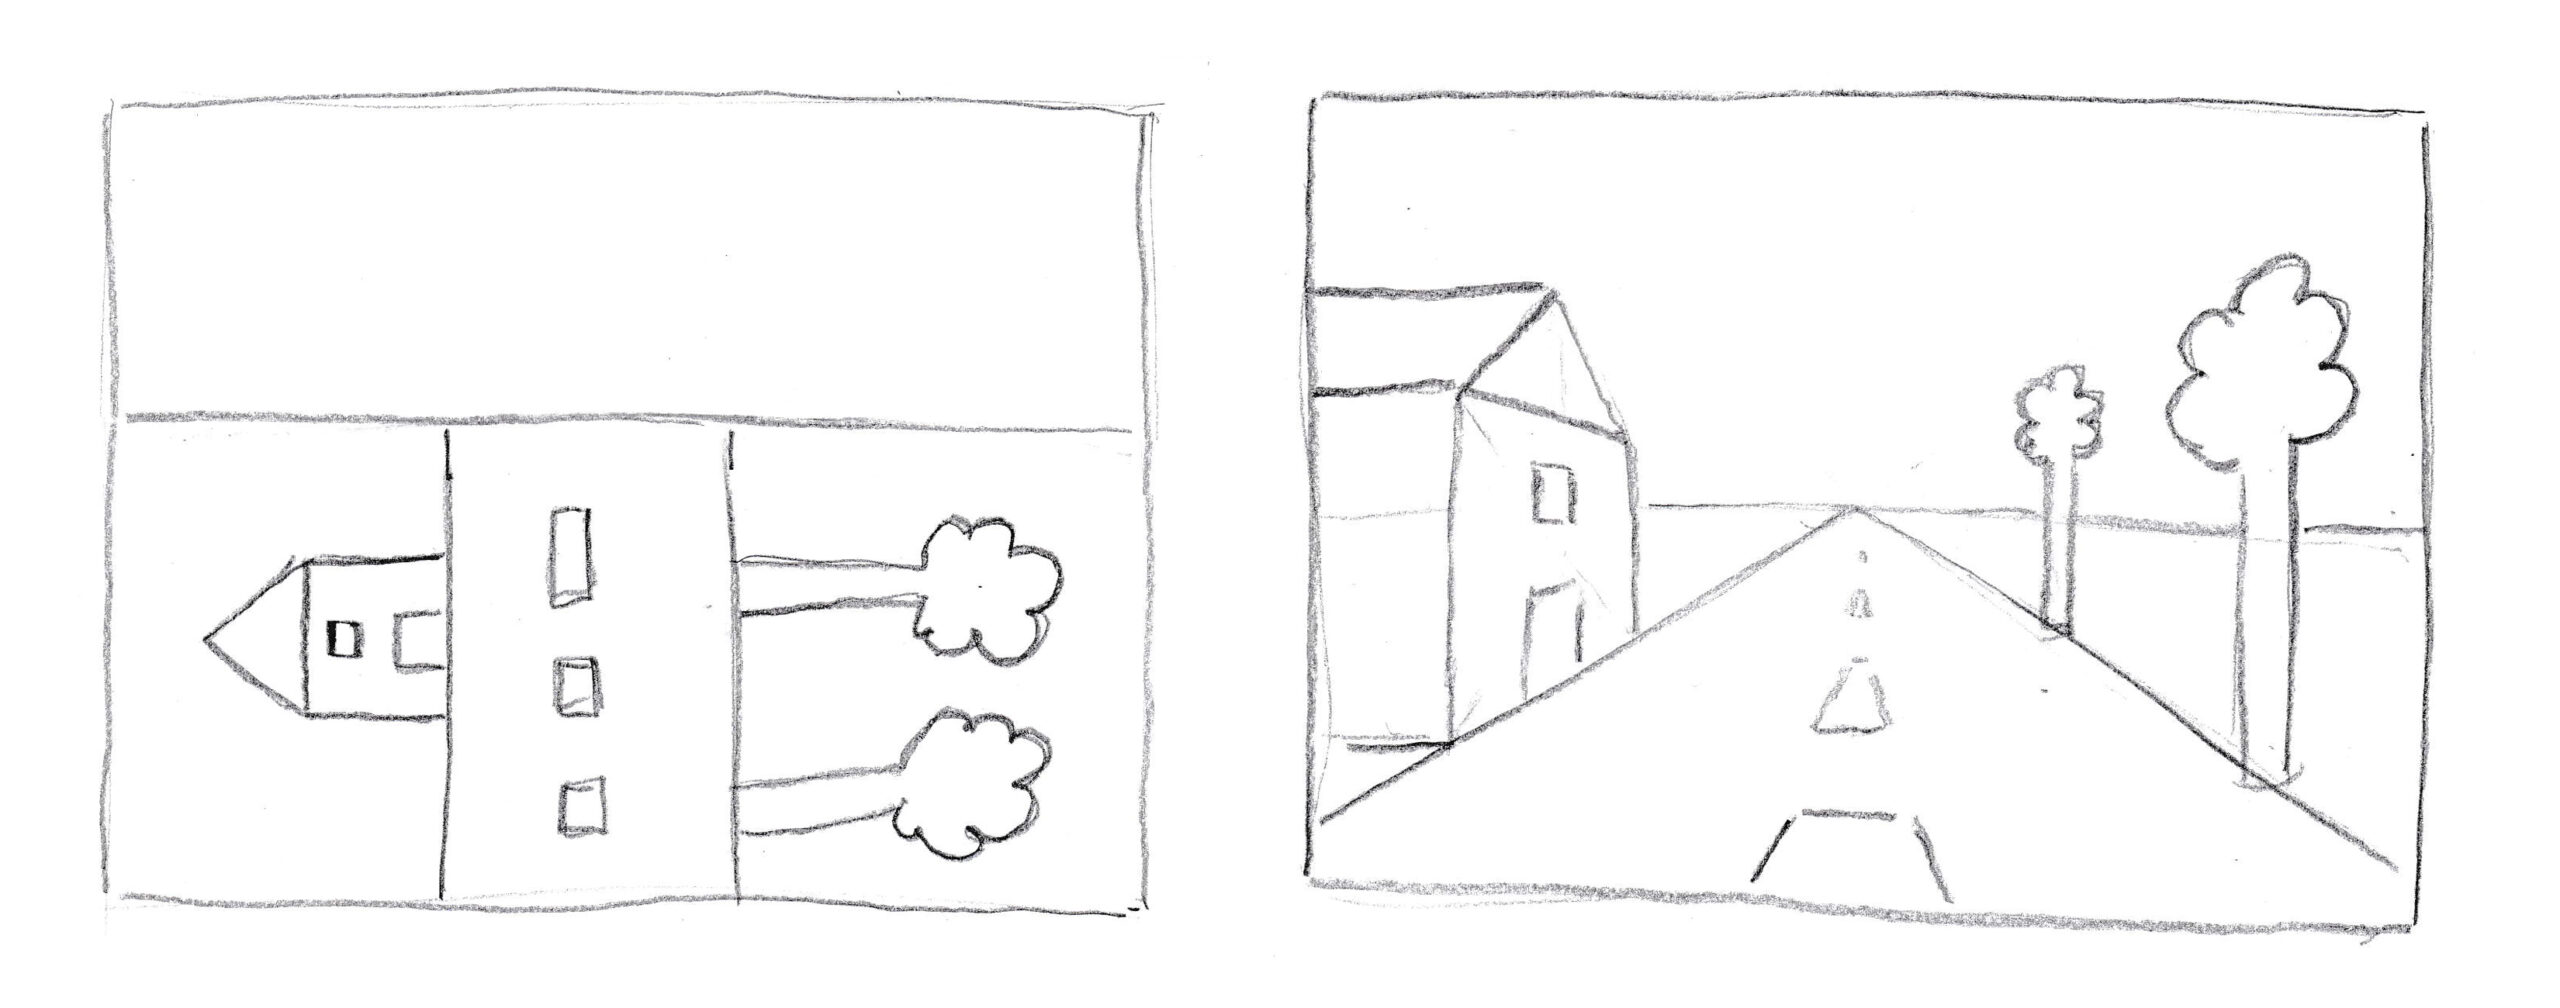
Both drawings are perfectly understandable: a house and two trees along a road. Only the right one is a perspective drawing.
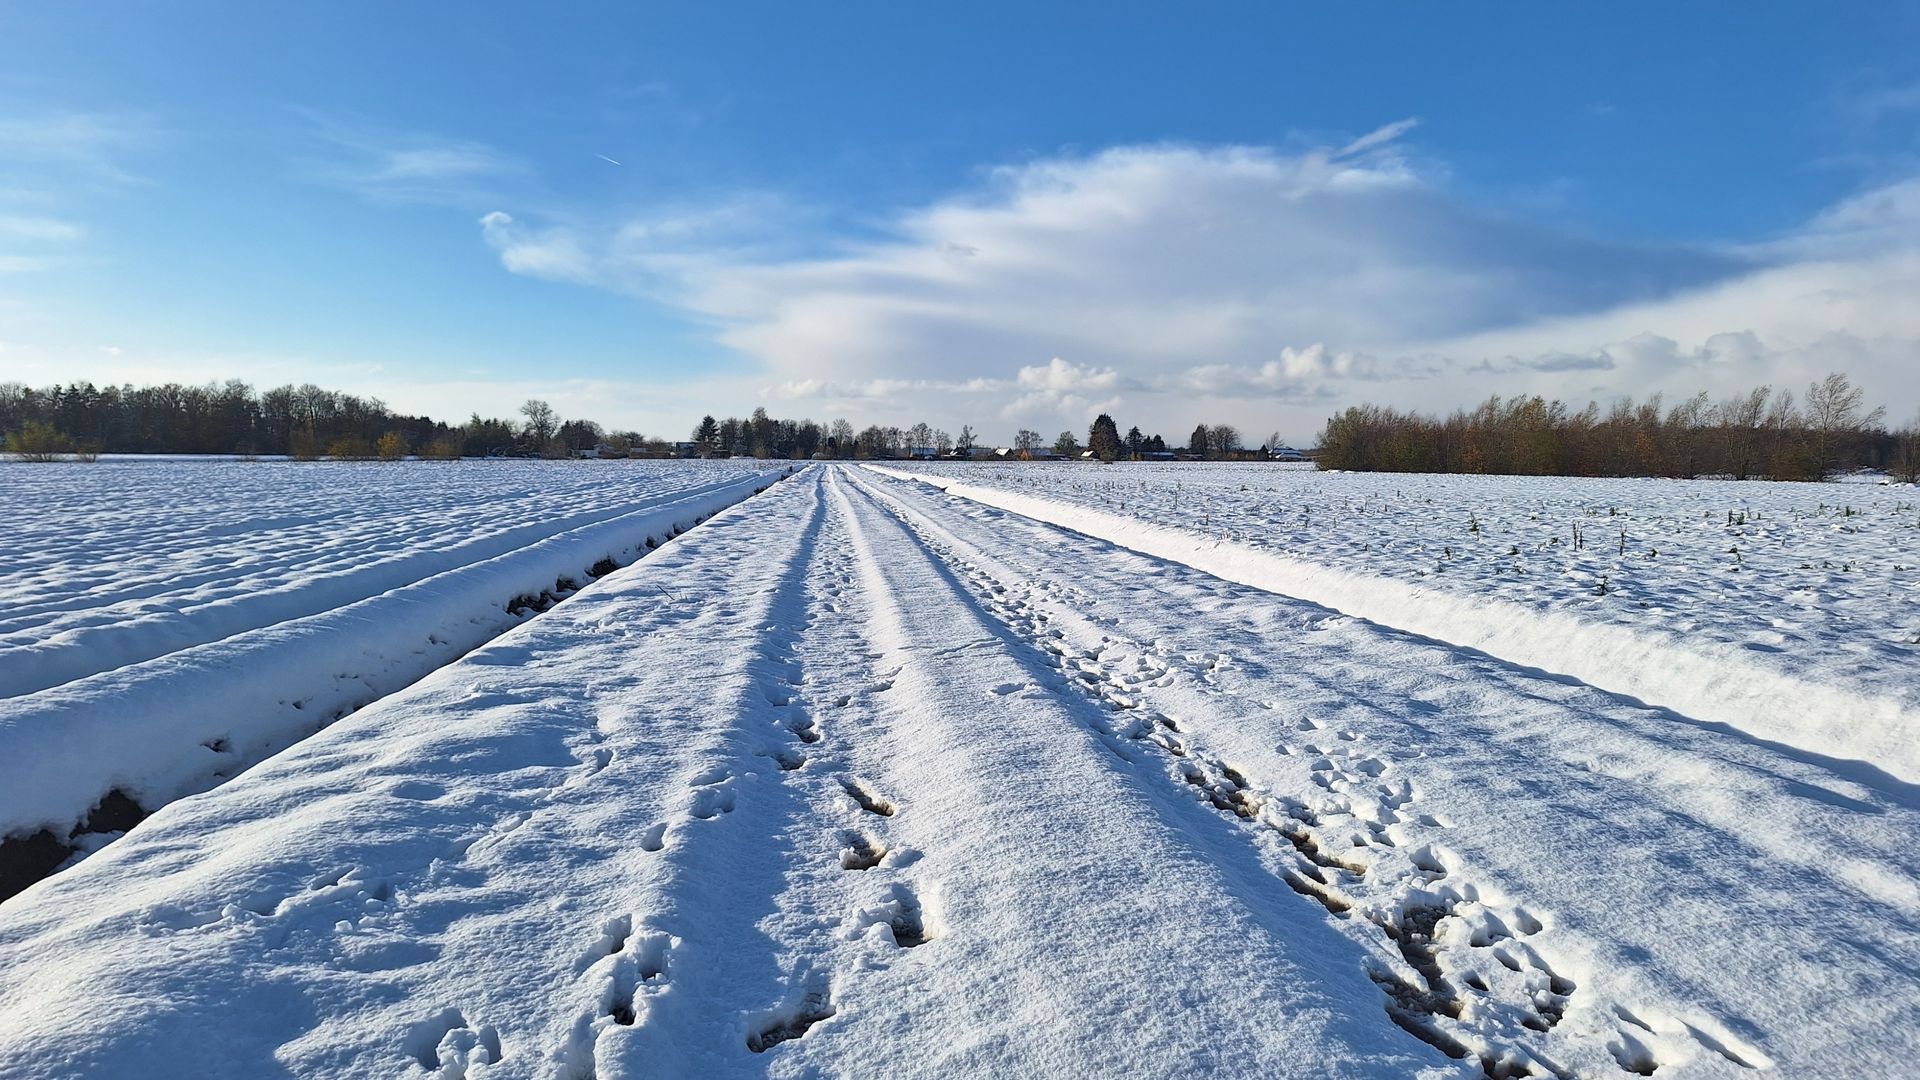
A road appears to narrow in the distance. This is beautifully illustrated in a photo of tracks in the snow. The tracks, which in reality run parallel, become increasingly closer together as they grow further away, until they finally converge at a vanishing point on the horizon.
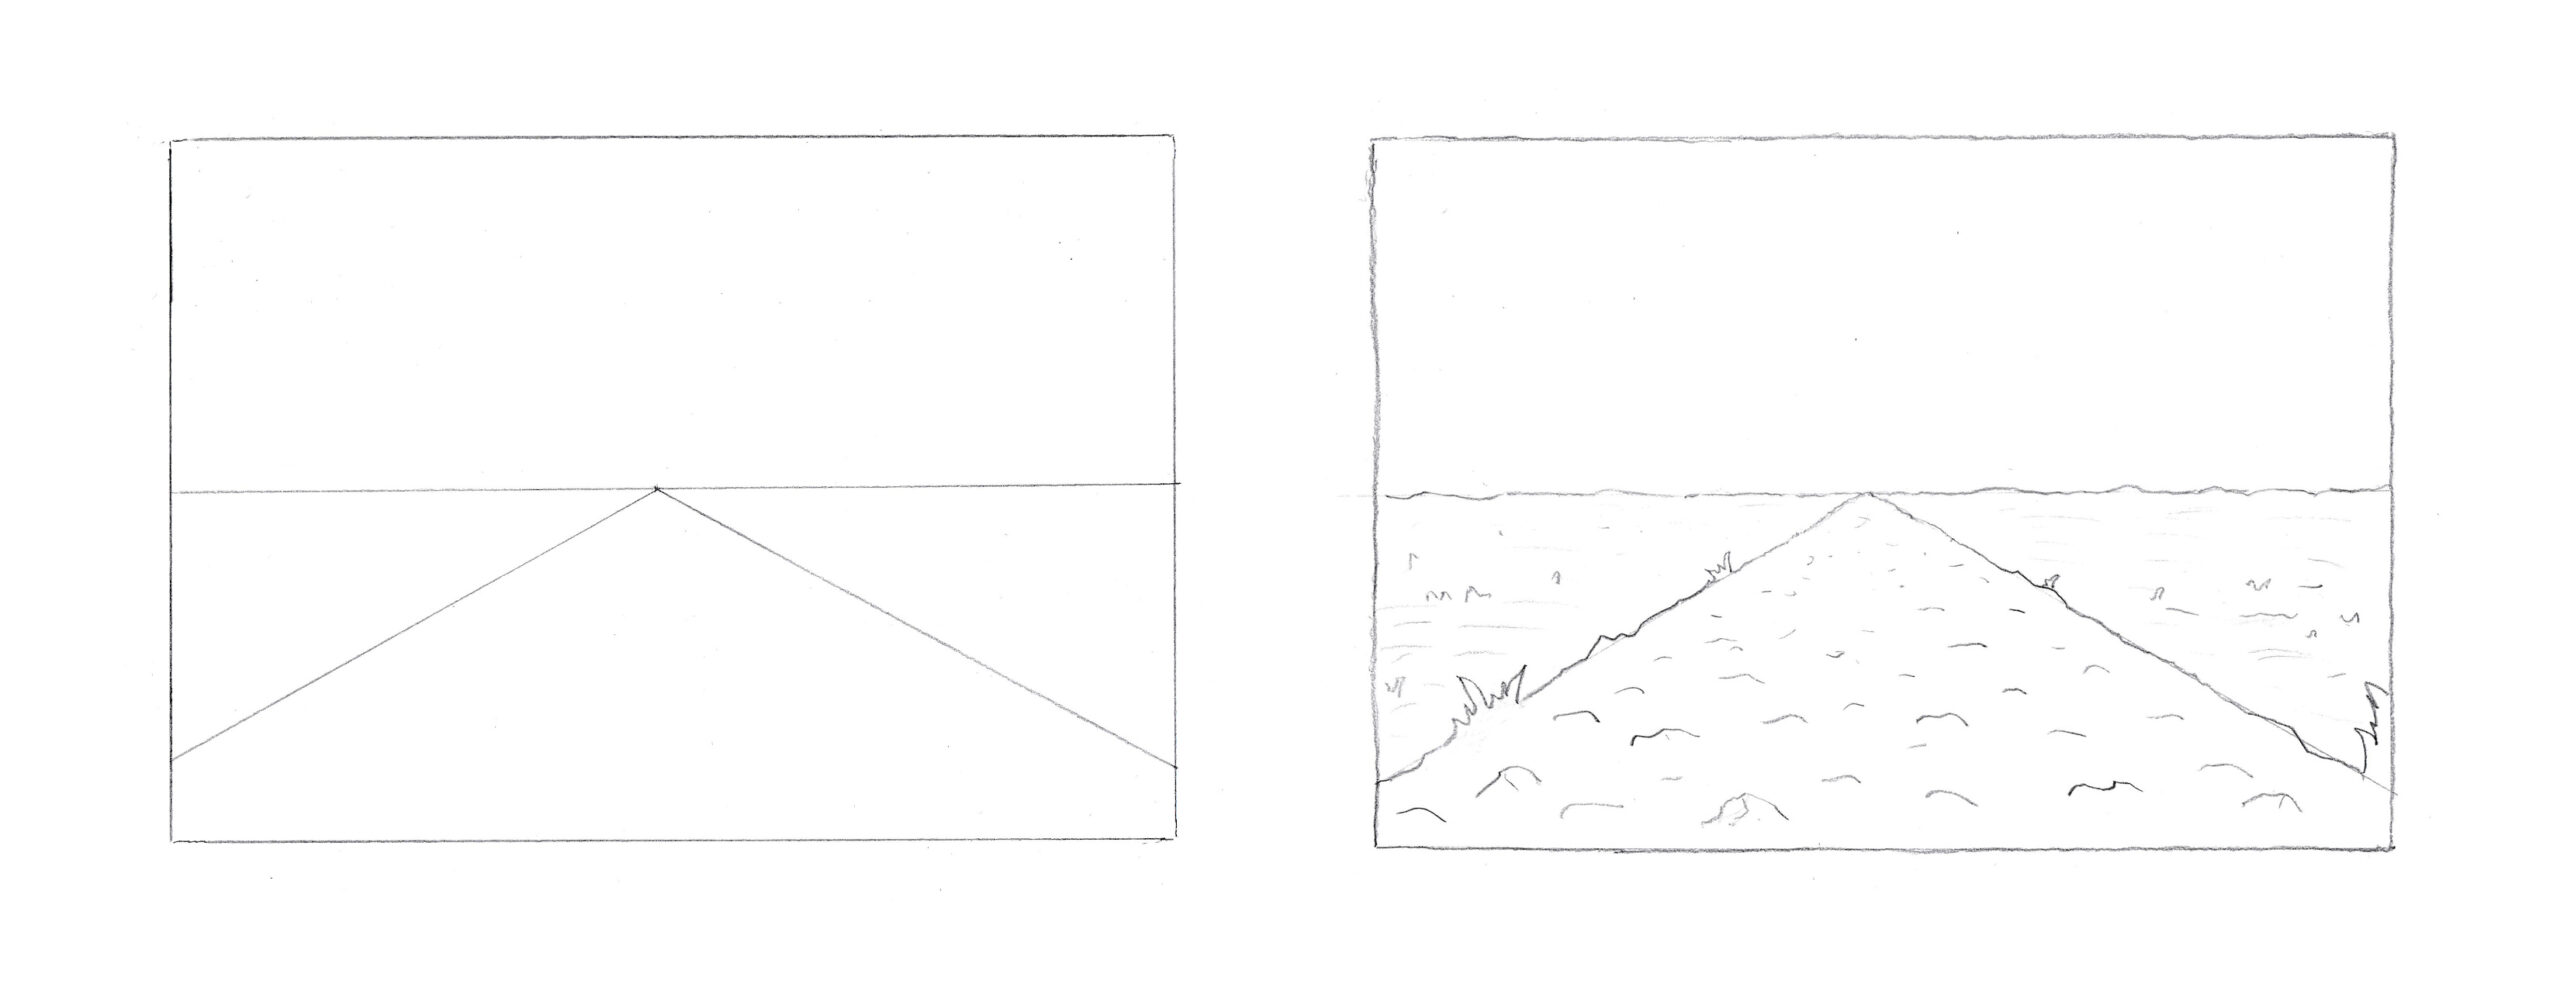
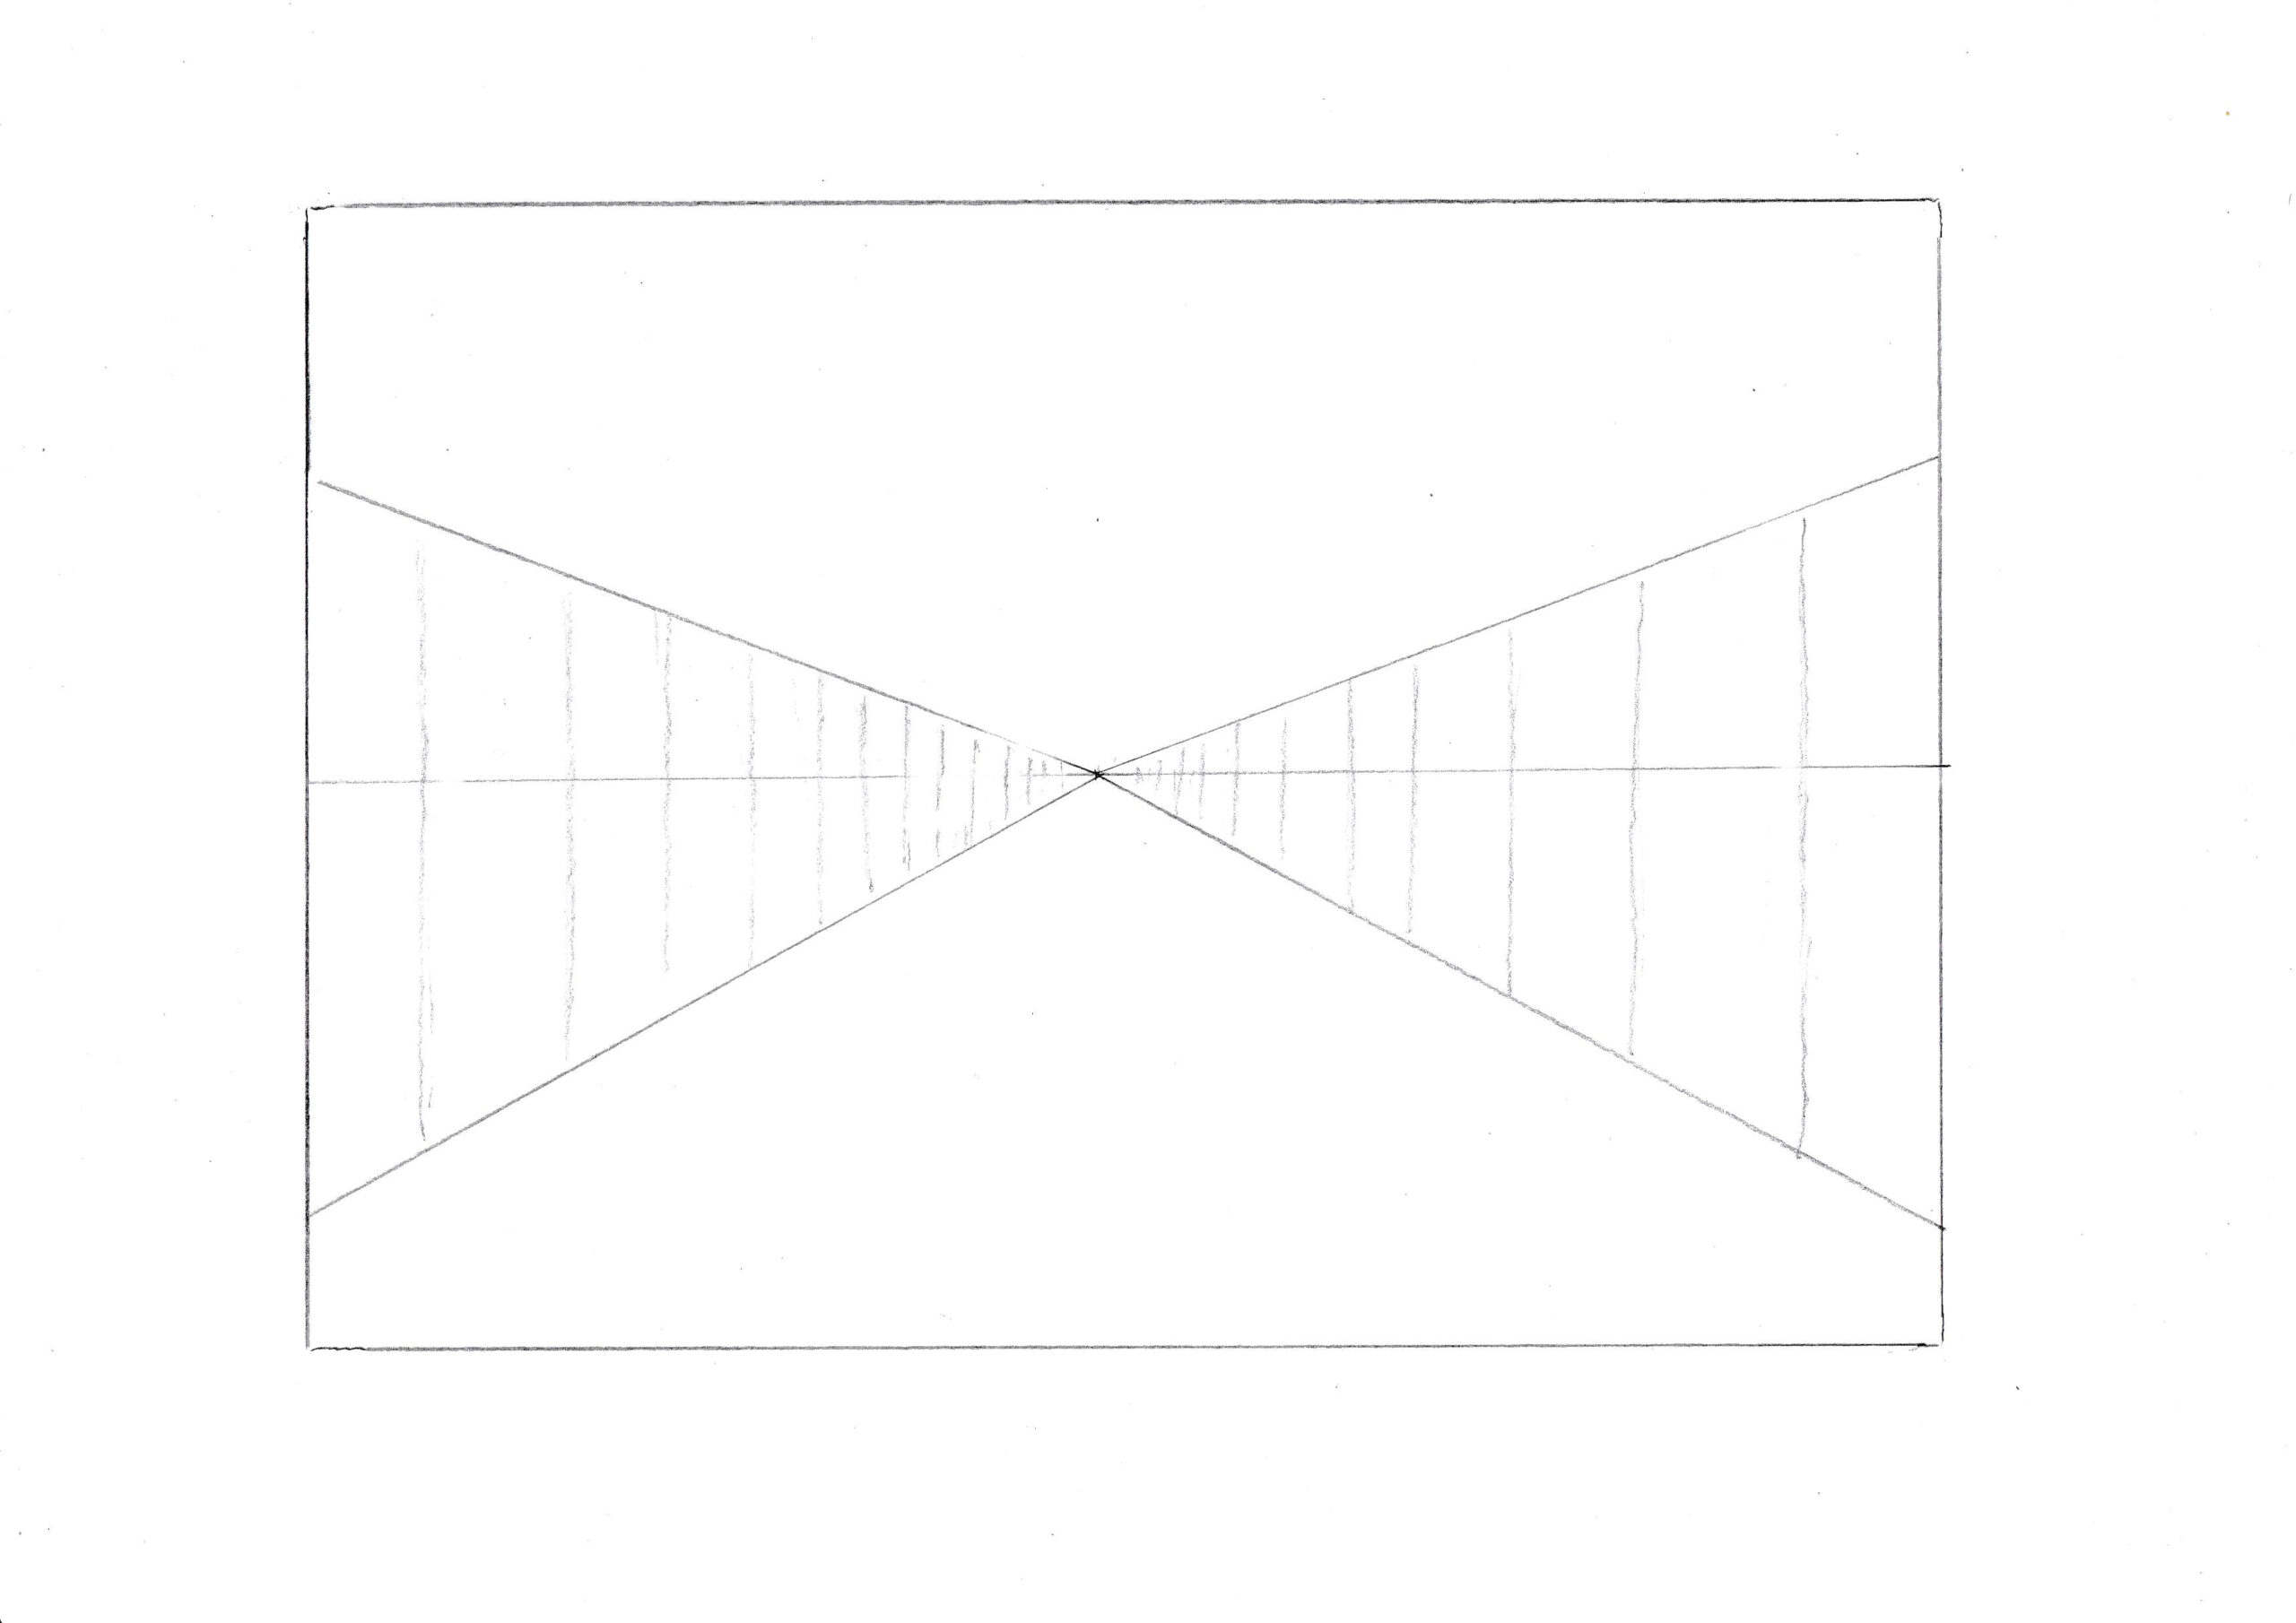
Exercise 1: Draw a road to the horizon using a ruler (left) or freehand to make it look like land or water (right). You can shift the vanishing point on the horizon to the left or right. Add whatever you like.
All ‘lines of flight’ that in reality run parallel (such as the tracks in the snow) converge at the same vanishing point in a perspective drawing. So this also applies to noise barriers, walls, hedges, or fences on either side of the road. Here I’ve drawn vertical lines in the walls progressively closer together. Of course it could as well be an endless corridor lined with lockers or doors.
In the next drawing I added three figures on the road, all three with their heads at eye level. Take a look at the man in the foreground on the right: by drawing an auxiliary line from his feet to the vanishing point, I could exactly determine how tall the woman behind him should become (assuming she is about the same height in reality).
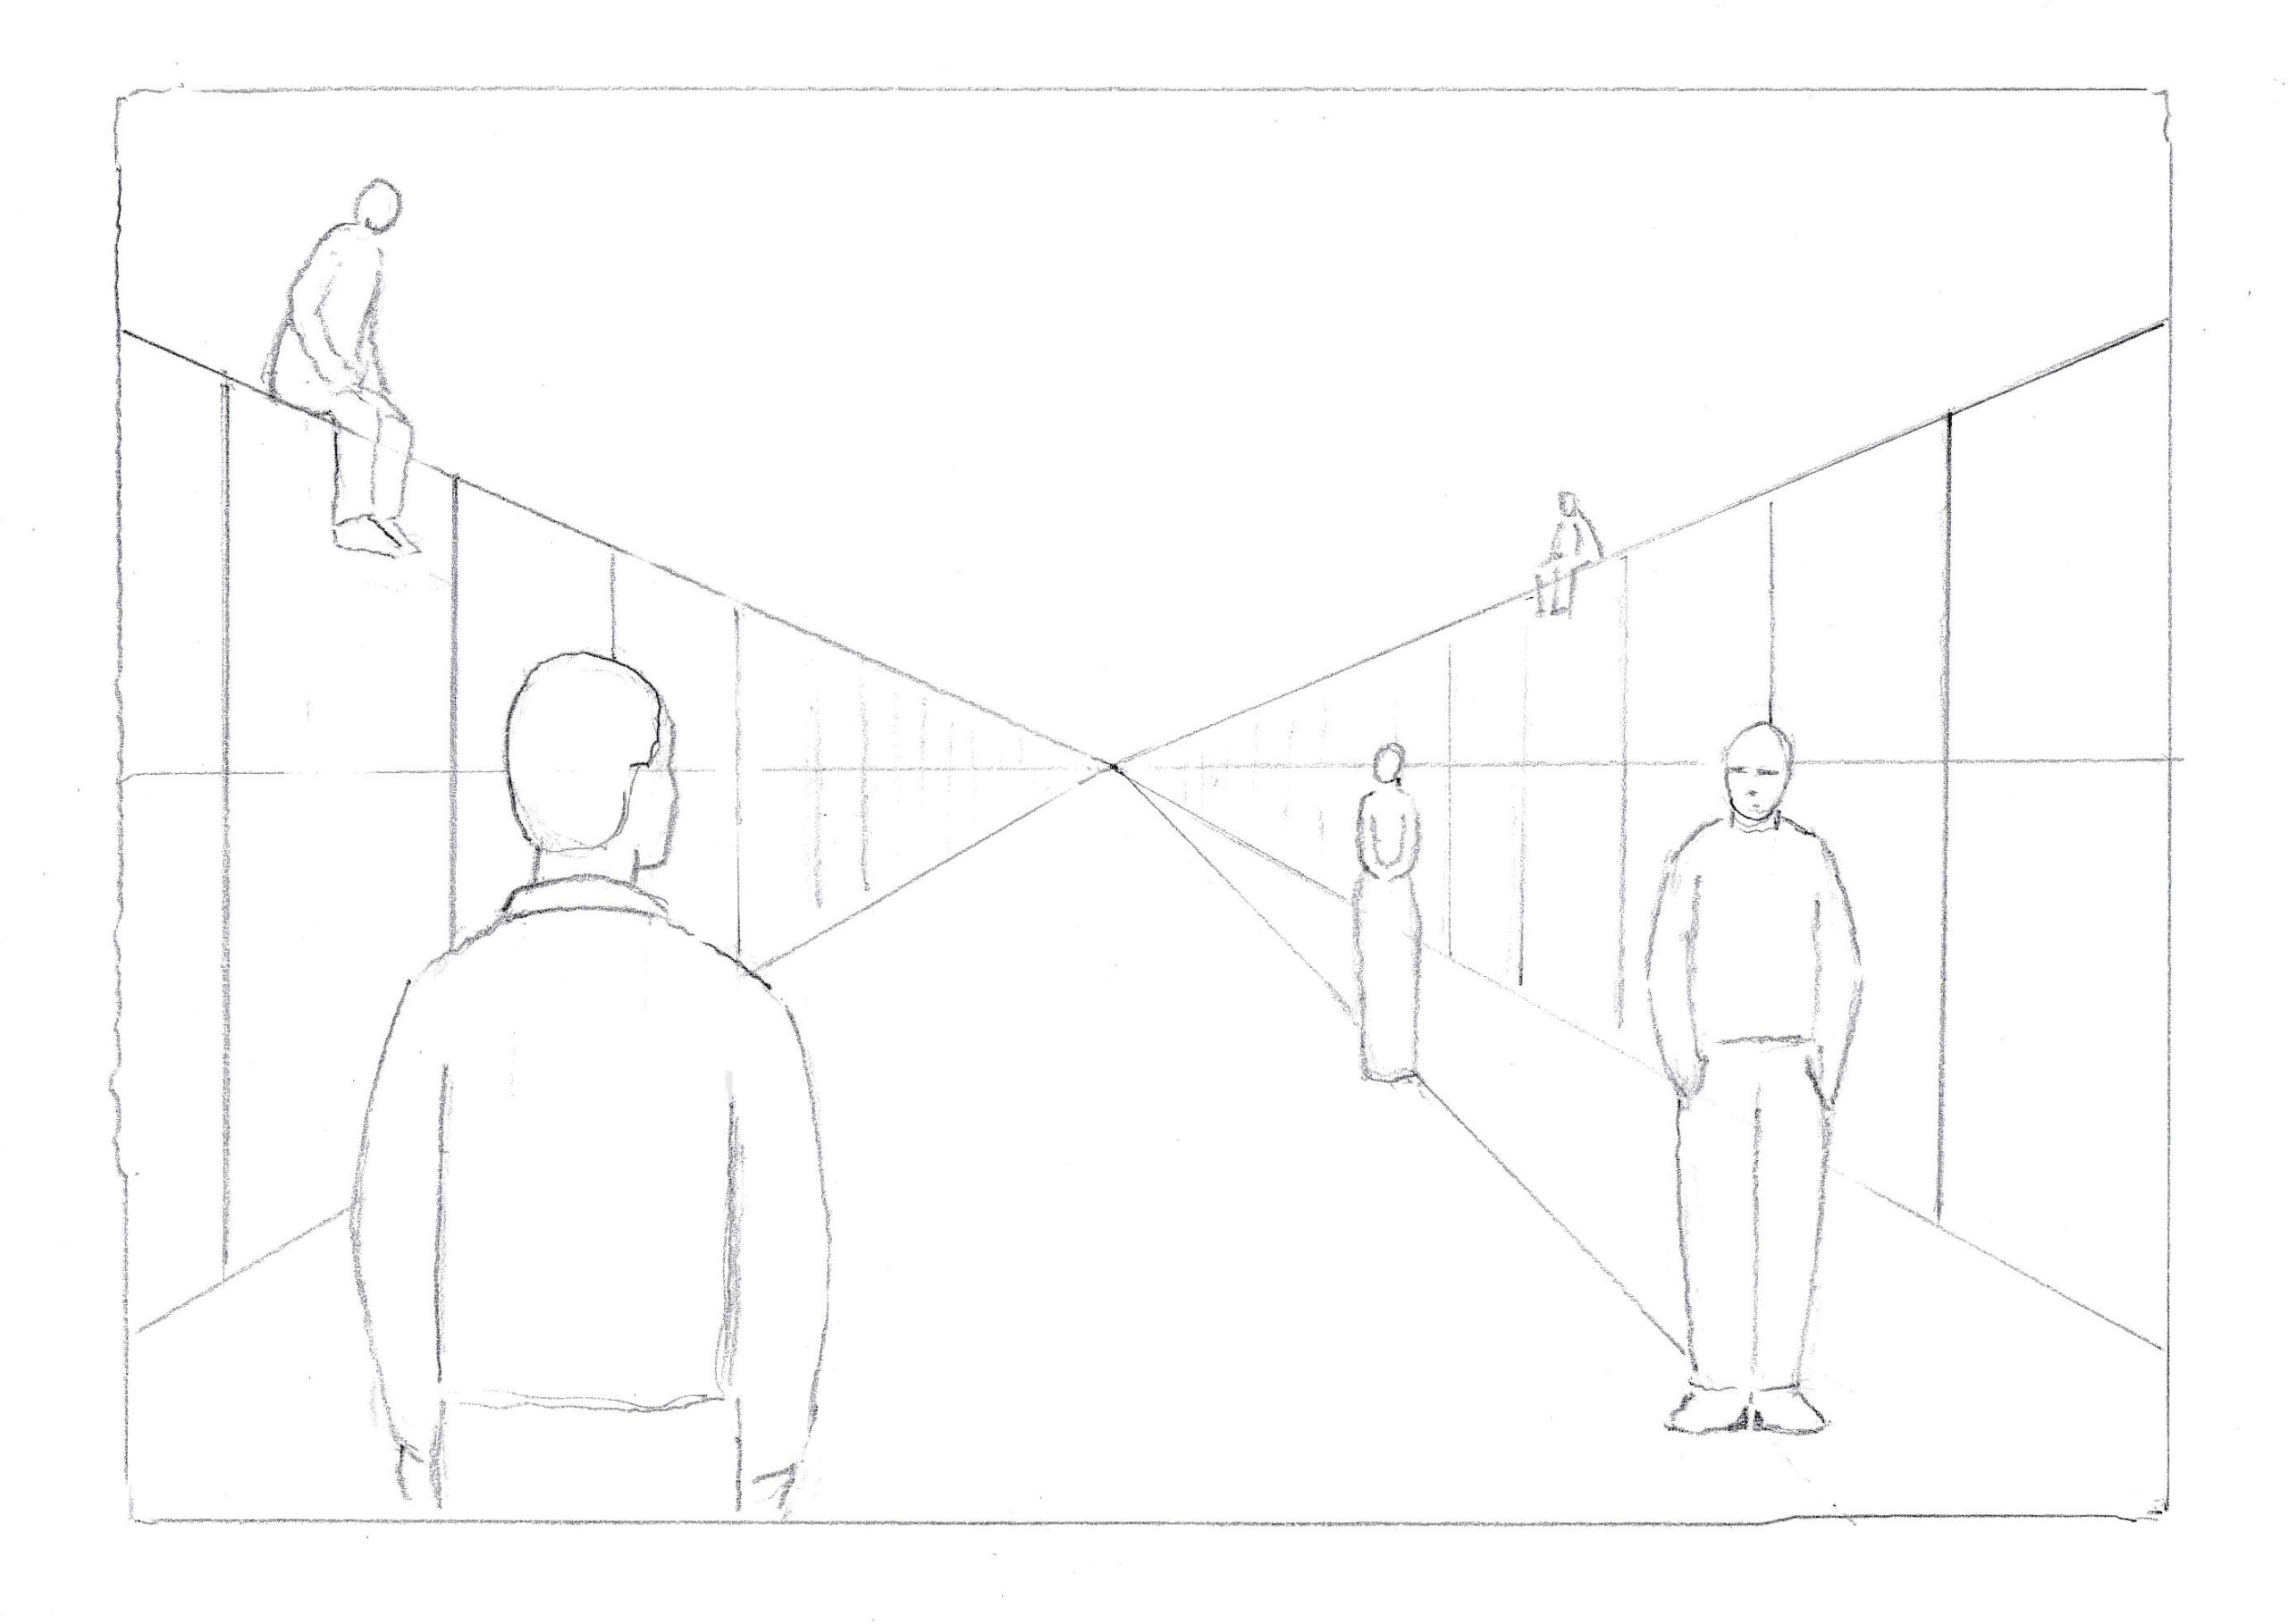
Exercise 2: Draw a road/bridge/long passage with walls and place some figures at different distances in such a way that the perspective looks reasonably correct. Add whatever you like.
In the following drawing, On the left wall I’ve again drawn the distance between the segments freehand, gradually closer together as they become more distant. This usually works well for creating a sense of depth. If you’d still like to know how to correctly divide a wall/fence/facade into equal sections, check out the following geometric exercise.
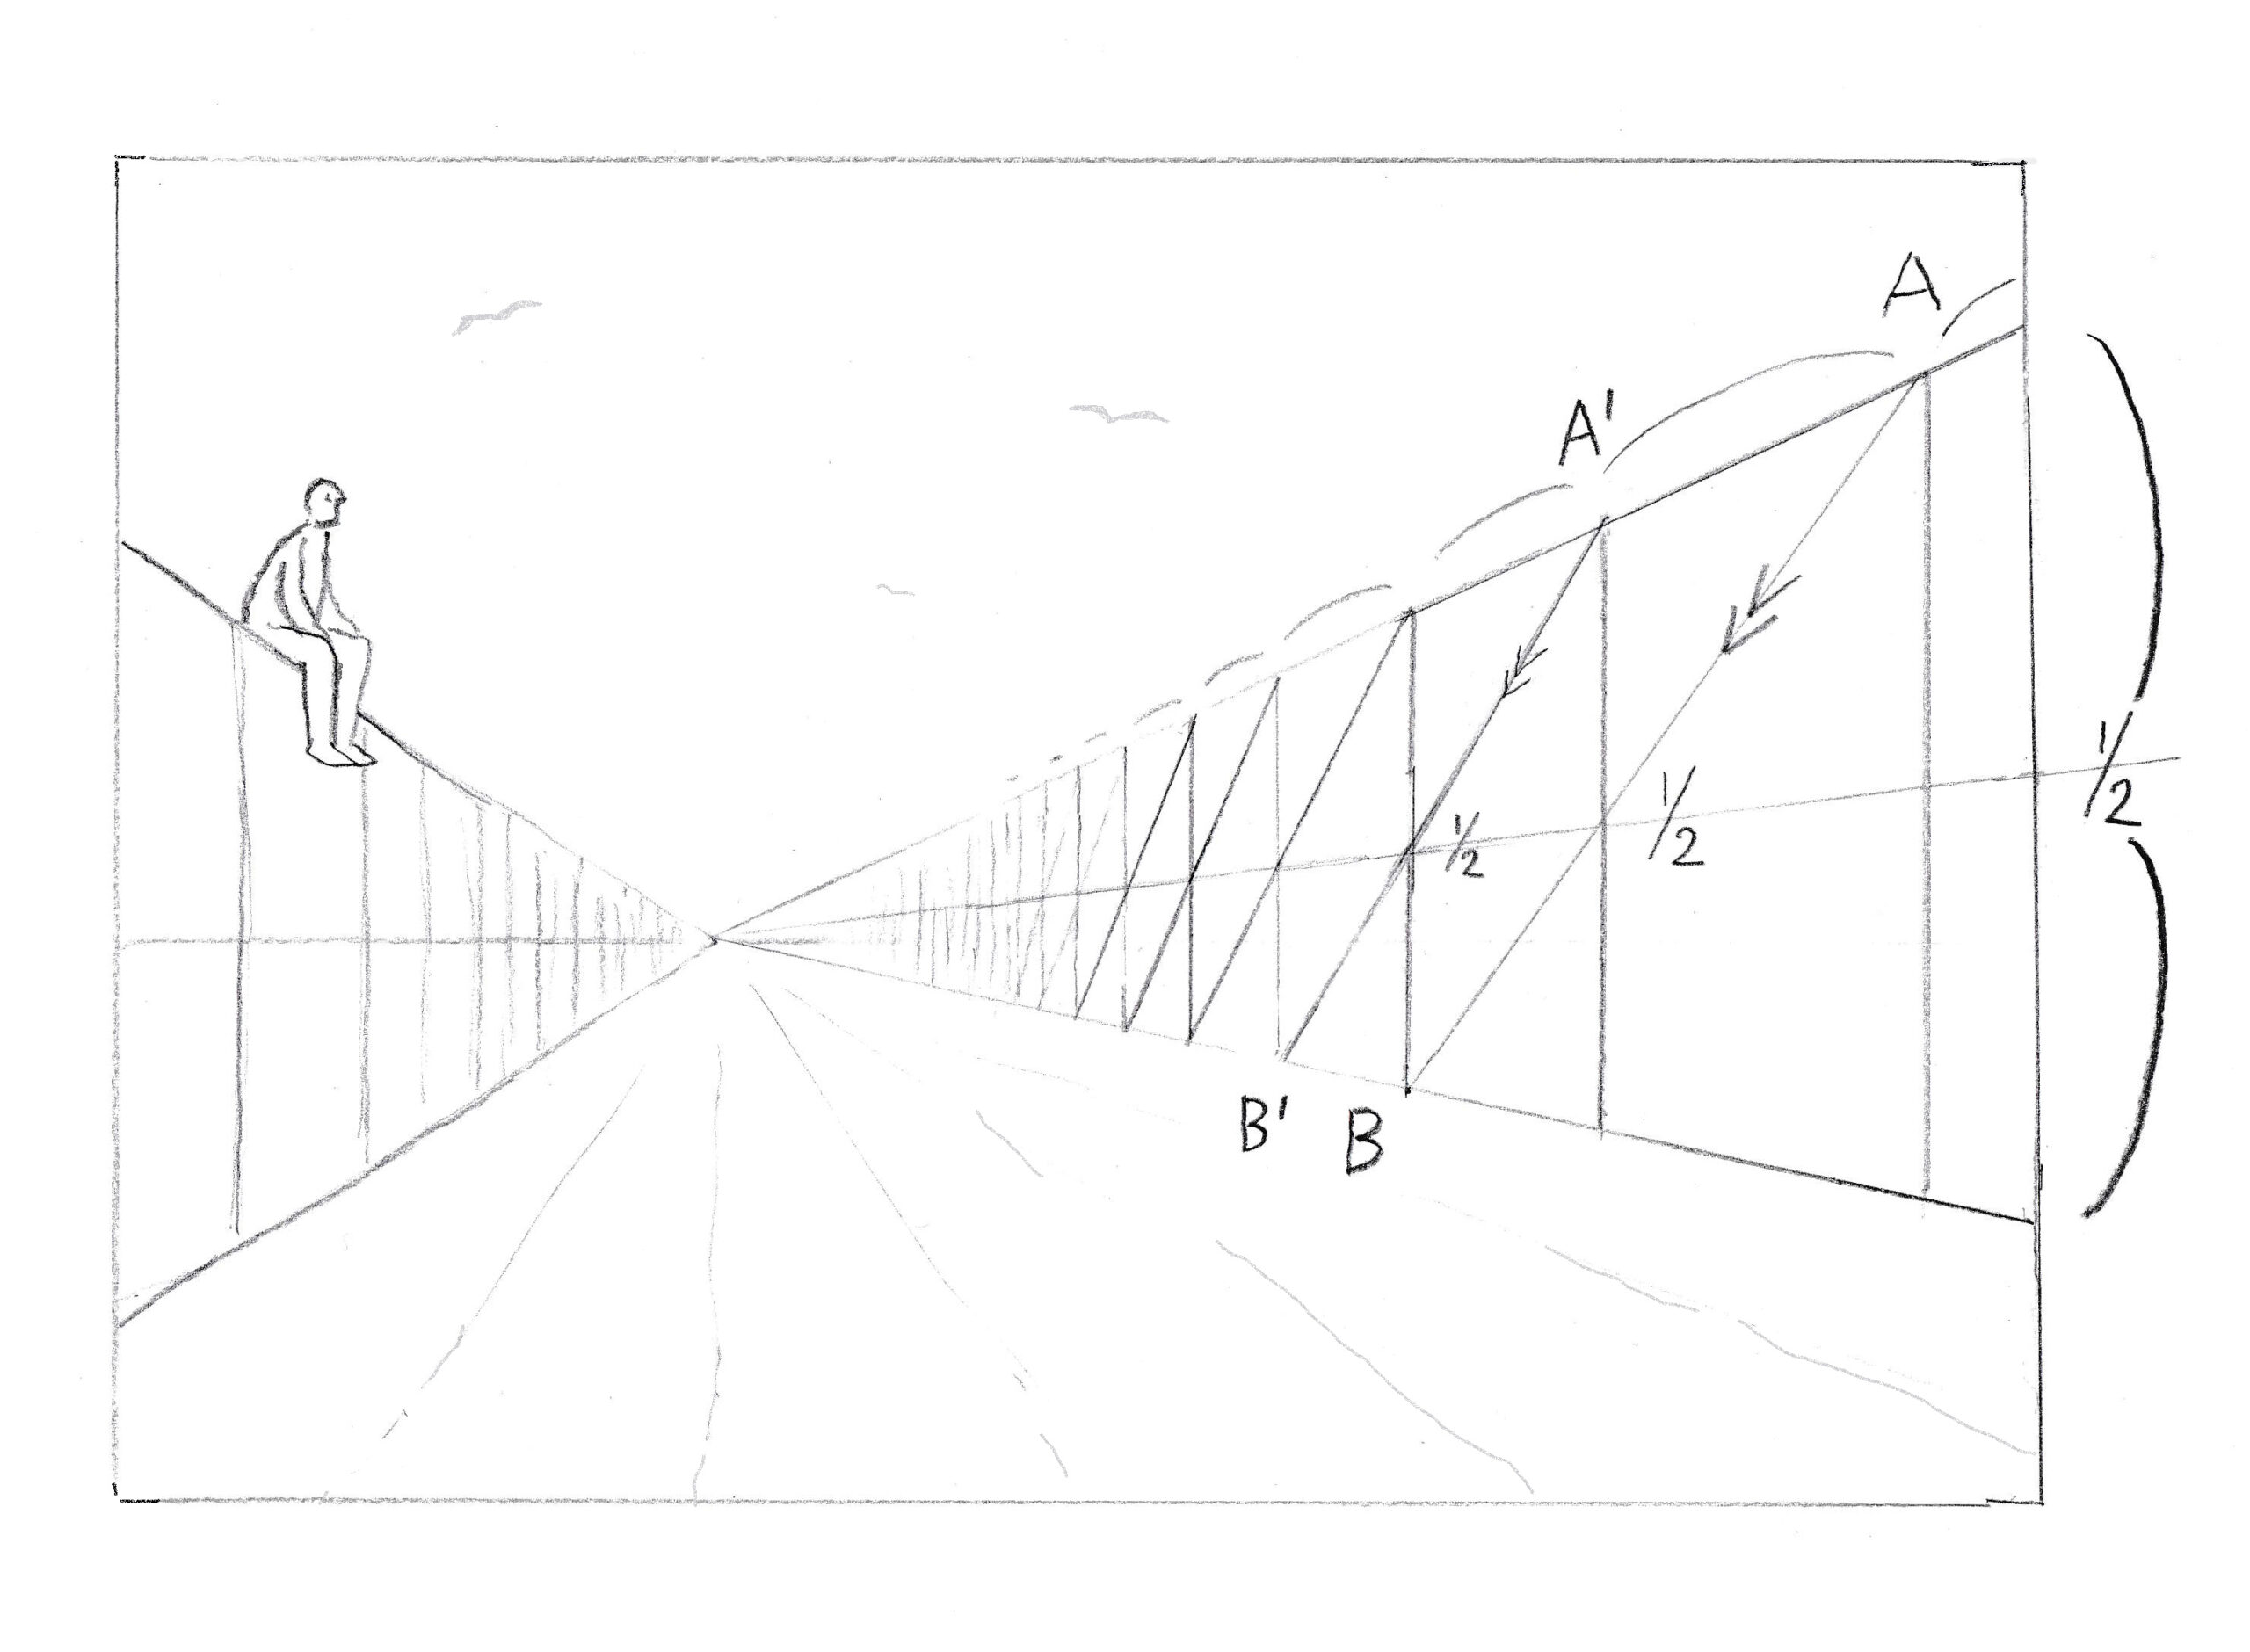
Exercise 3: Look at the wall on the right. Perform step 1-6 using a ruler:
Step 1: Draw vertical lines from chosen points A and A1 to the ground.
Step 2: Measure the center of the vertical line from A (indicated by 1/2).
Step 3: Draw a line through the center (1/2) to the vanishing point.
Step 4: Draw a line from A through the intersection of the 1/2 line and the vertical line from A1.
Step 5: Where this line meets the road (indicated here by B), draw the third vertical line. You now have two equal parts.
Step 6: Repeat from A1 to B1, etc.
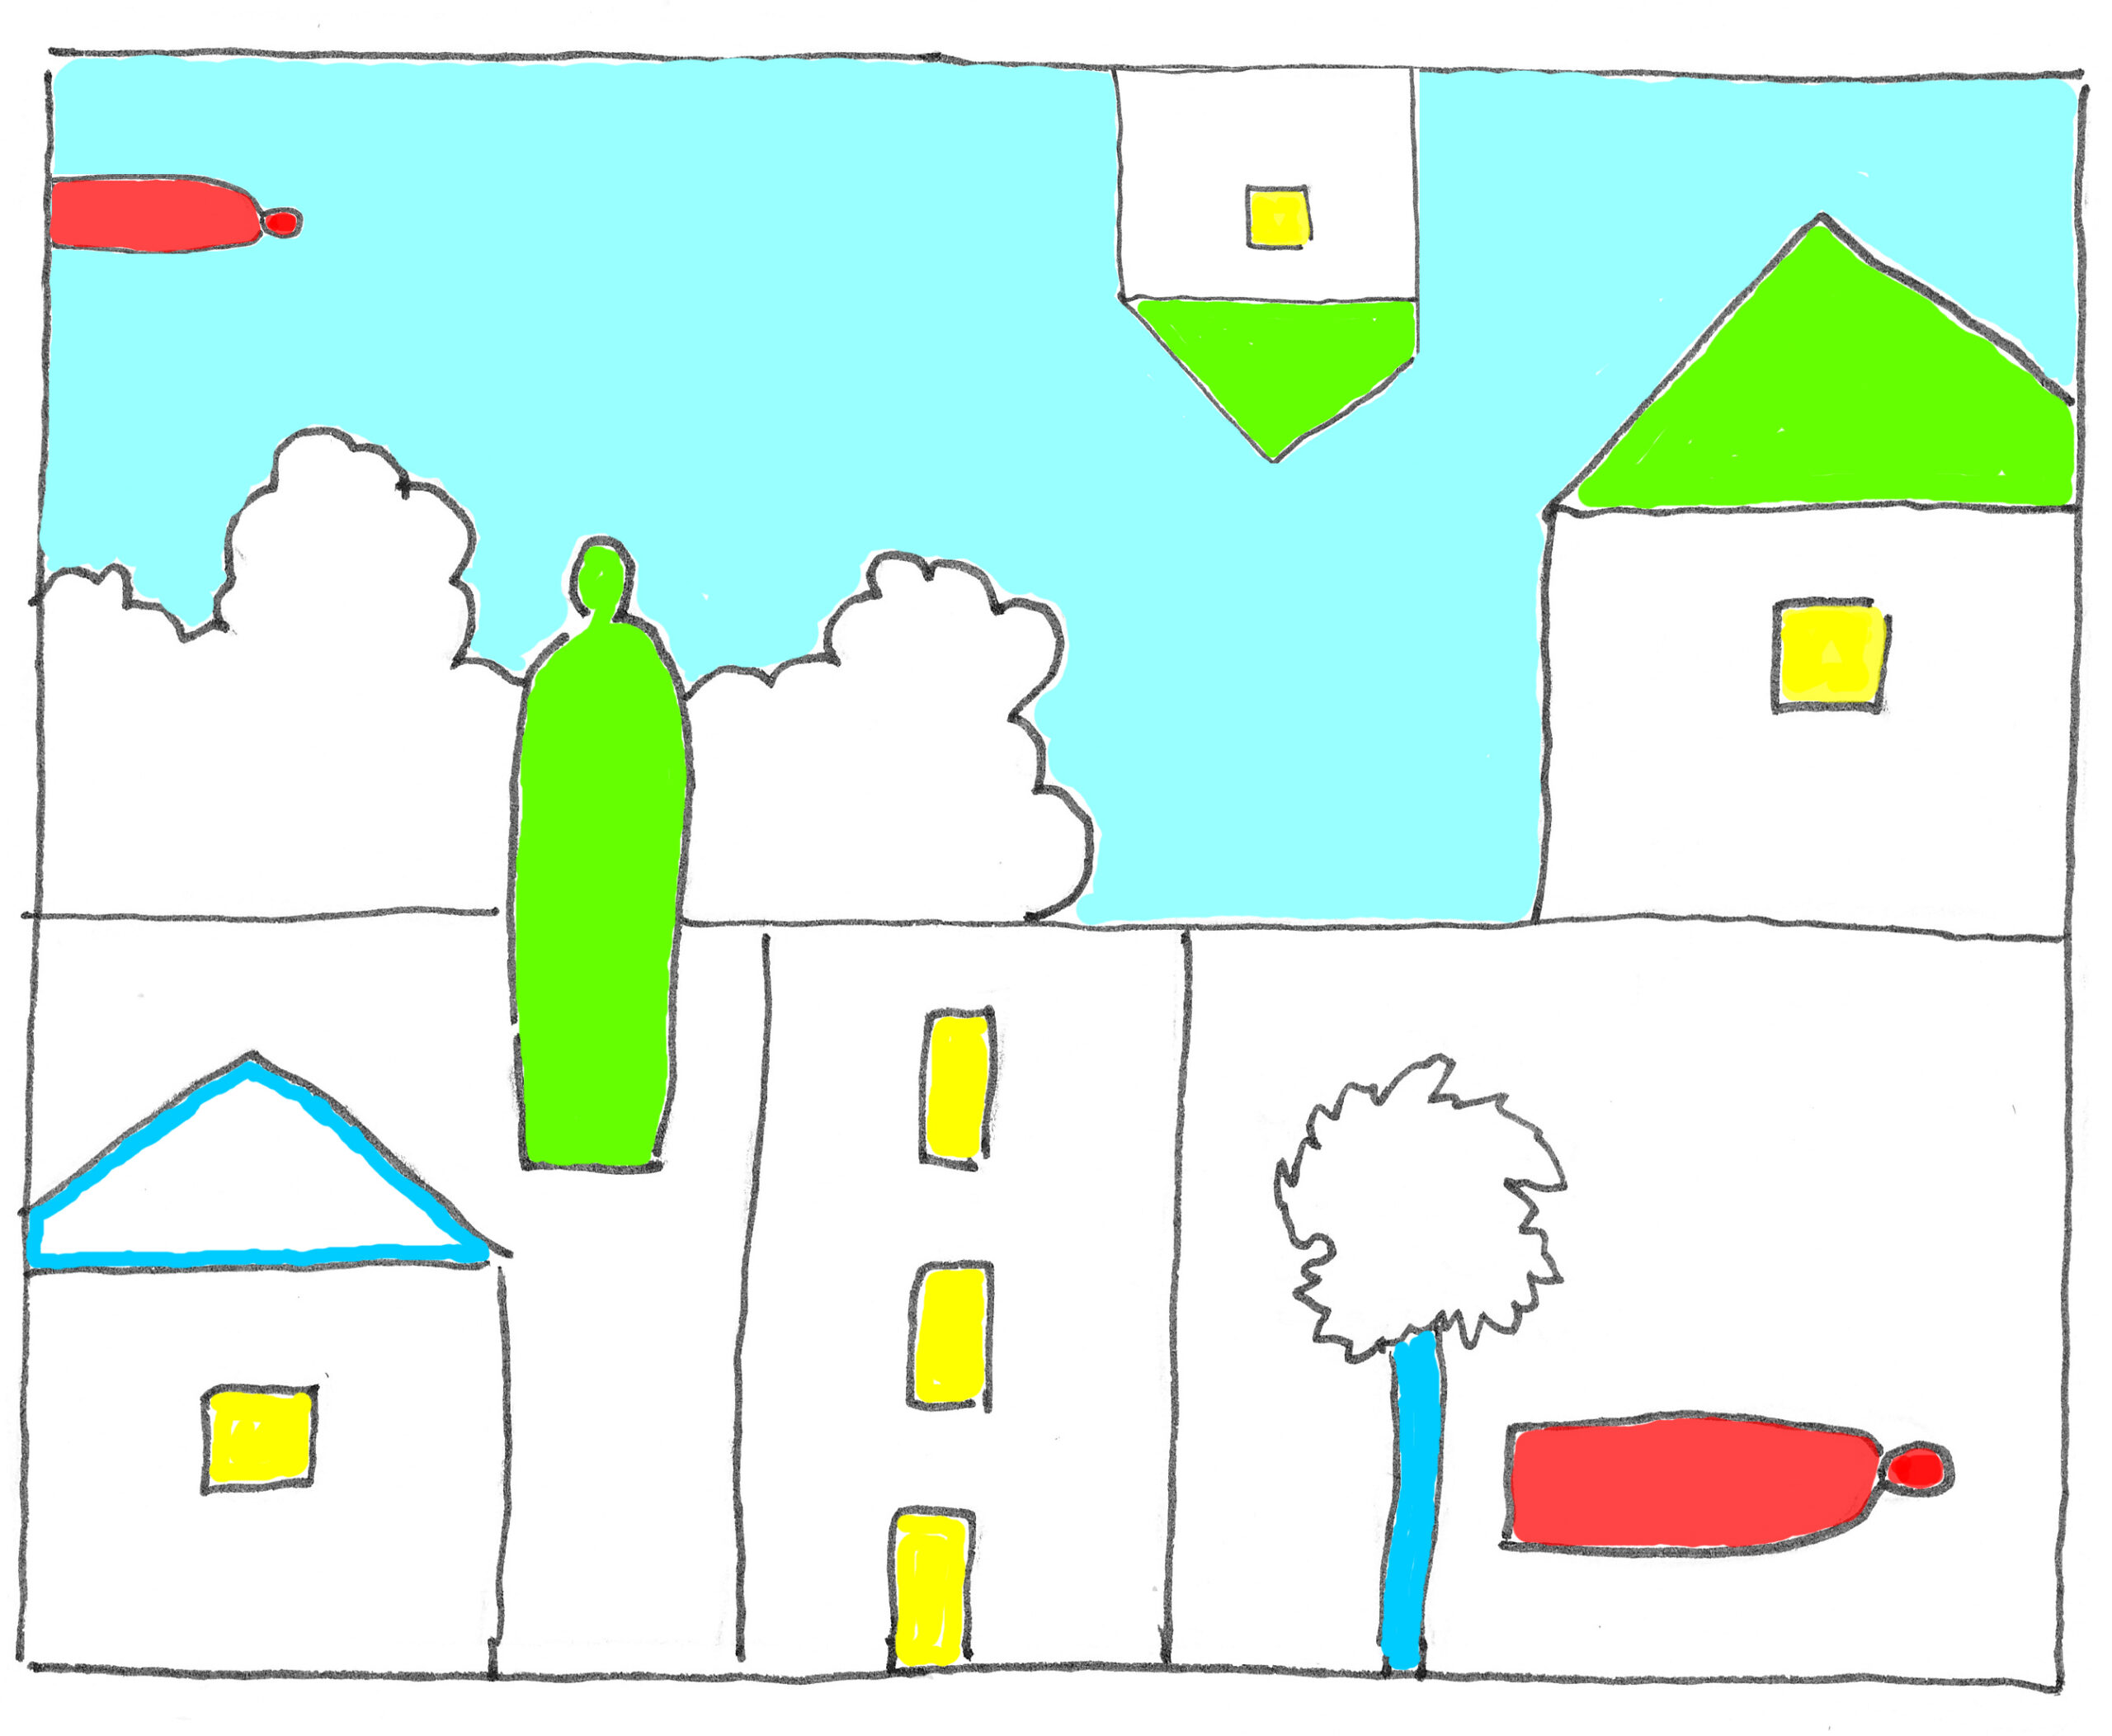
EXTRA: Of course you can pause or abandon perspective drawing anytime you like. Try drawing all kinds of objects at random above, next to, below each other or even upside down. Use the whole paper. Apply color where you want.