Chapter 1 | THE TILED FLOOR
More than 500 years ago, architects and artists invented a geometric way to draw realistic spaces using perespective lines. This method is called line perspective. They often started with a the construction of a tile floor, as it were the base of the pizza..
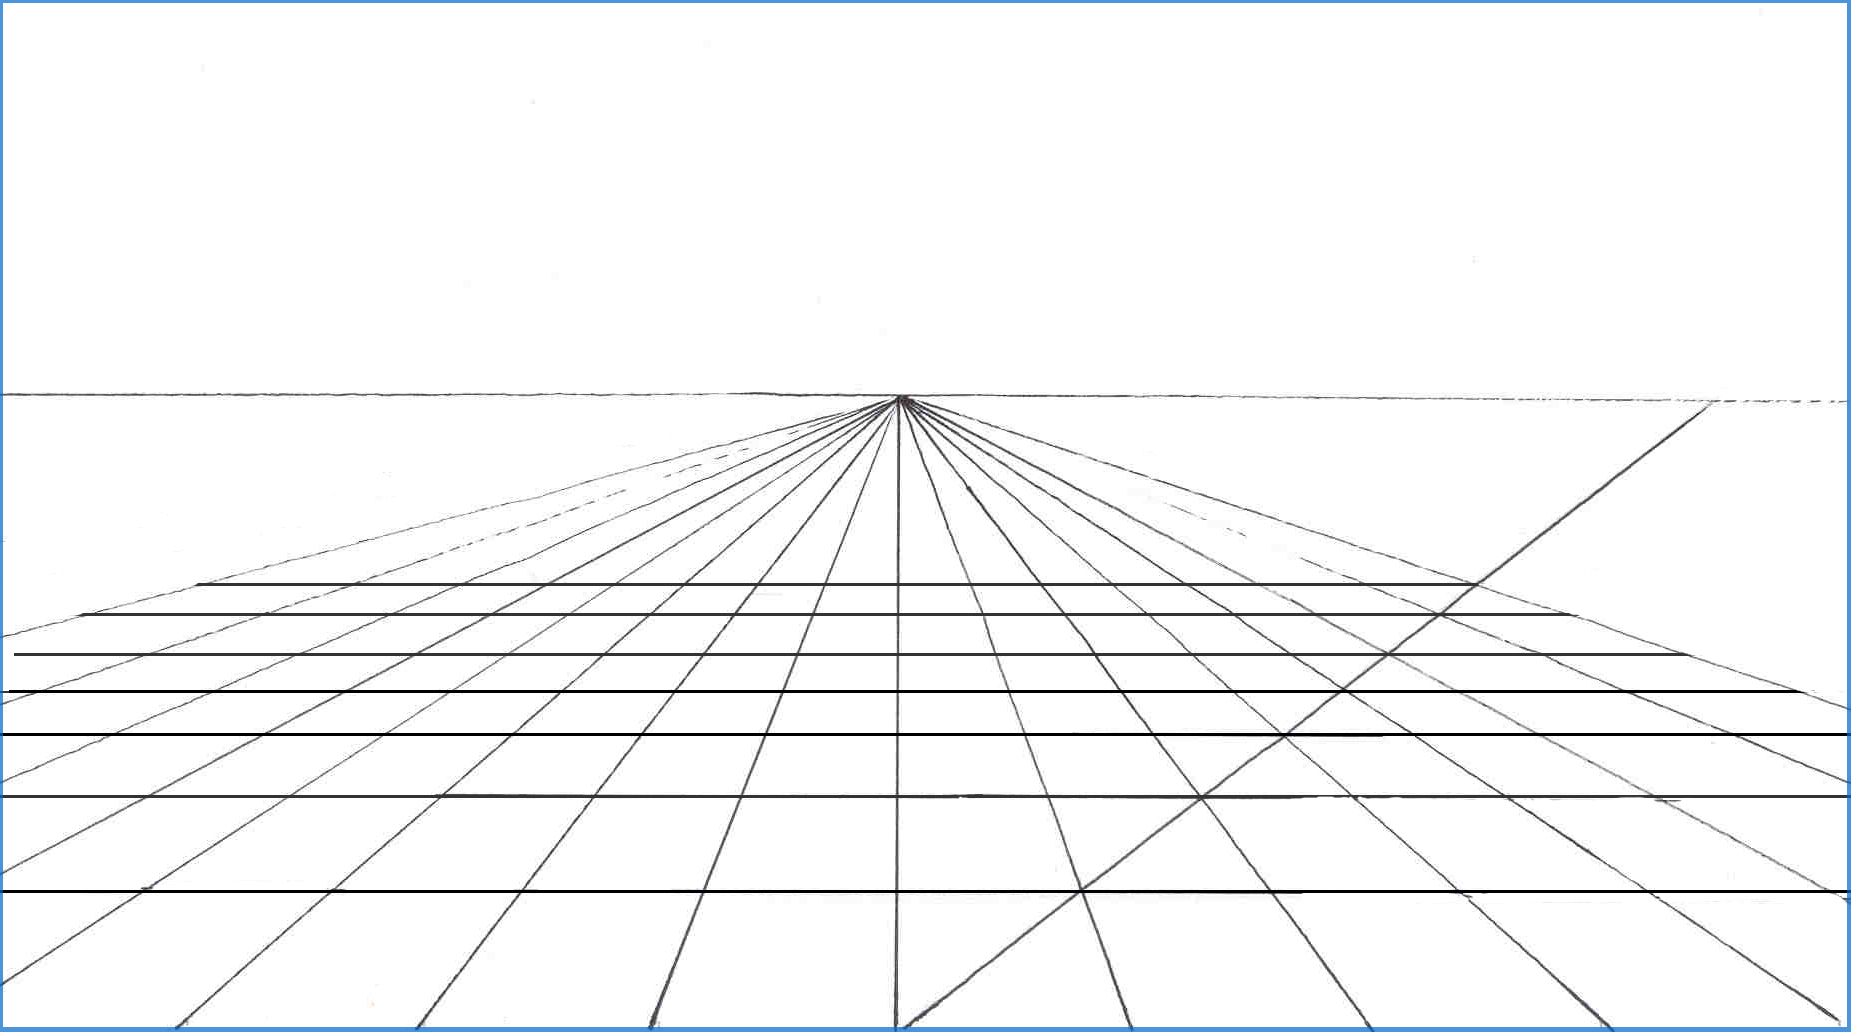
Here’s one way to construct a perspective tile floor. Draw as lightly as possible with a well-sharpened pencil (preferably HB) and use a ruler with centimeter markings.
Exercise 1:
Step 1: draw a frame and divide the bottom edge from the center into equal pieces of, for example, 2 cm. To the left and right of your frame you can measure more equal pieces, not visible here.
Step 2: just above half of the frame, draw a horizon line with a vanishing point in the middle. In later drawings you can choose other horizon heights.
Step 3: very lightly draw the construction lines from the measured points at the bottom to the vanishing point.
Step 4: from the middle point at the bottom, draw a diagonal (45º) to the right or left. Wherever that diagonal intersects the perspective lines, you automatically get the rows of tiles, further away, smaller and smaller. You only have to draw the horizontal lines of a number of tile rows.
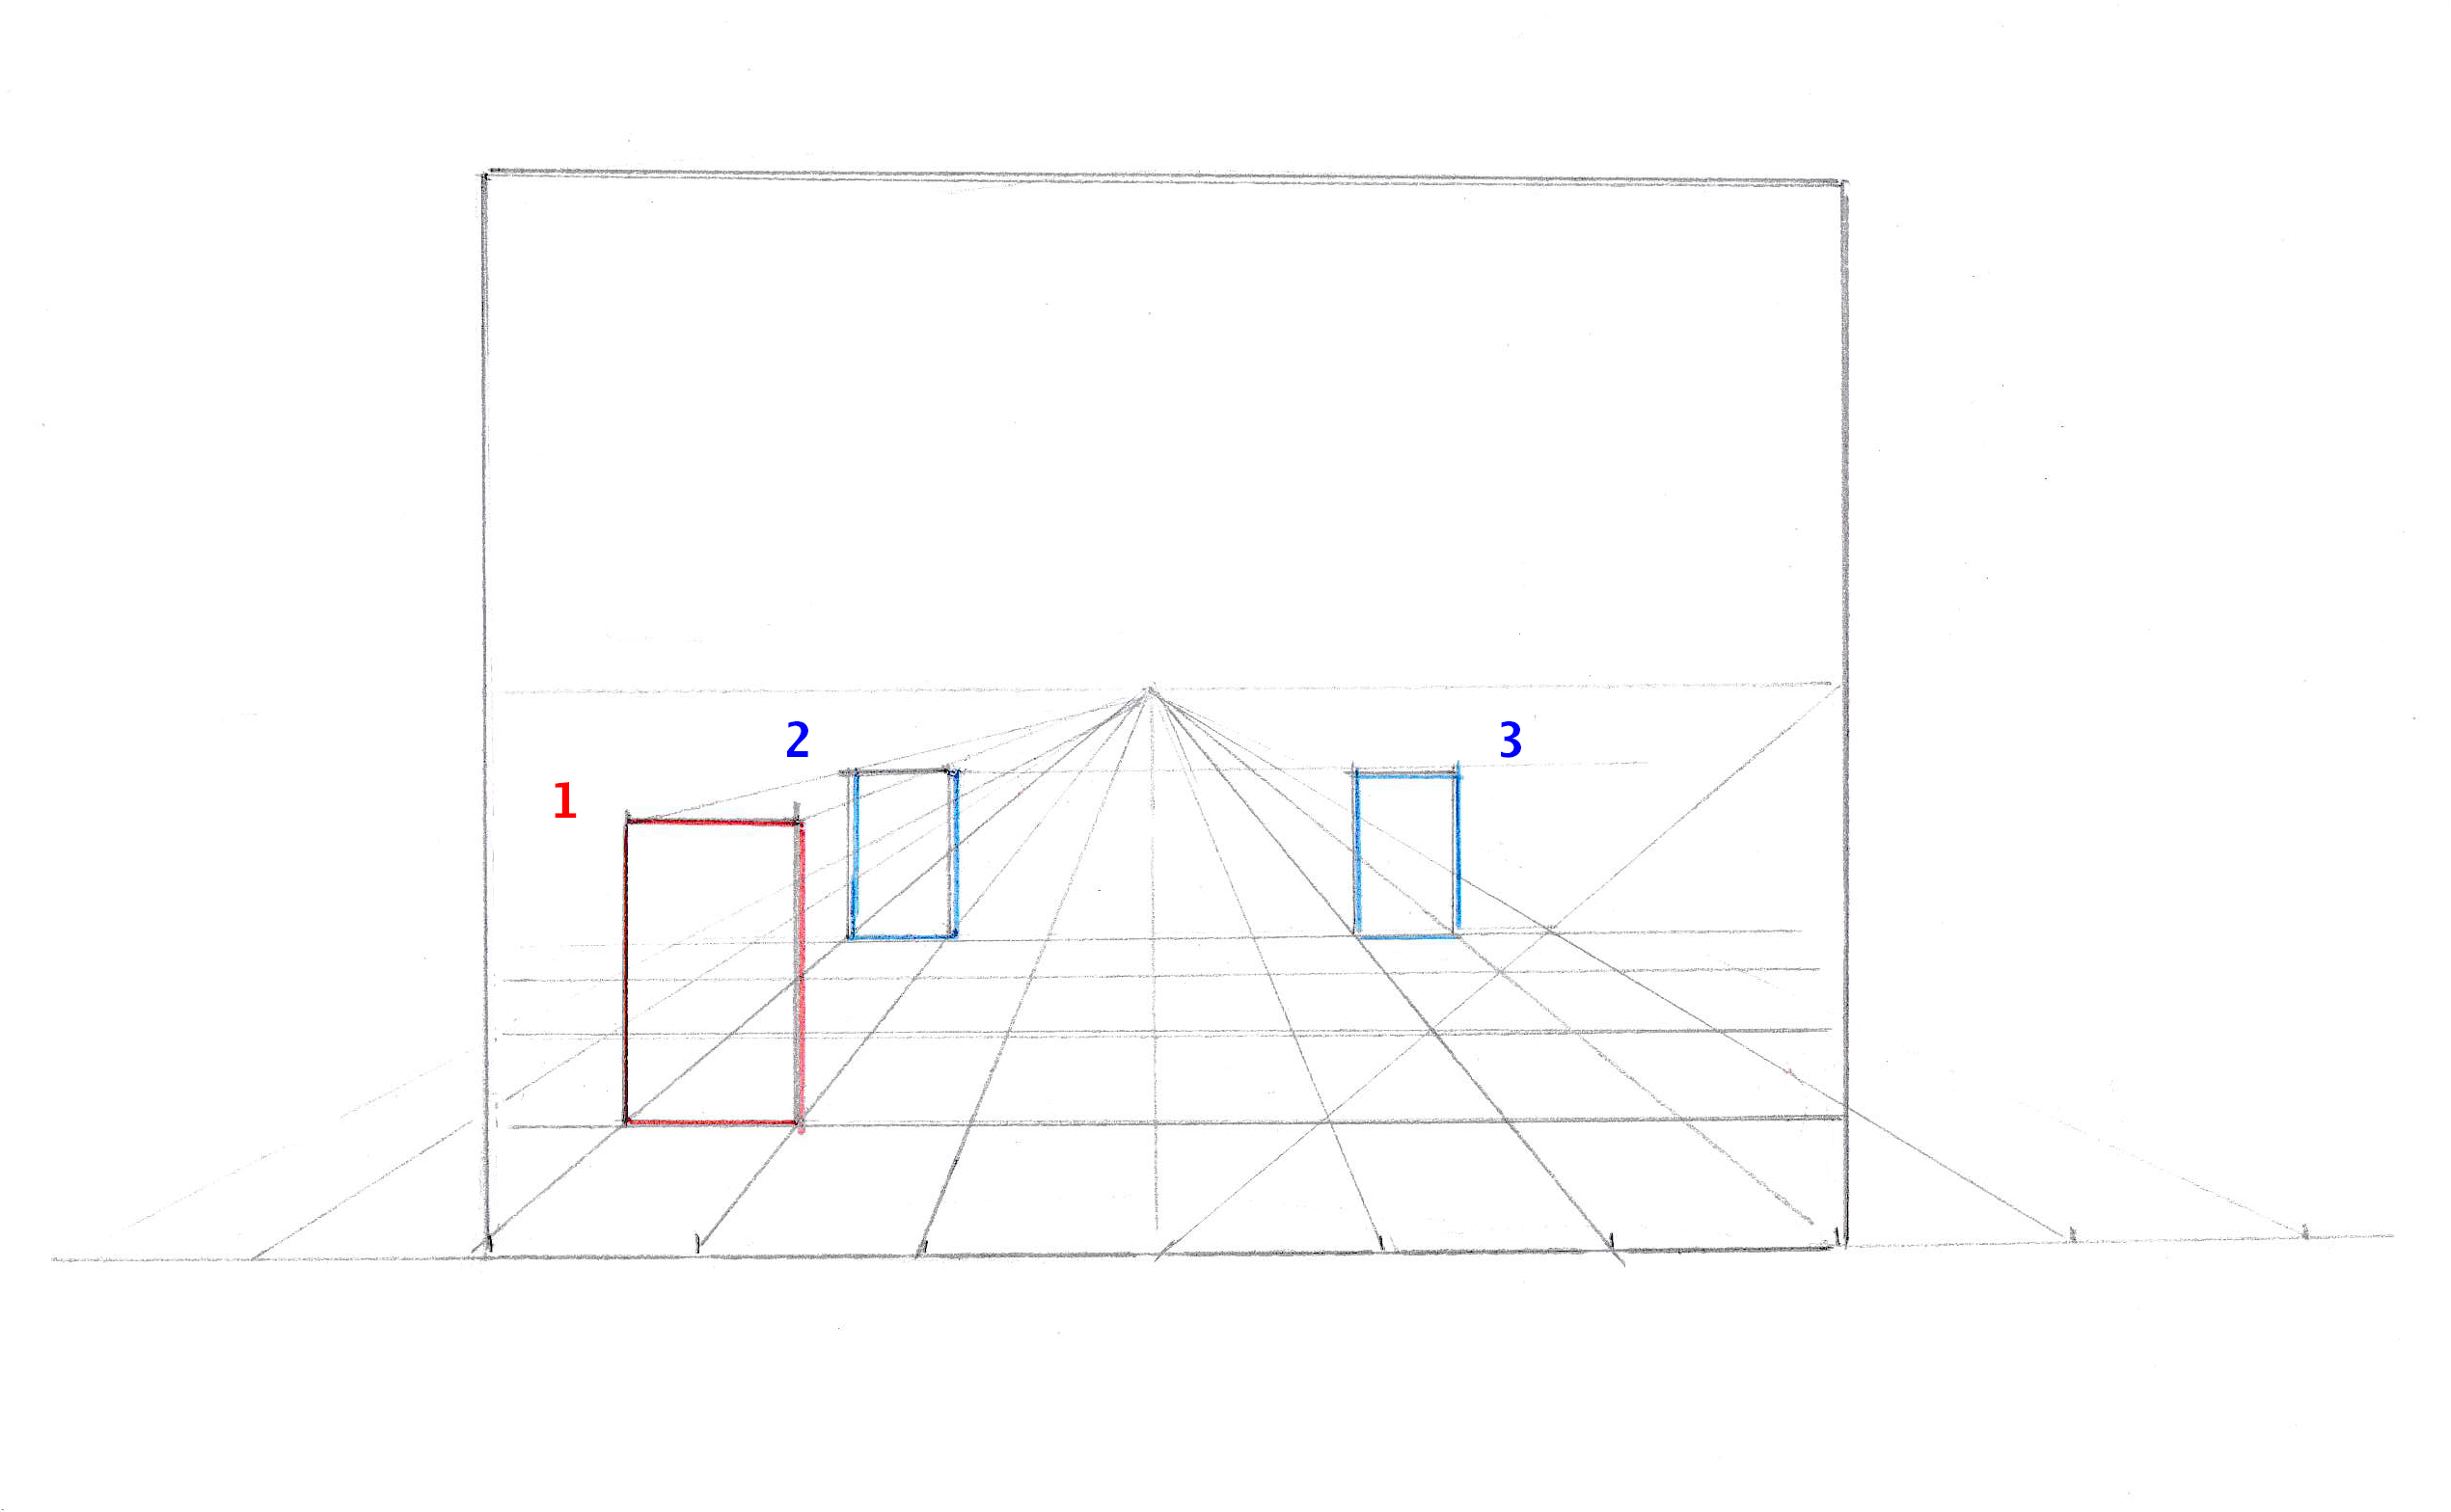
On such a perspective tile floor, you can slide figures like chess pieces on a chessboard. In the following drawing, notice how the position of figure 3 on the right is determined. First, figure 1 is moved three tiles further away along flight lines (figure 2). Since figure 3 is at the same distance/tile row, it becomes the same size as figure 2.
Exercise 2: try to draw about the same arrangement in mirror image, so with the front figure on the right.
On such a perspective tile floor you may place figures like chess pieces on a chessboard. The further away the smaller the figures. To determine your point of view see the lesson Perspective drawing part 1 chapter 4.
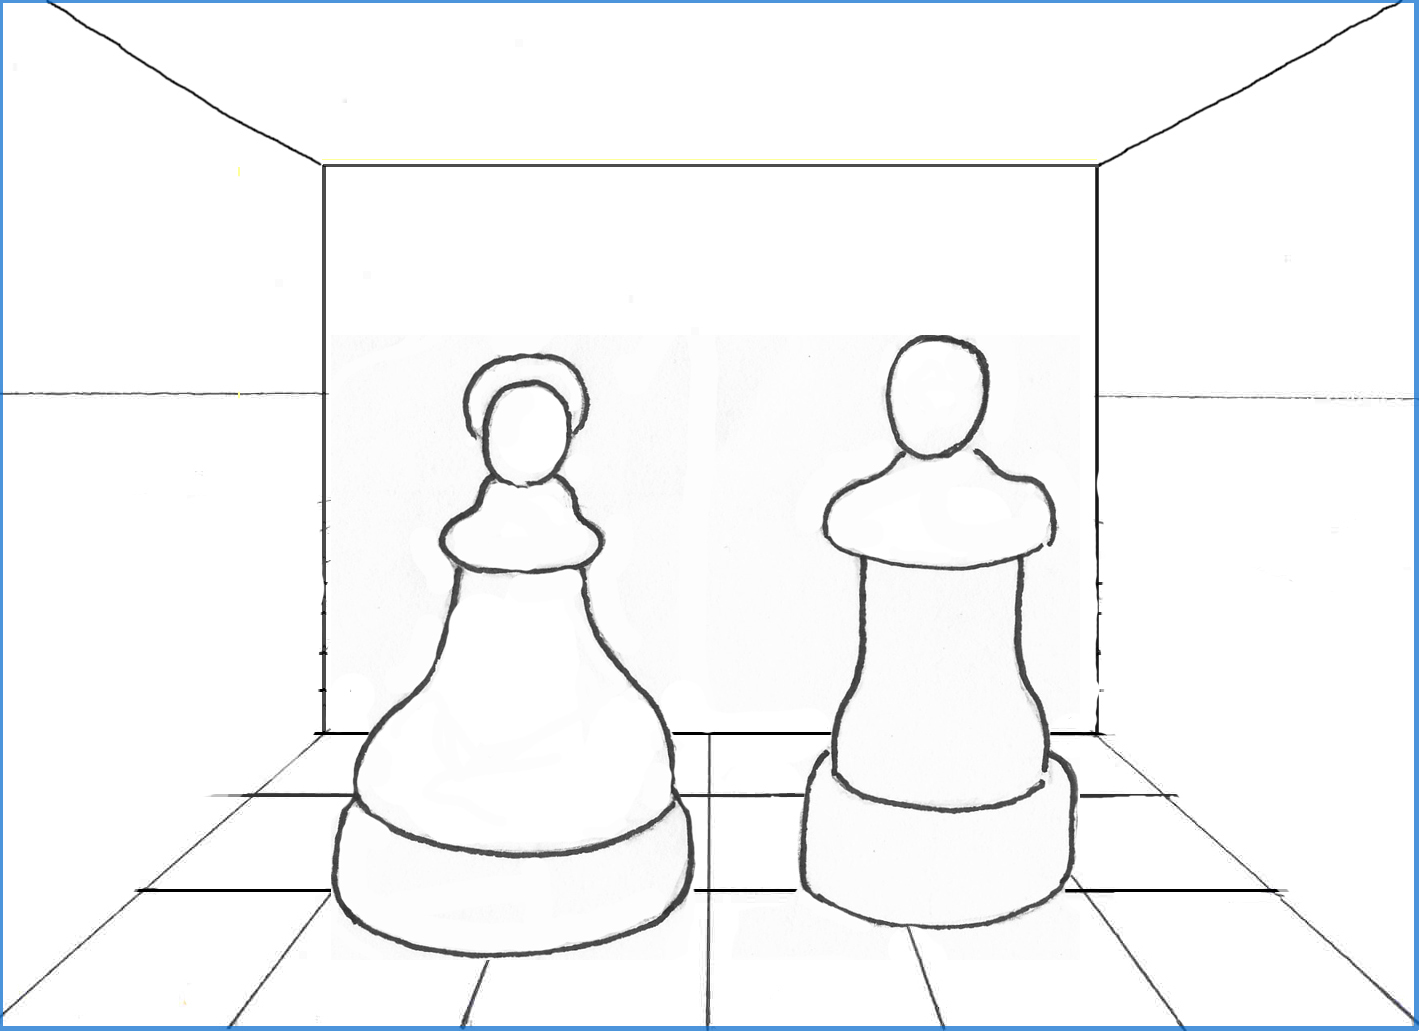
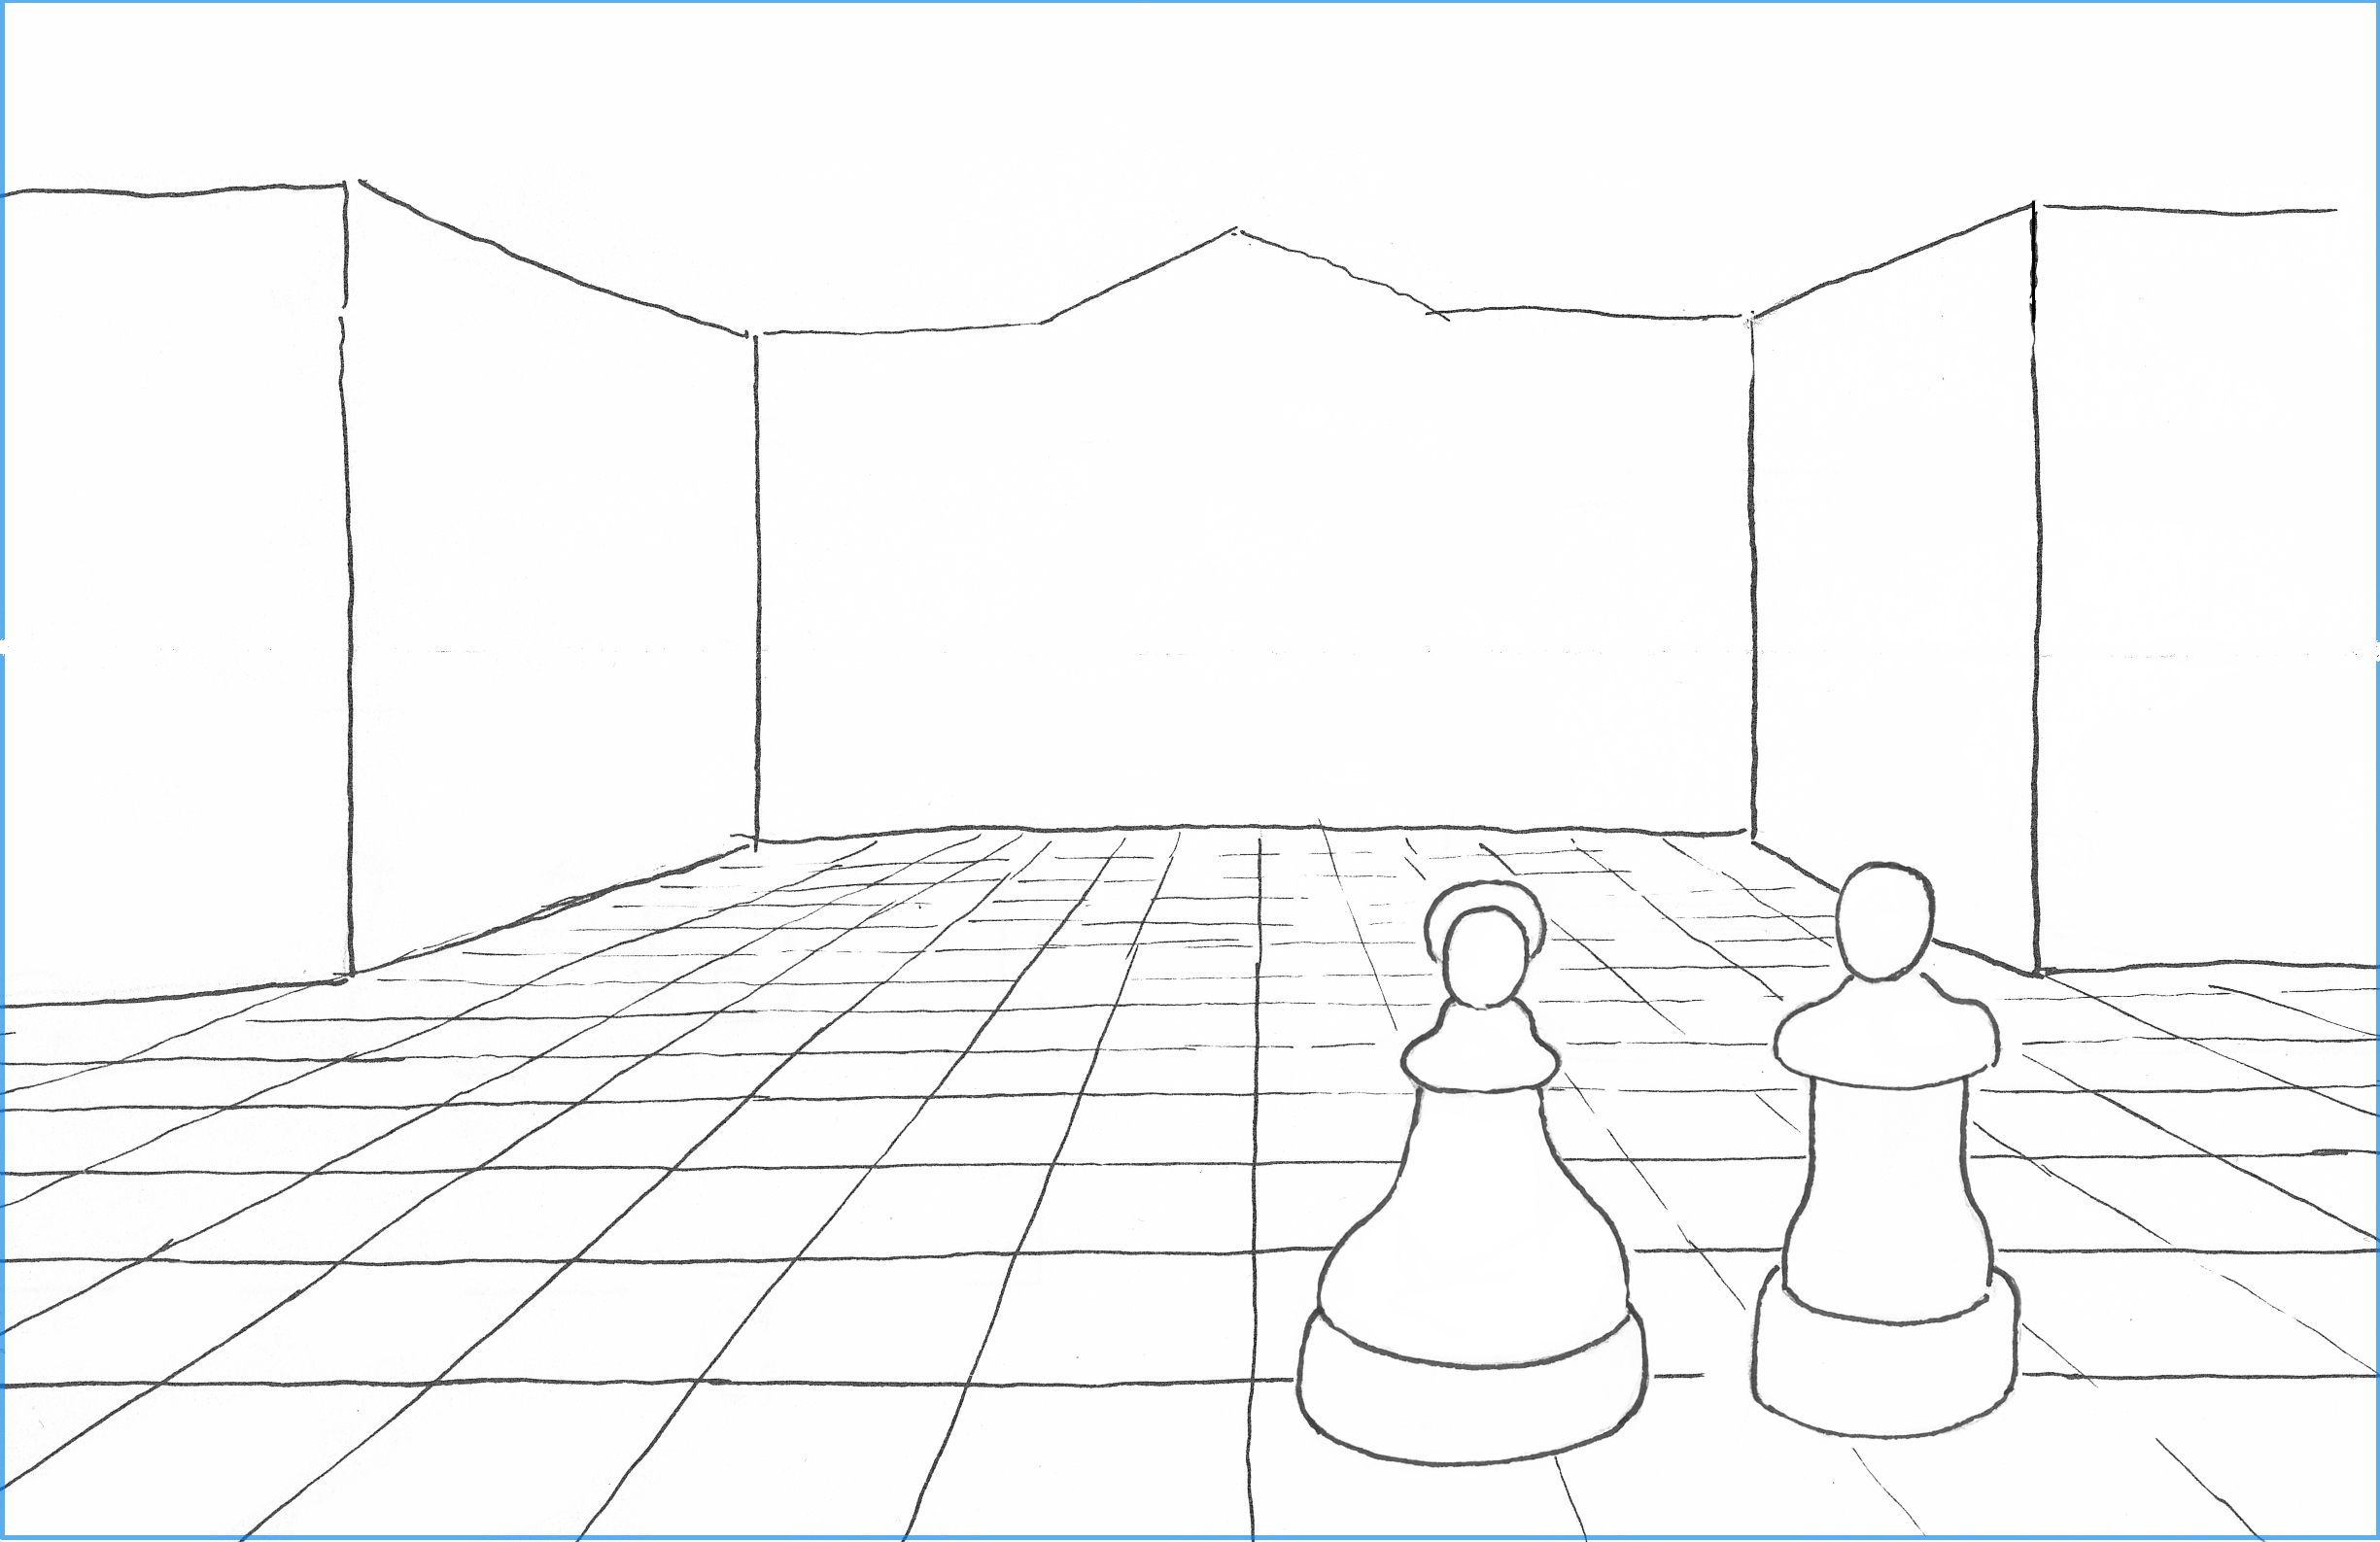
Exercise 2: You can use the tiled floor for example for a room. Draw a back wall on one of the tile rows (in the example below the third row). For the side walls, draw perspective lines in the direction of the vanishing point. Then erase all construction/assisting lines except the tile floor in the room itself. You can put figures in the room, in my example a kind of pawns. The larger the figures, the smaller the room appears and vice versa. So here it looks like a small room.
Exercise 3: use the tiled floor as a square with a view of a building. In my example the horizon and the vanishing point are hidden behind the building. Our eye level/horizon is higher than the two pawns so we see them a little bit from above.
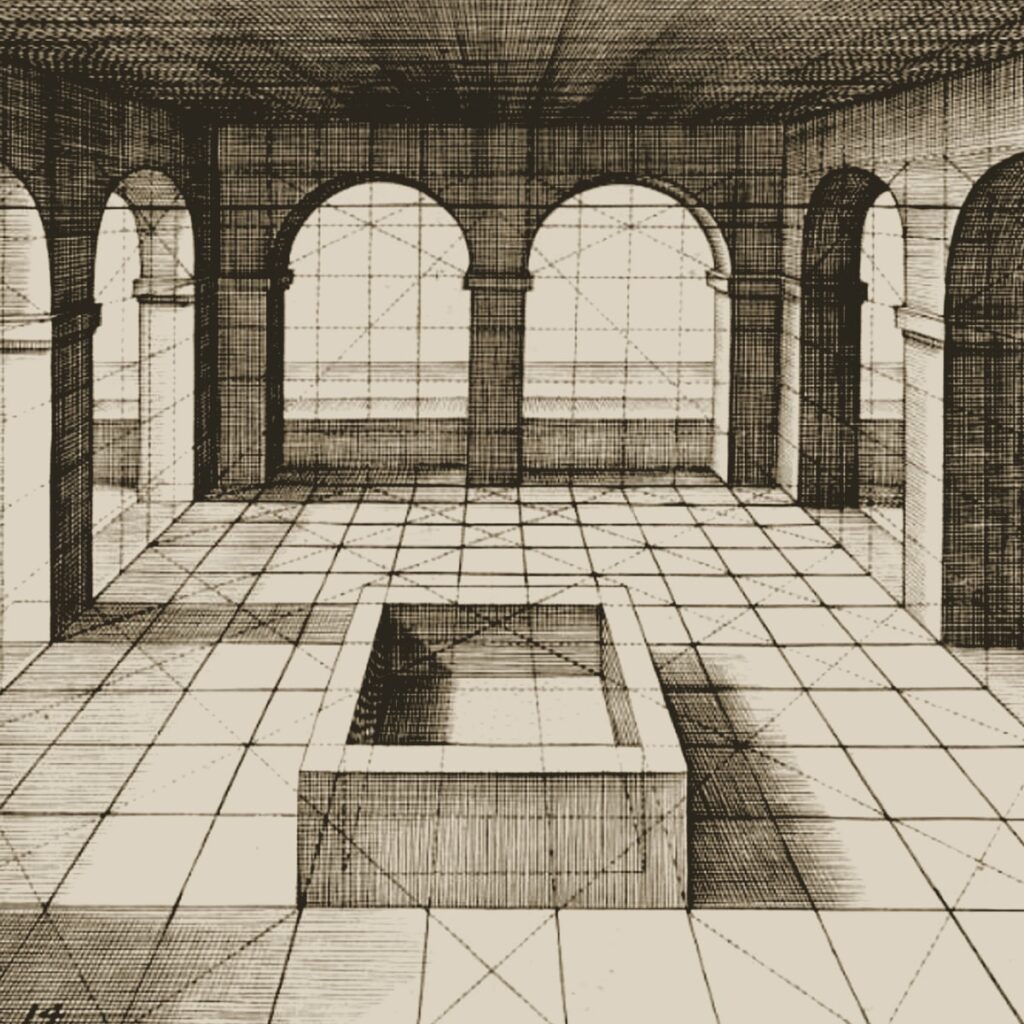
Try to find the horizon in the drawing by the Dutch architect/artist Hans Vredeman de Vries (1527-1609) and check whether the vanishing lines really go to a central vanishing point. The object in the center could also have been a table or a bed. Important: vertical remains vertical, and horizontal remains horizontal. Only the lines extending away from us go to the vanishing point.
