Chapter 5 | REAL FACES
There are many ways to draw portraits. One artist begins with a schematic layout, another with the eyes, or even with the residual shape around the head. One draws slowly and subtly, another quickly and energetic. One wants it to look exactly like a photograph, another primarily aims to capture the character of a person, realistic or not. A personal style is often developed only after years of study. Marvel at the diversity of both old and contemporary drawings and paintings in museums.
I want to give you some basic exercises that could be very useful once you start drawing real faces. Get yourself a mirror of at least A3 size that you can easily place in front of you.
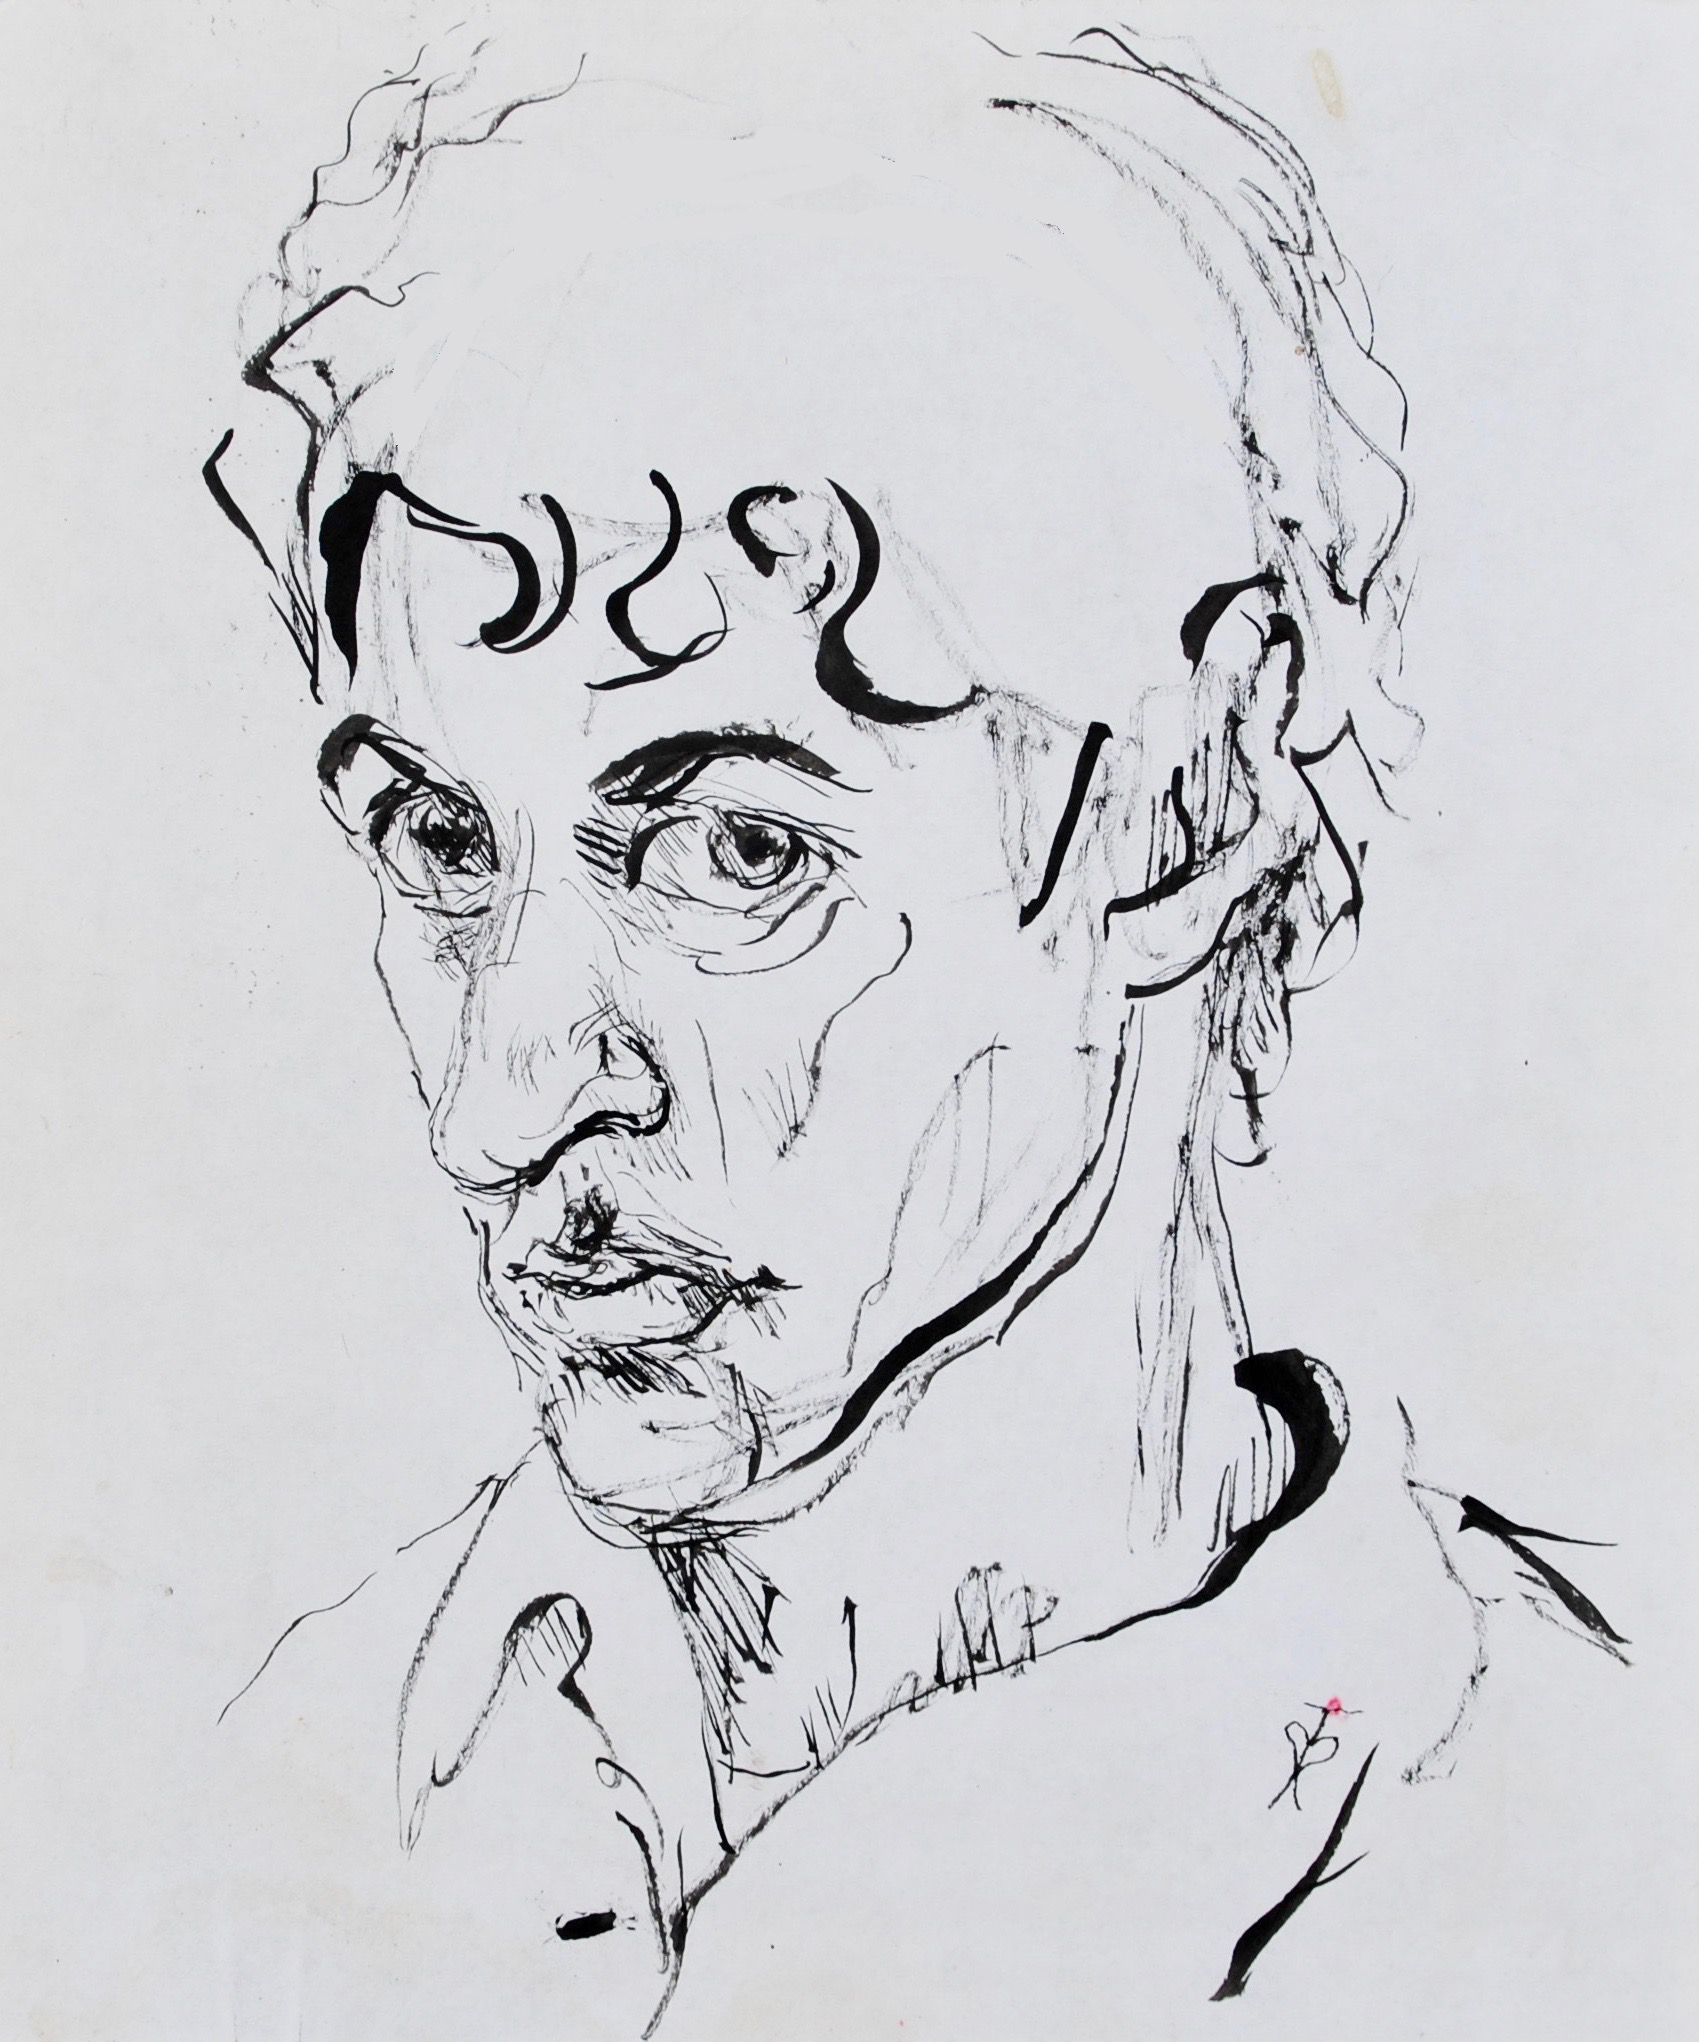
Exercise 1: Draw your mirror image WITHOUT LOOKING AT YOUR PAPER IN BETWEEN. Hold your pencil further away from the tip. Keep your pencil in contact with the paper while drawing. Quietly explore your mirror image as if you were gently touching every detail in your face. Wander from one place to another. The result is always a surprise and certainly not a glamour portrait. The funny thing is that you are really hidden in those drawings even though photographically they don’t look like you at all.
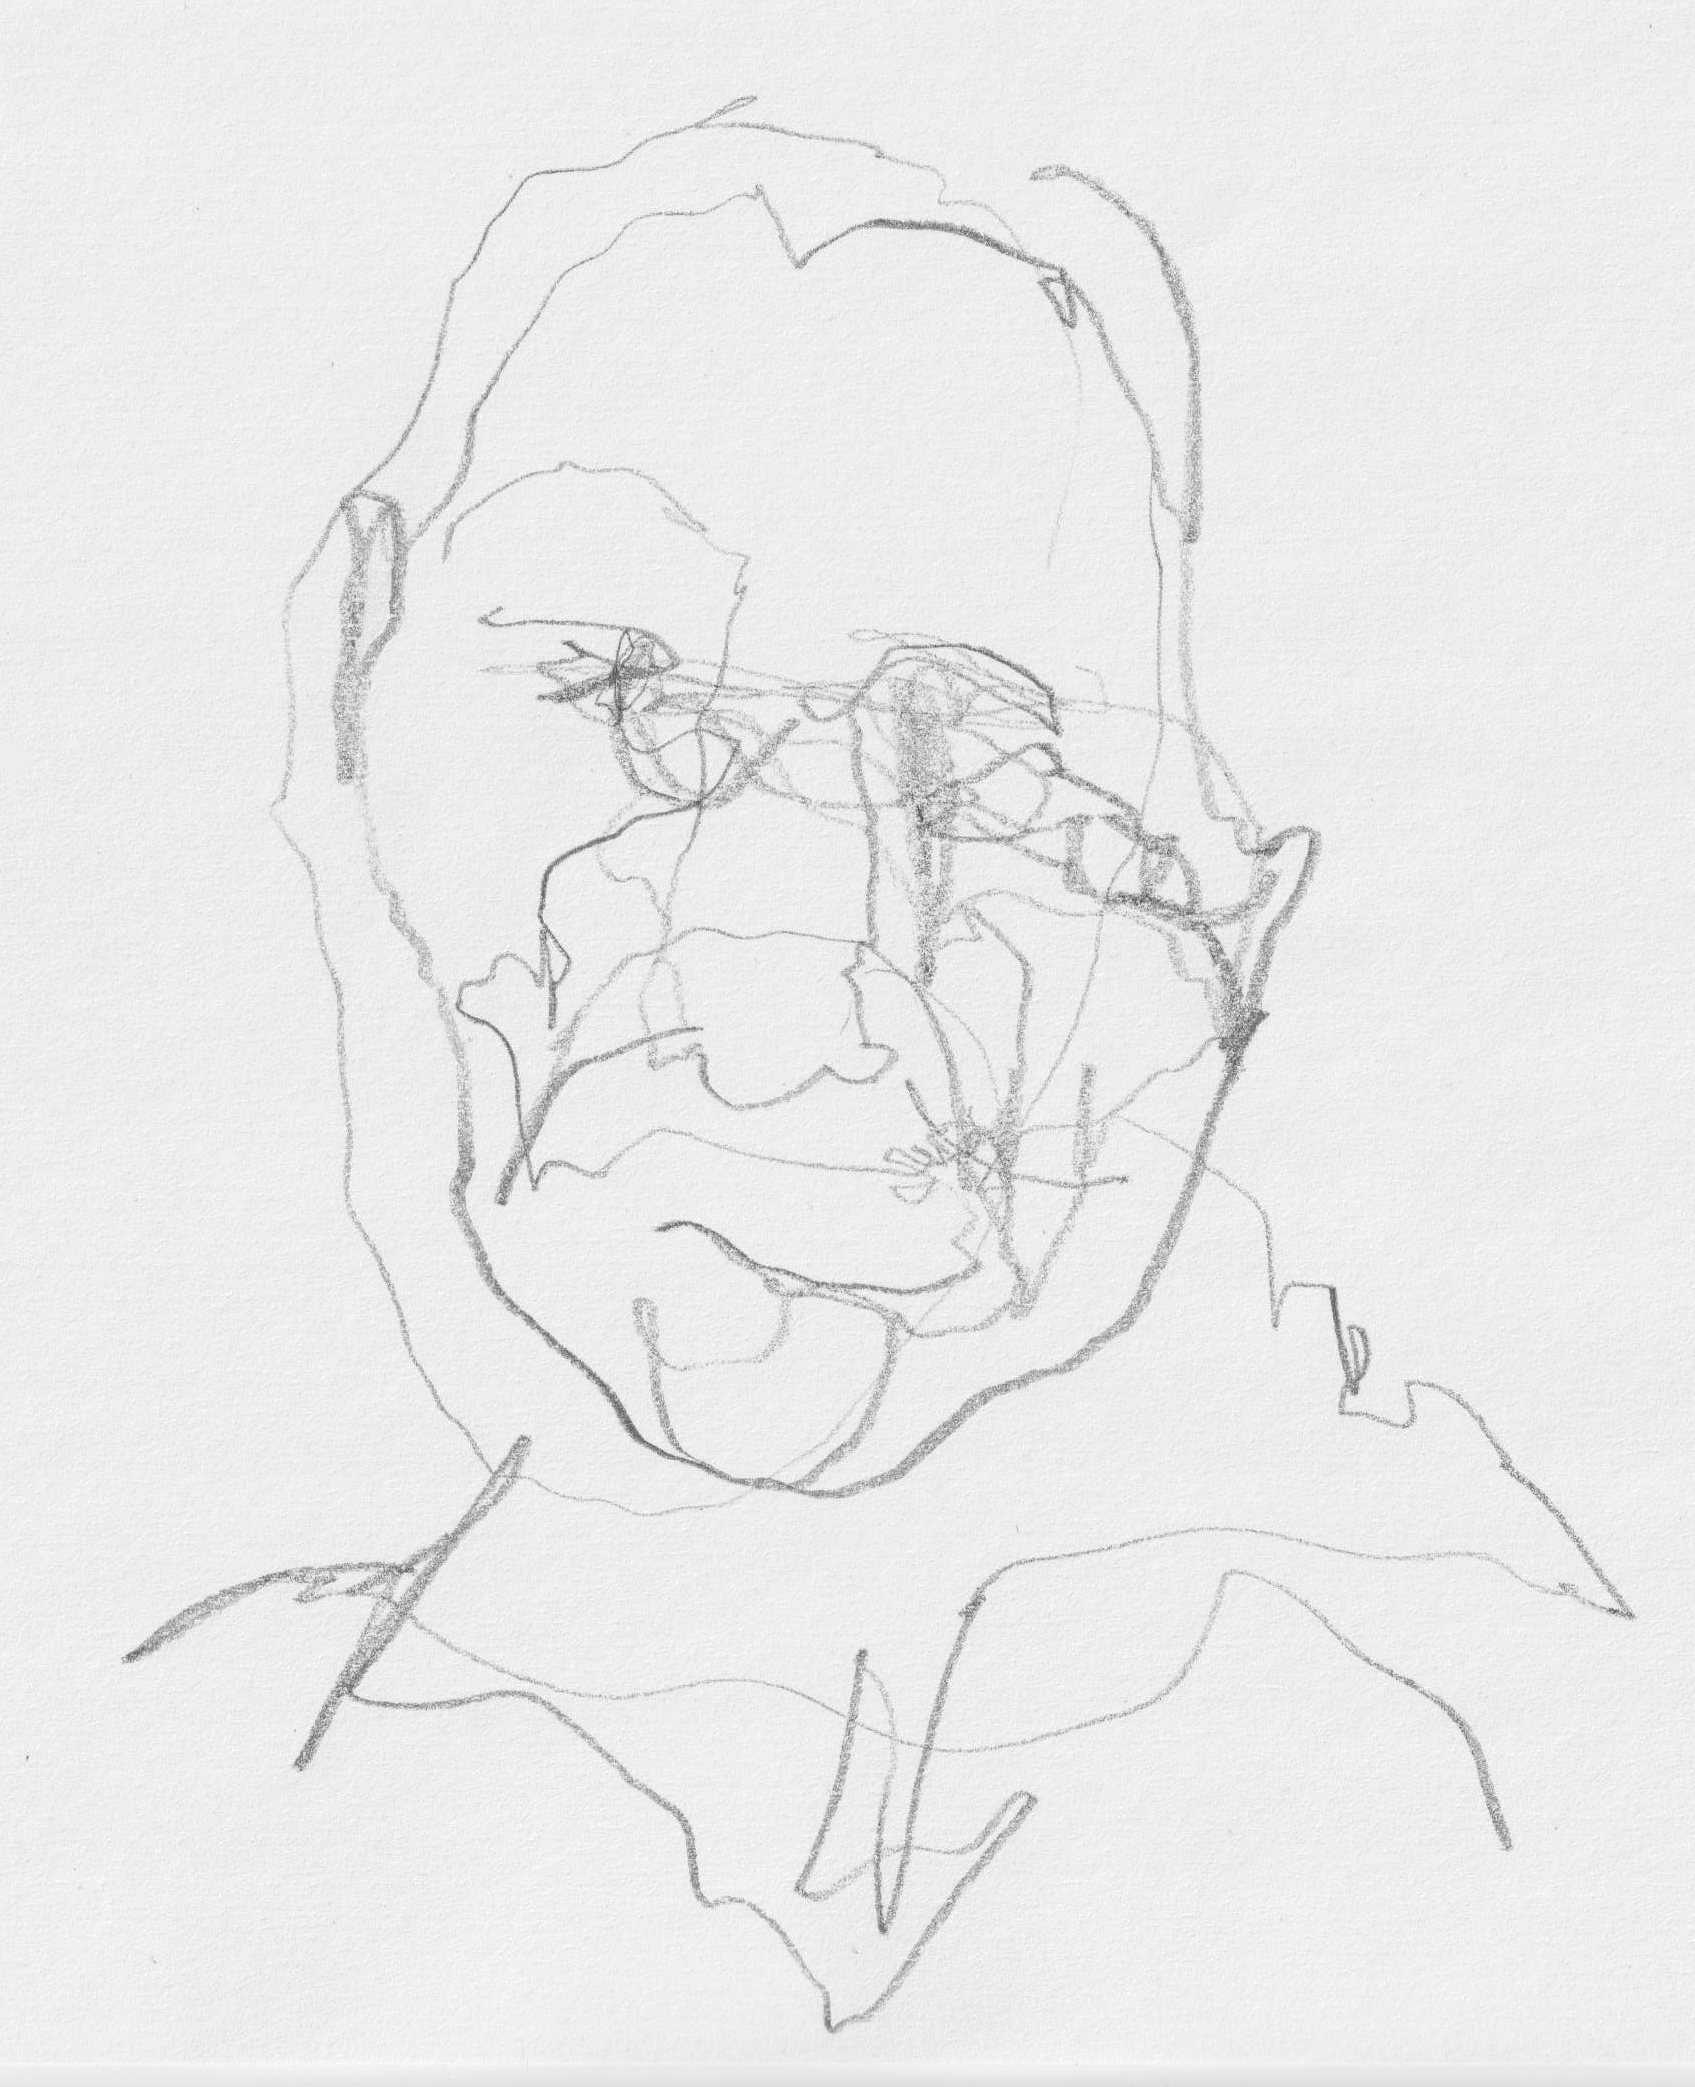
Two self-portraits without looking at the paper
Tip: It is fun to do exercise 1 with someone. Sit opposite each other, start drawing at the same time and after five or ten minutes, for example, show each other the surprising results.

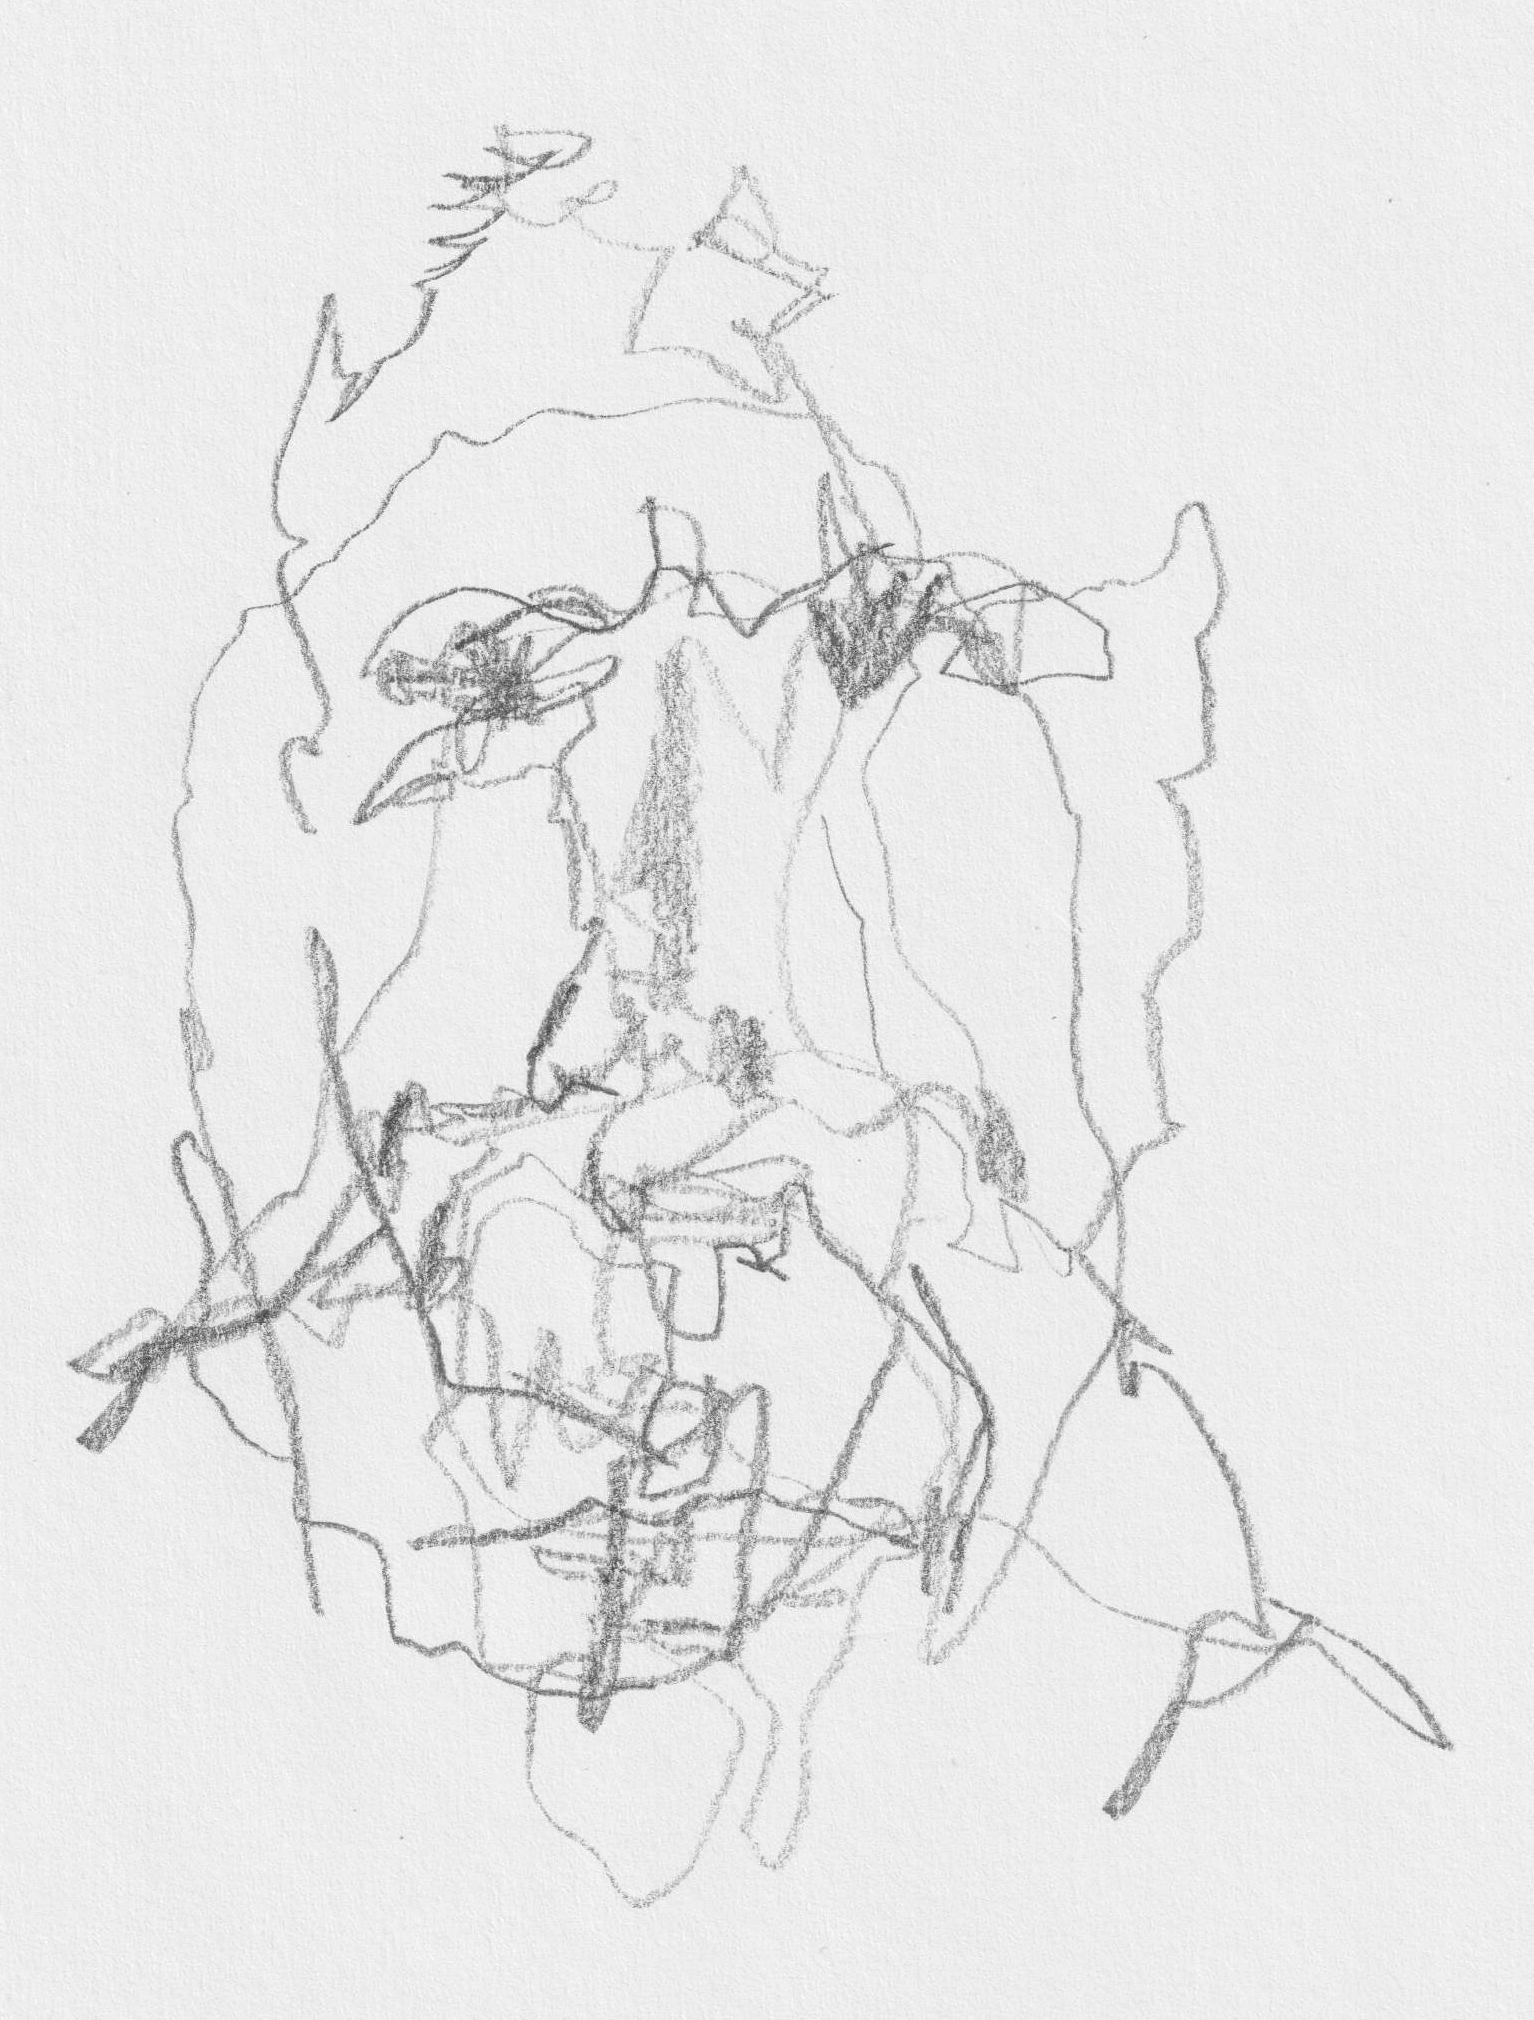
Exercise 2: DRAWING FROM MEMORY
Use a small mirror. Study your mirror image (head, neck and a bit of the shoulders) for at least 5 minutes WITHOUT DRAWING. Then, without looking in the mirror, draw in five minutes what you can remember. Repeat this sequence: first five minutes just looking, then another five minutes drawing from memory. I got this exercise from Anastasia K, a young artist who lives and works in Rotterdam. She gives painting courses and workshops in her studio: https://www.art-workshop.nl
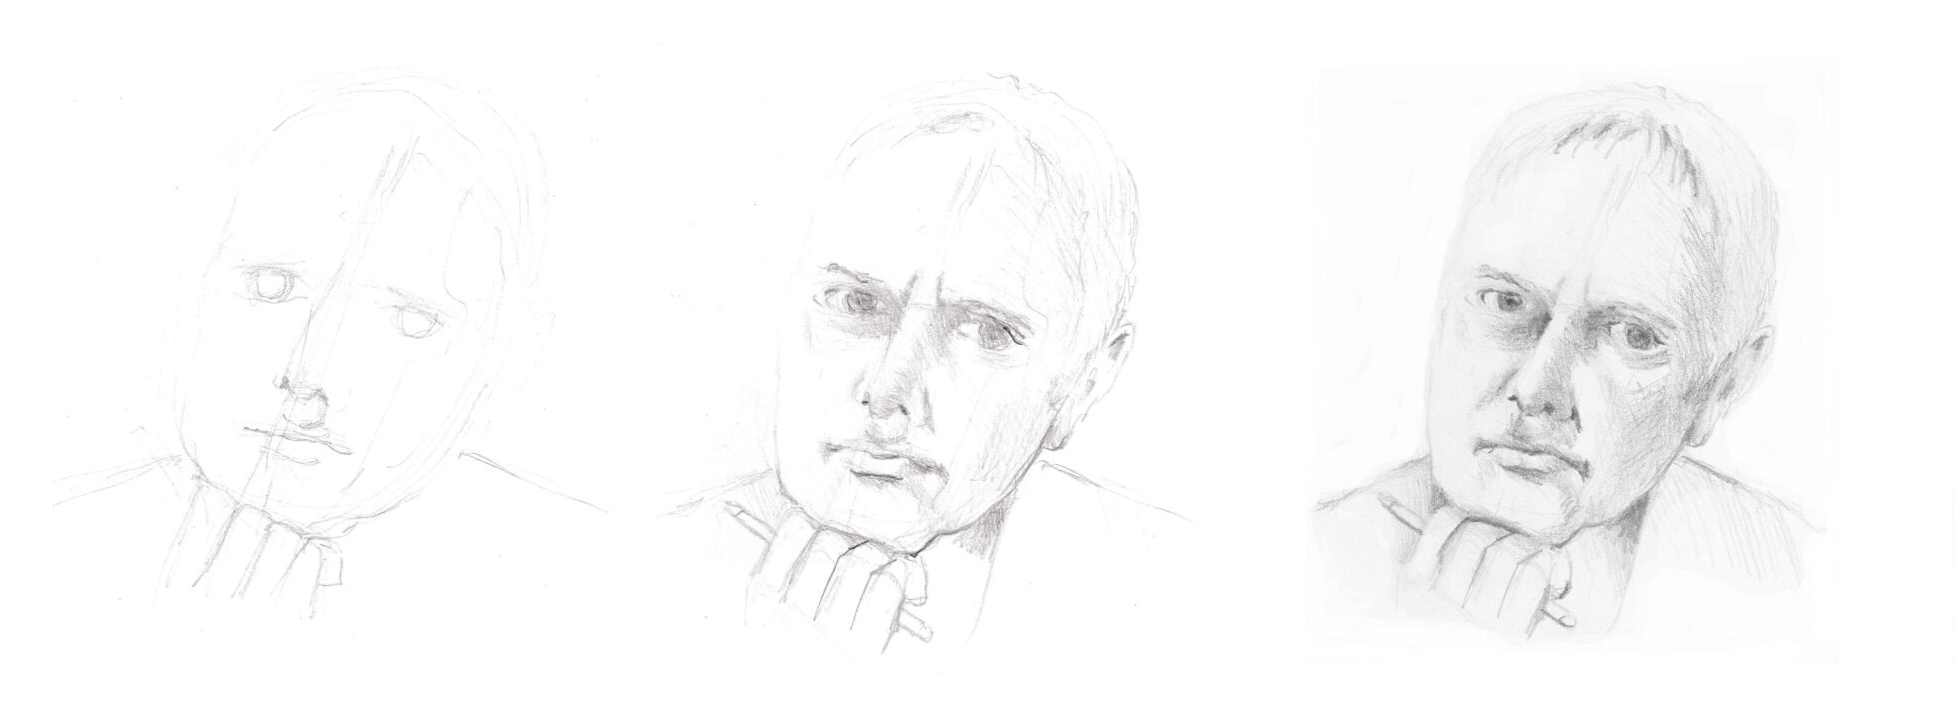
Exercise 3: FOCUS ON SHADOW
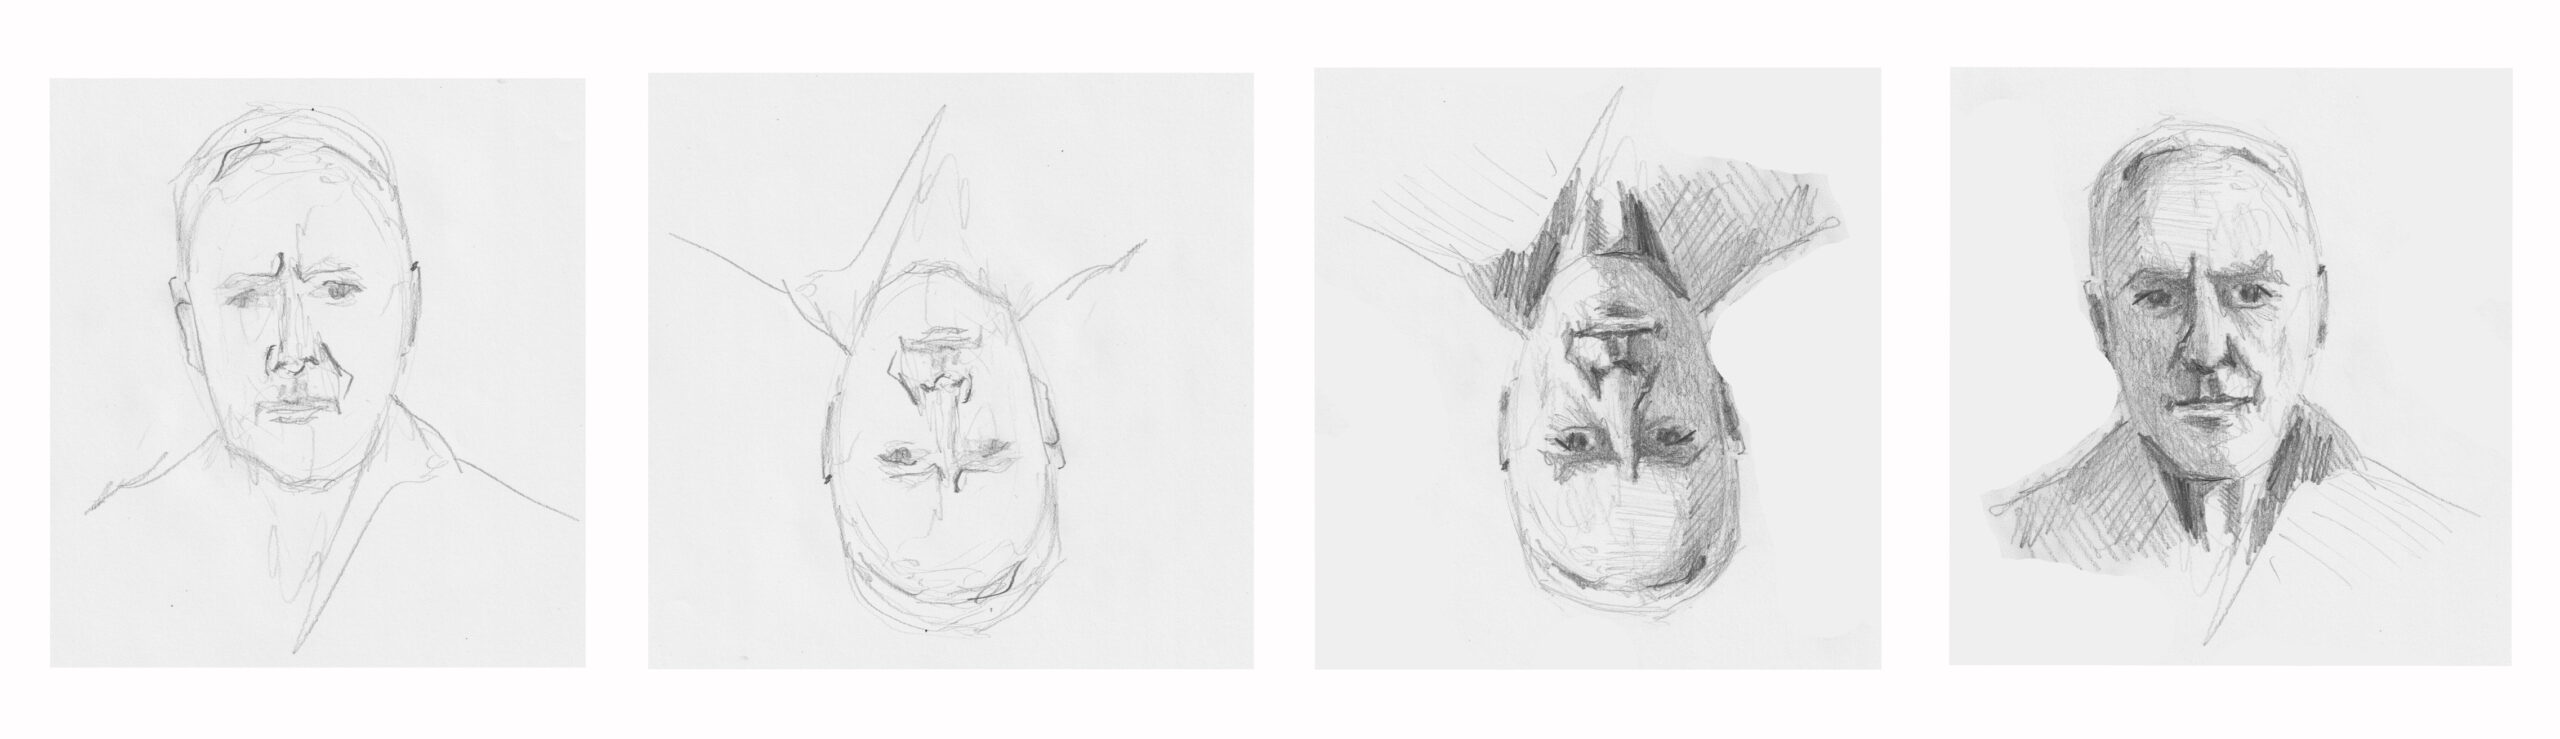
Take a selfie or a photo of someone else in close-up (head, face, neck and a bit of the shoulders). Make sure there is strong light from the side so that you get nice shadows. Change the photo on your camera or computer to black and white. First draw the face from the photo in line (far left). Then rotate the photo as well as your drawing 180 degrees* (second from the left). First draw the darkest shadow shapes and then the “midtones” (third from the left). Finally, flip your drawing and see if you missed anything. This exercise comes from the master illustrator/portraitist of the NRC, Siegfried Woldhek.
*Rotating the drawing and photo 180 degrees allows you to focus much better on light and dark instead of fixating on eyes-nose-mouth.
Working with gray tones is a good preparation for painting.

Ultimately, there are many ways to draw portraits. One artist begins with a schematic layout, another with the eyes, or even with the residual shape around the head. One draws subtly, another more roughly. A personal style is often only developed after years of study. Marvel at the diversity of both old and contemporary drawings and paintings in museums.