Trees
Wonders of nature
-
Rogier van der Erve
- 0 enrolled students

Course Overview
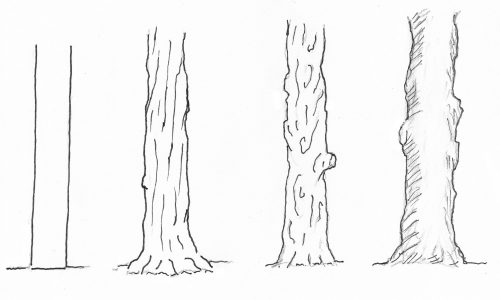
In this lesson you will learn to draw different types of trees, even an Ent from the Fangorn Forest in Lord of the Rings.
Start with chapter 1
- Course level Level 1
- Course Duration 2 hours
- Lessions 6
- Quizzes 0
- Pass Percentage 80
- Certificate Yes
- Language English
Secure Payment:

More courses for you
Free

Free