Chapter 2 | BUILDINGS IN 3D
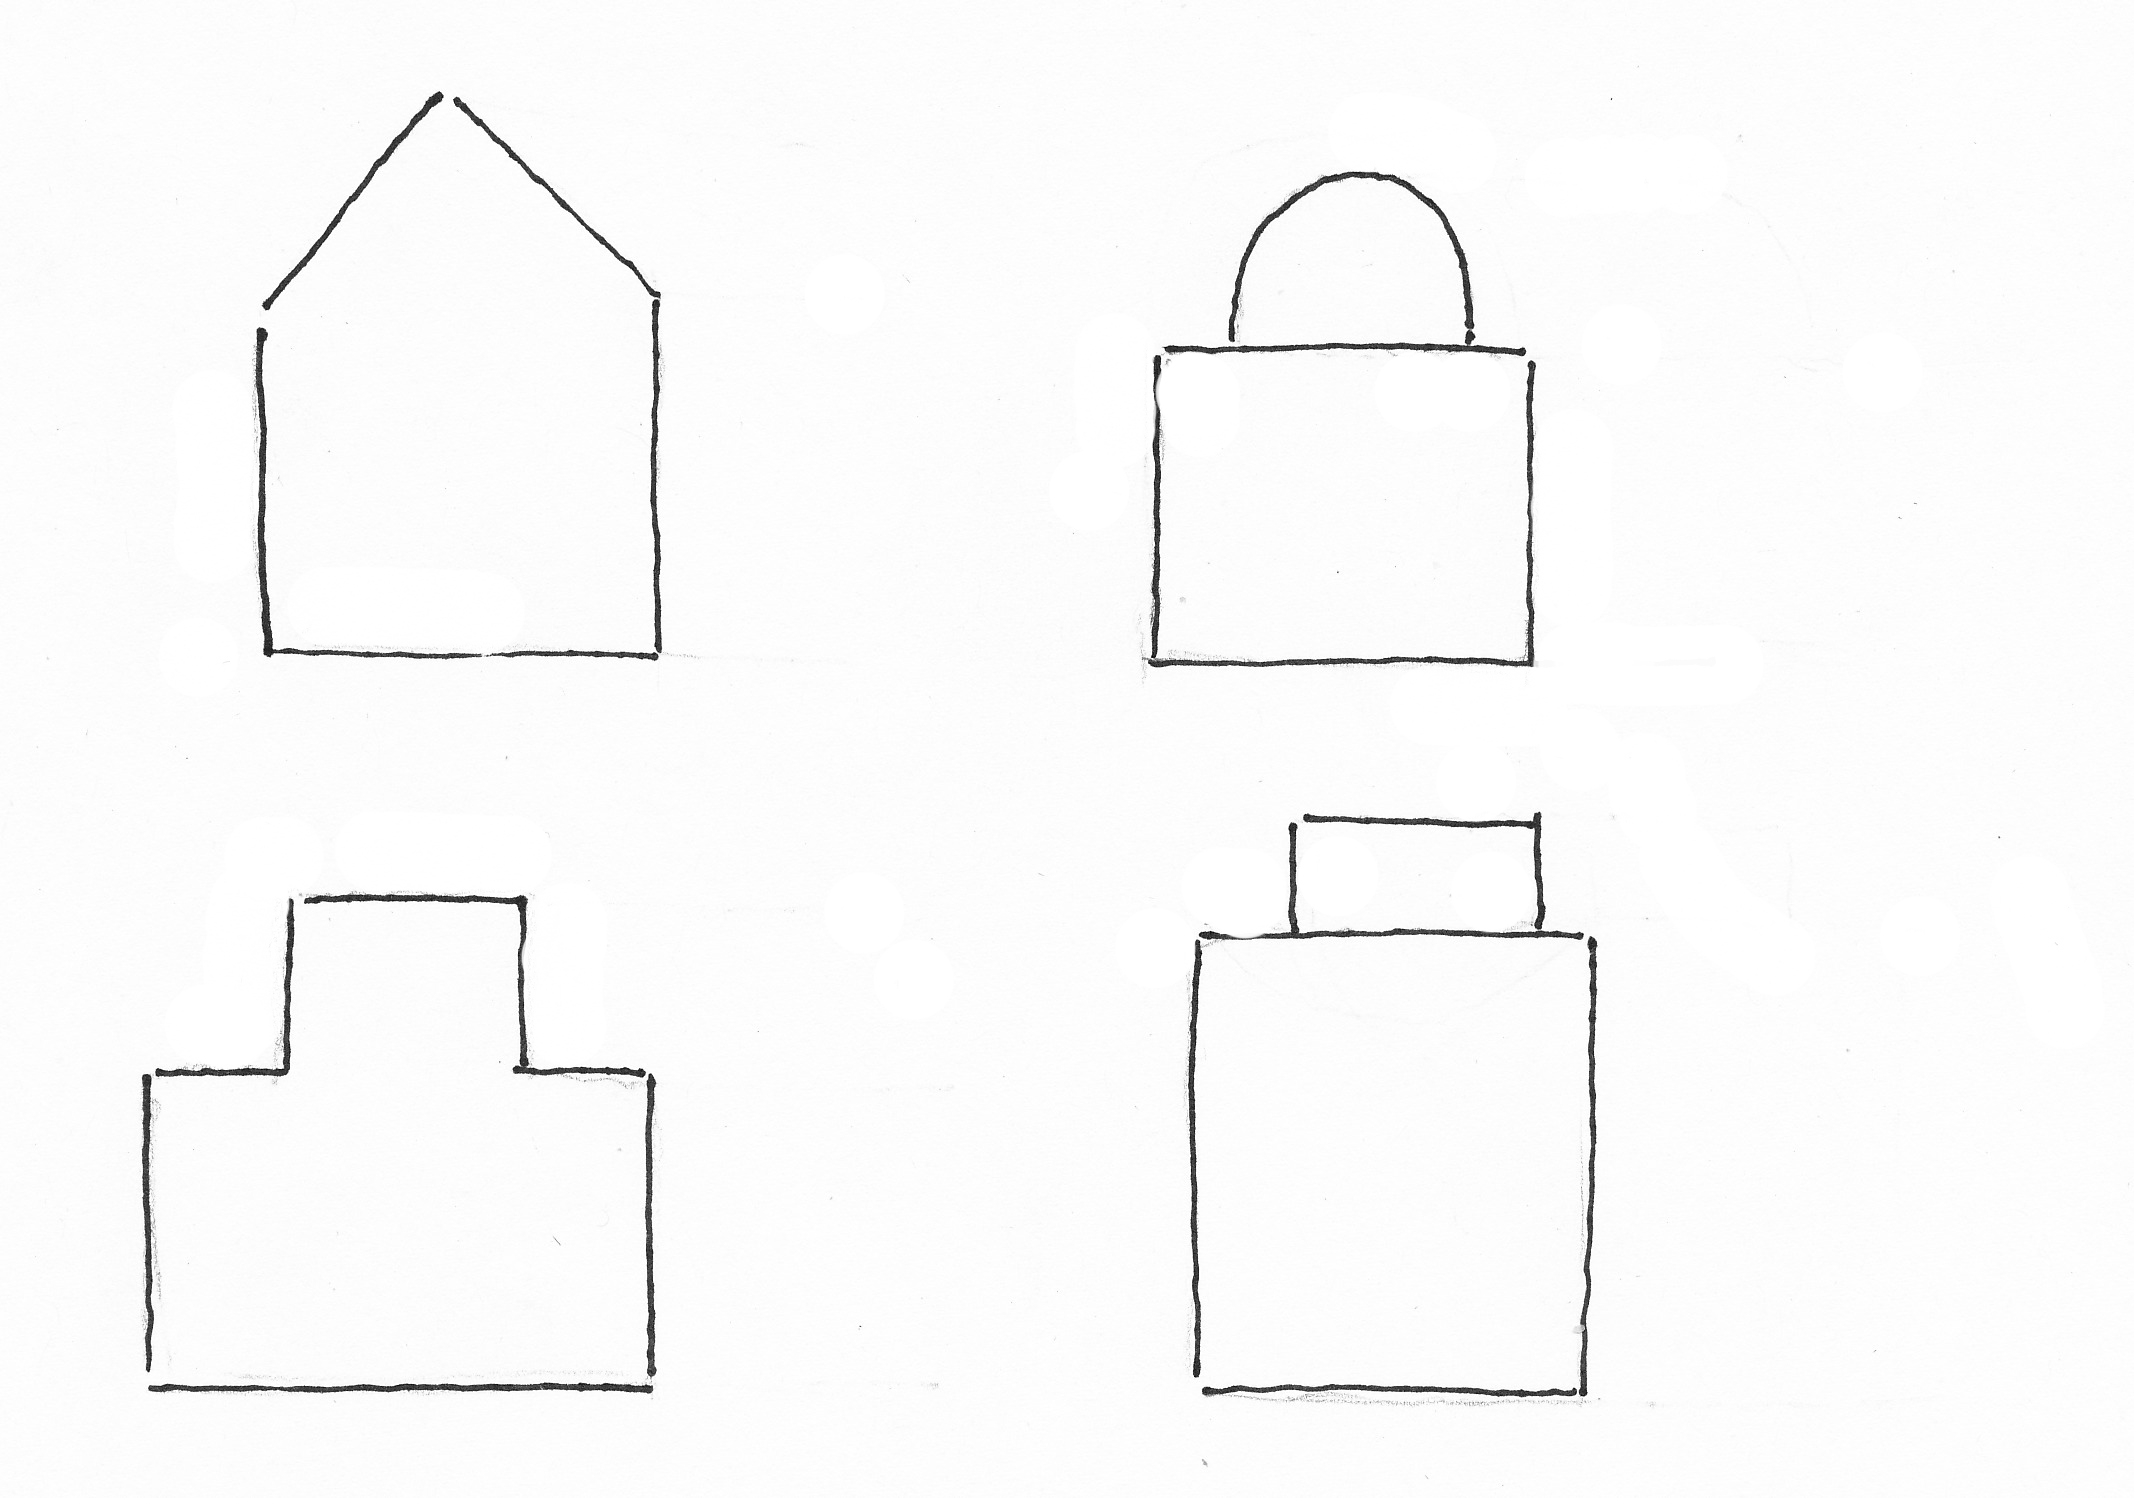
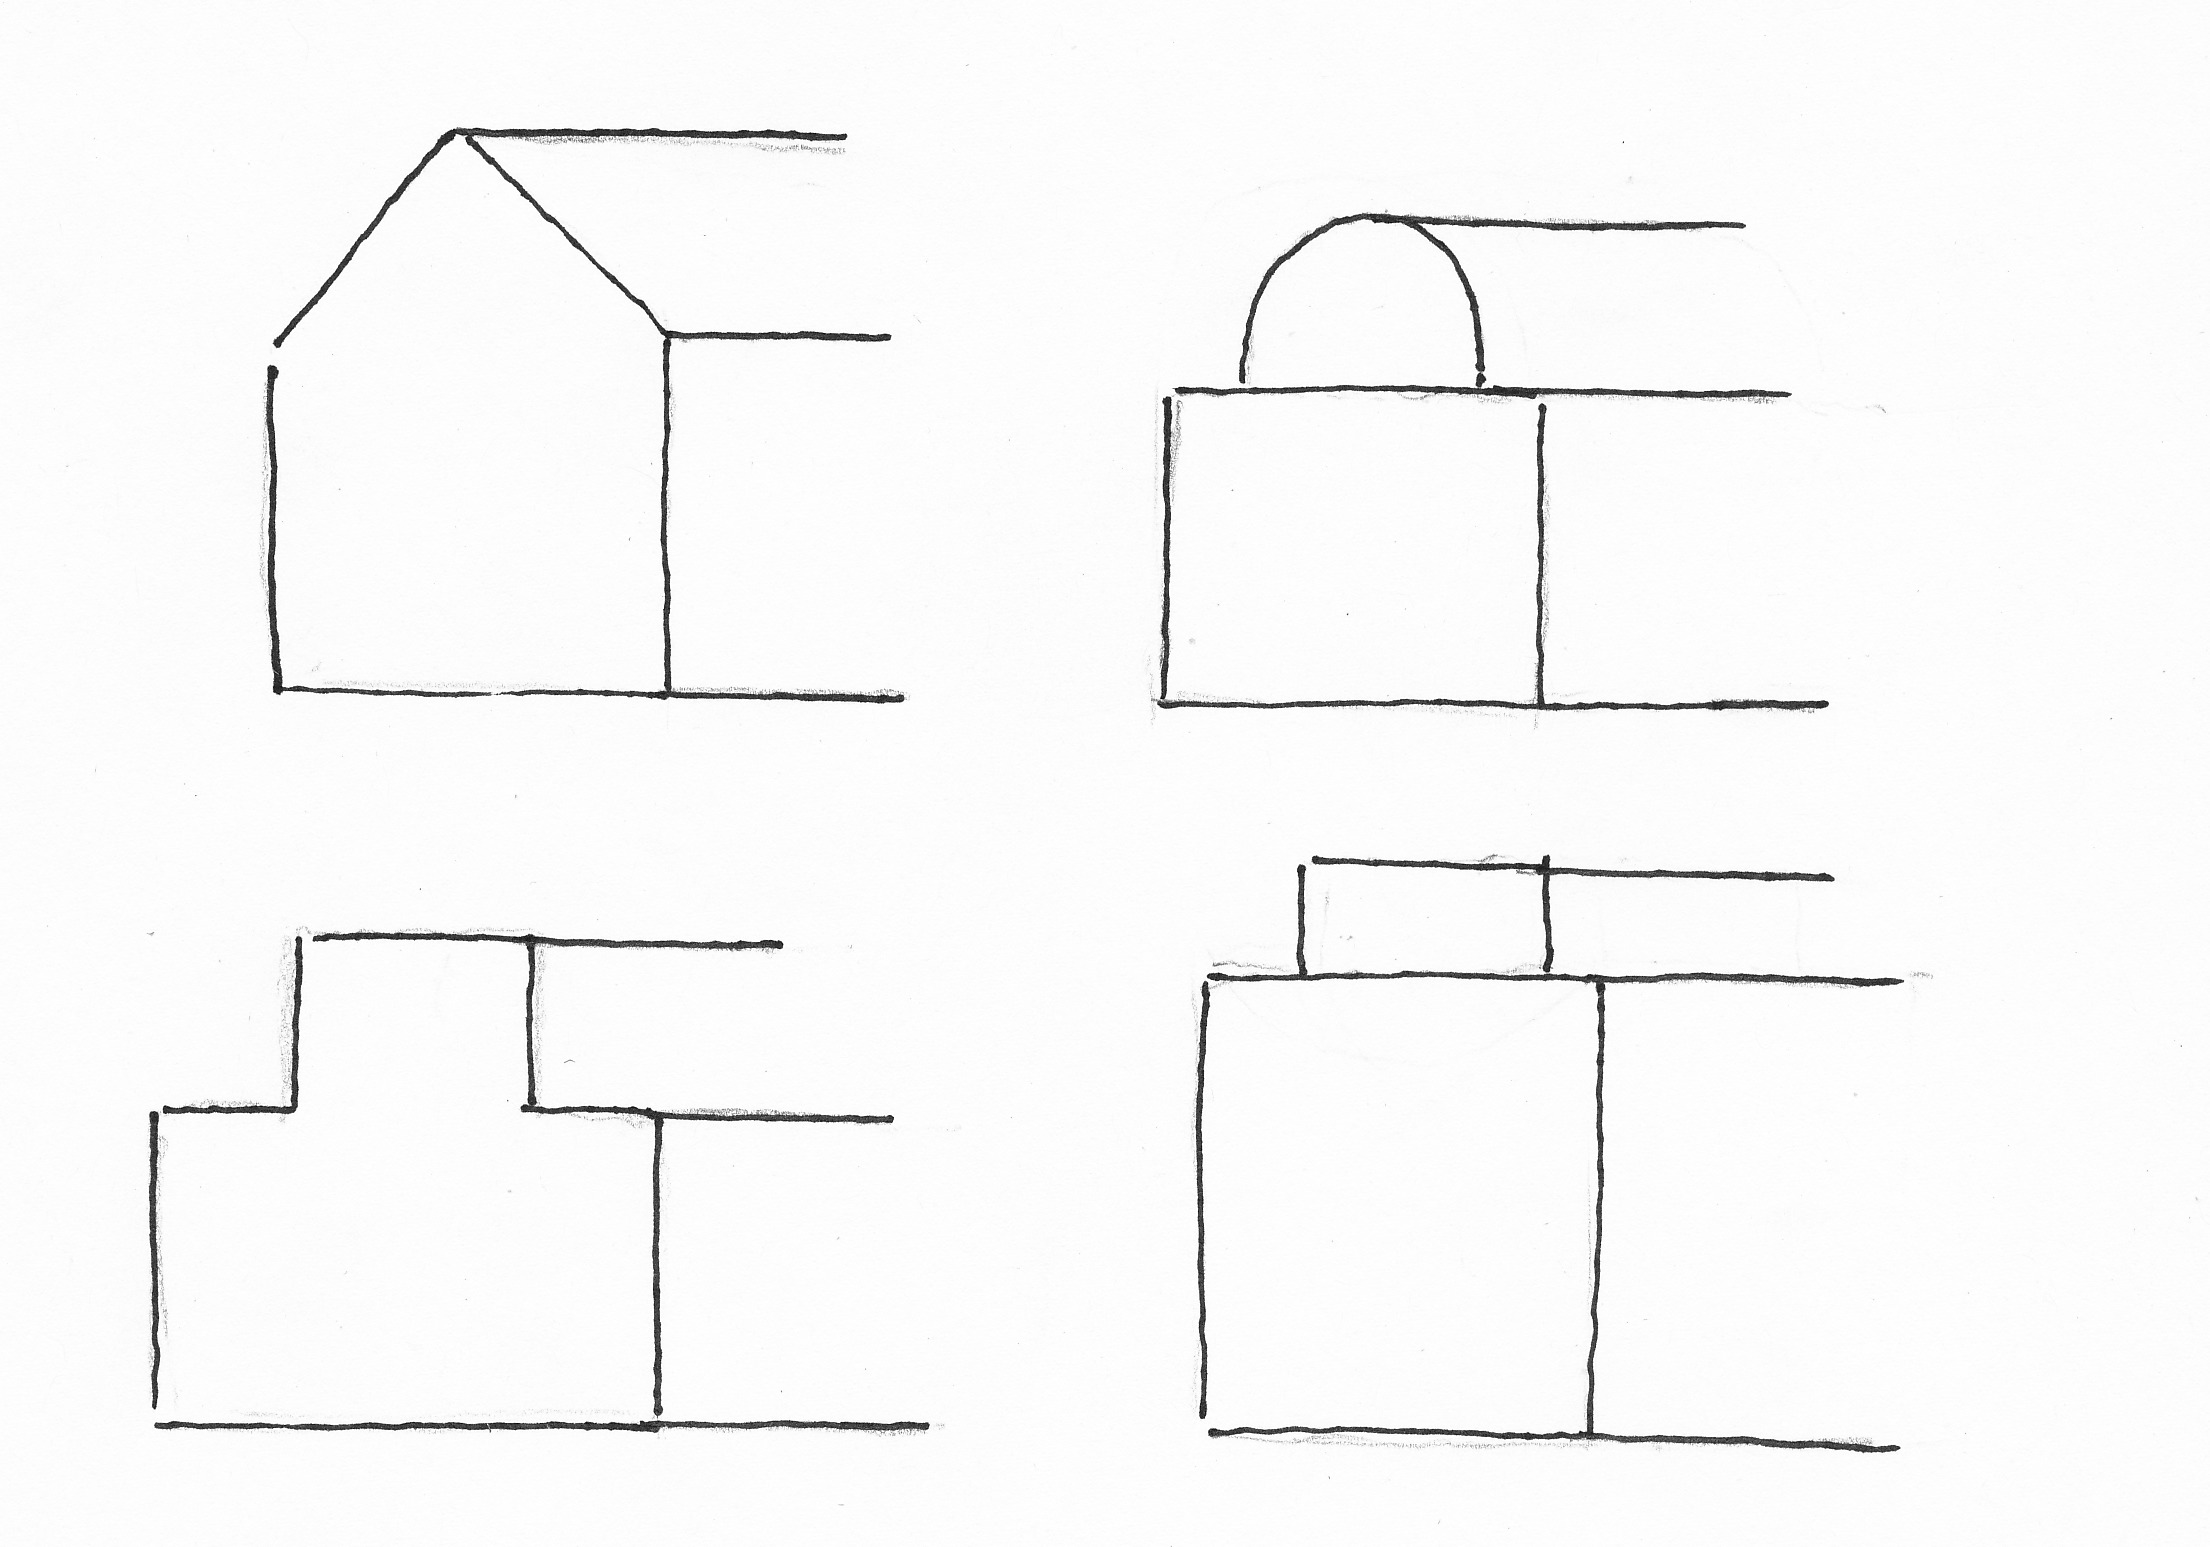
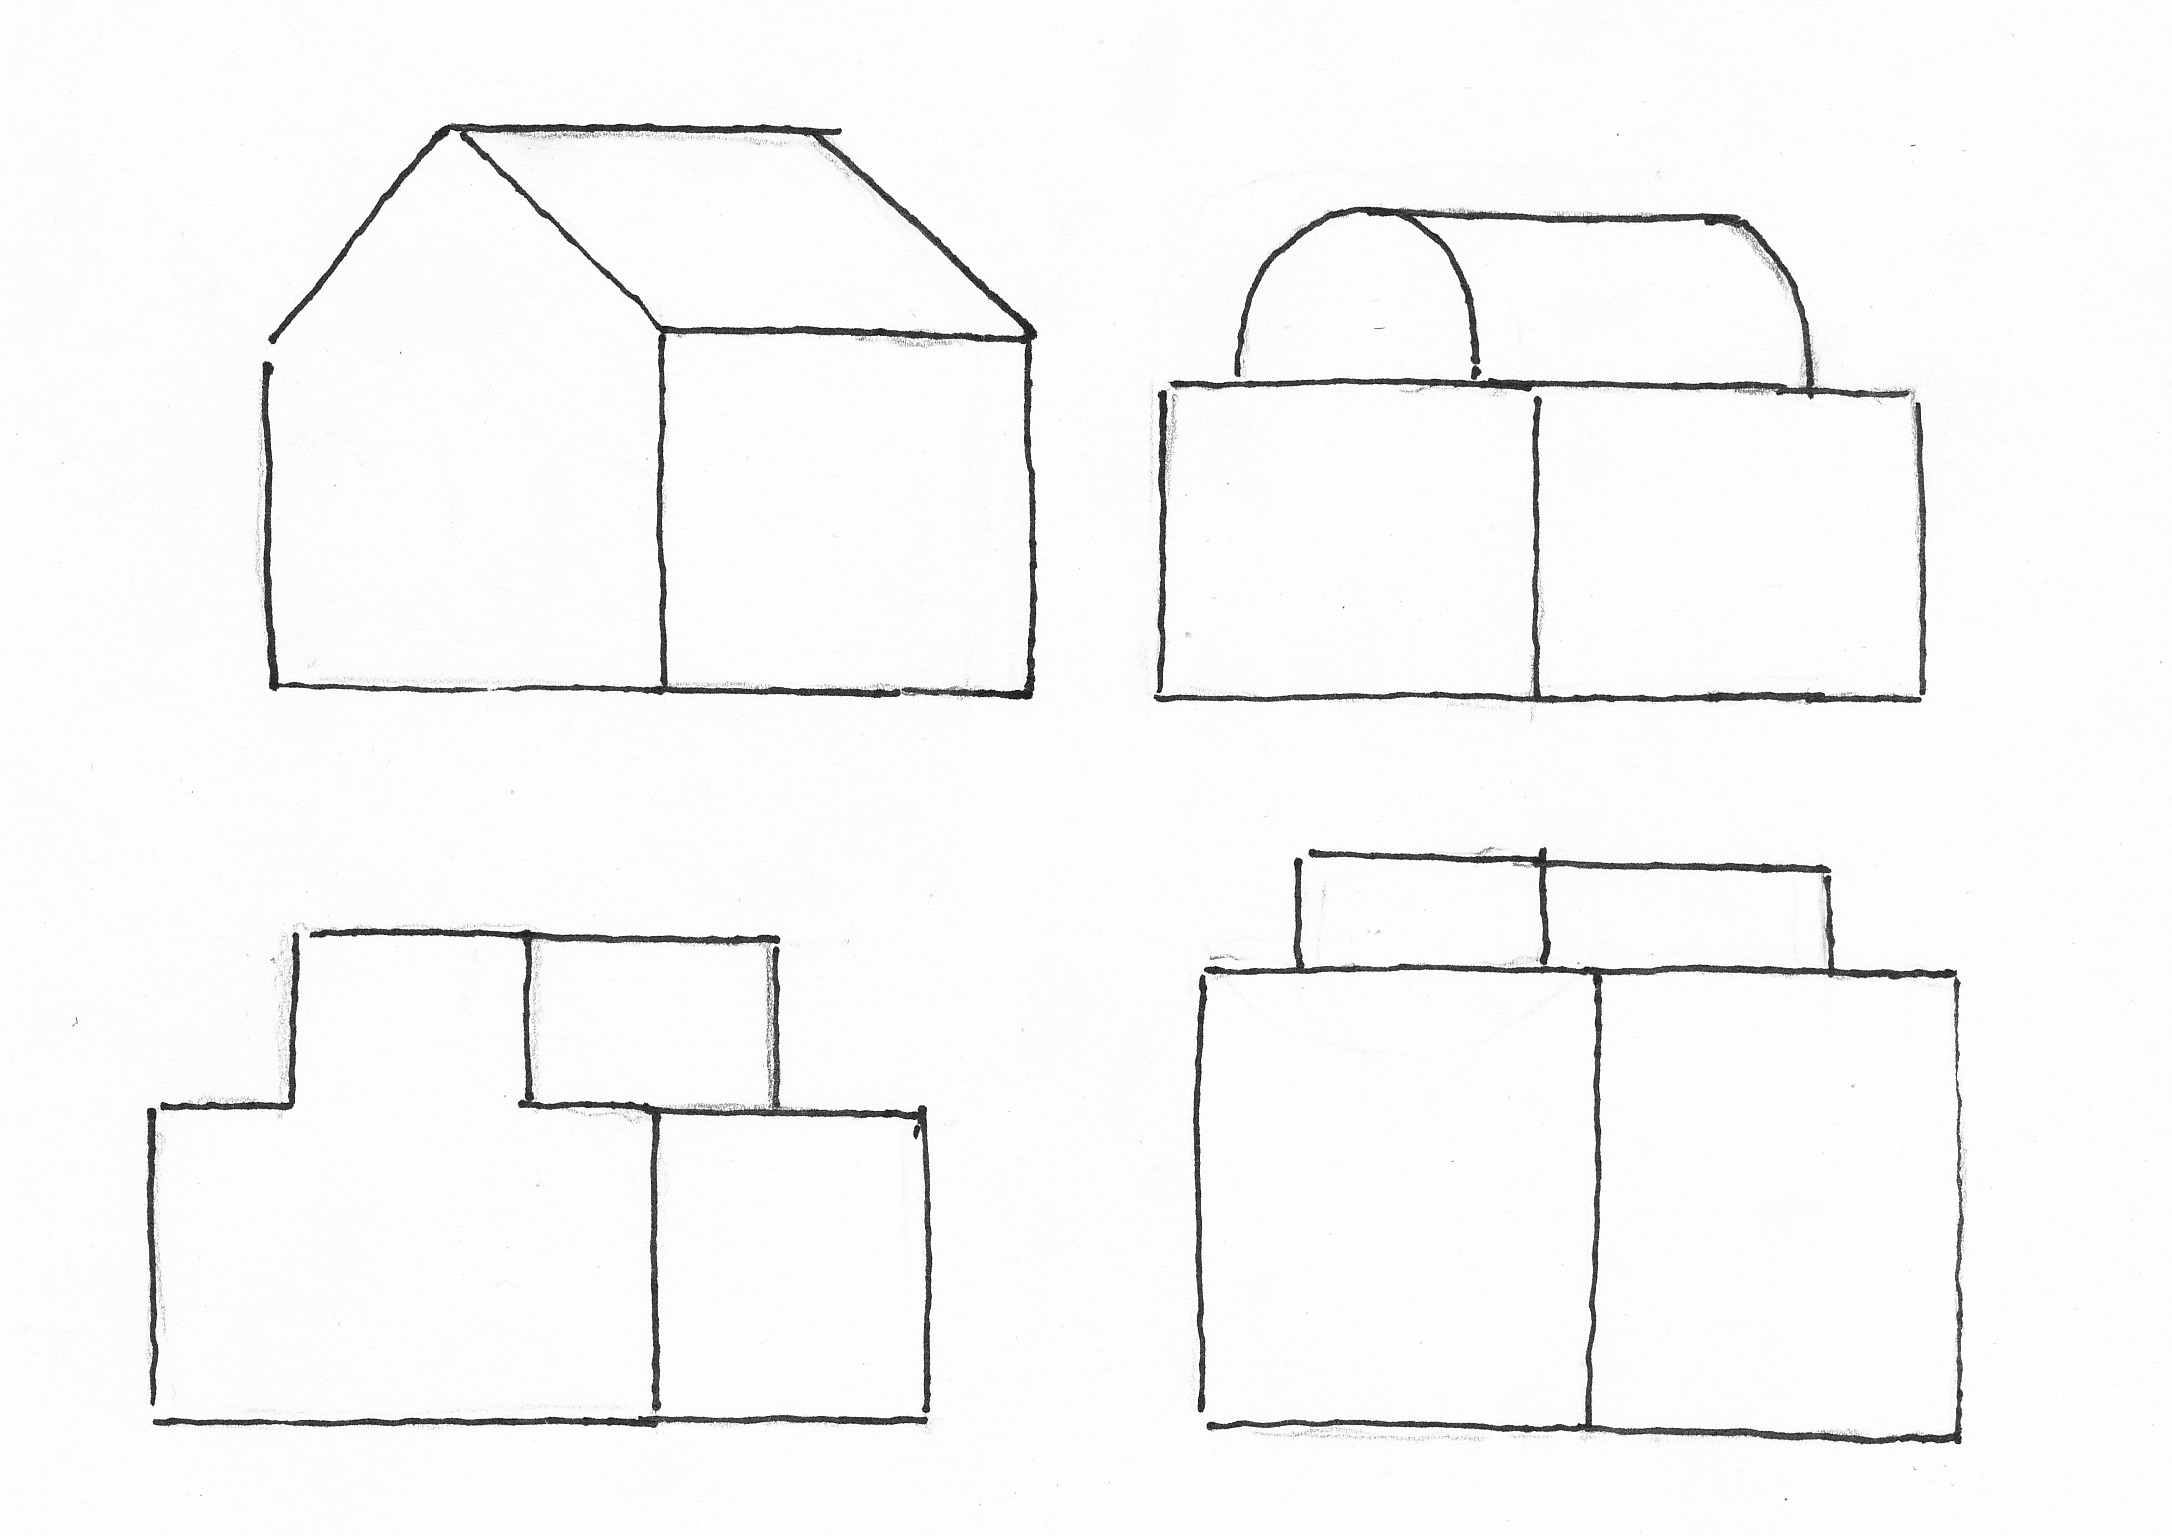
Exercise 1: In the same way as in chapter 1, you can also make 3D buildings. Copy the four front views from image 1. Then attach the sides to it (images 2 and 3). Of course, it can also be mirrored, with the sides on the left.
1
2
3
In the following image, two rows of buildings are drawn. In the top row, different facades/front views are drawn in one continuous line, pointed roofs, arch shapes and rectangular. In the bottom row, the sides are attached, which makes the buildings appear 3D. The insides of the windows and doors are also made 3D, which shows the thickness of a wall.

Exercise 2: Draw your own row of different types of buildings. First draw the shapes of the facades with one continuous line from left to right or vice versa and then attach the sides. Of course, it can also be mirrored, with the sides on the left.
In the following image, behind the front row, more rows or individual buildings are drawn. Each time I started with one continuous line. On the street, some figures are drawn so that you can clearly see how big the buildings are.
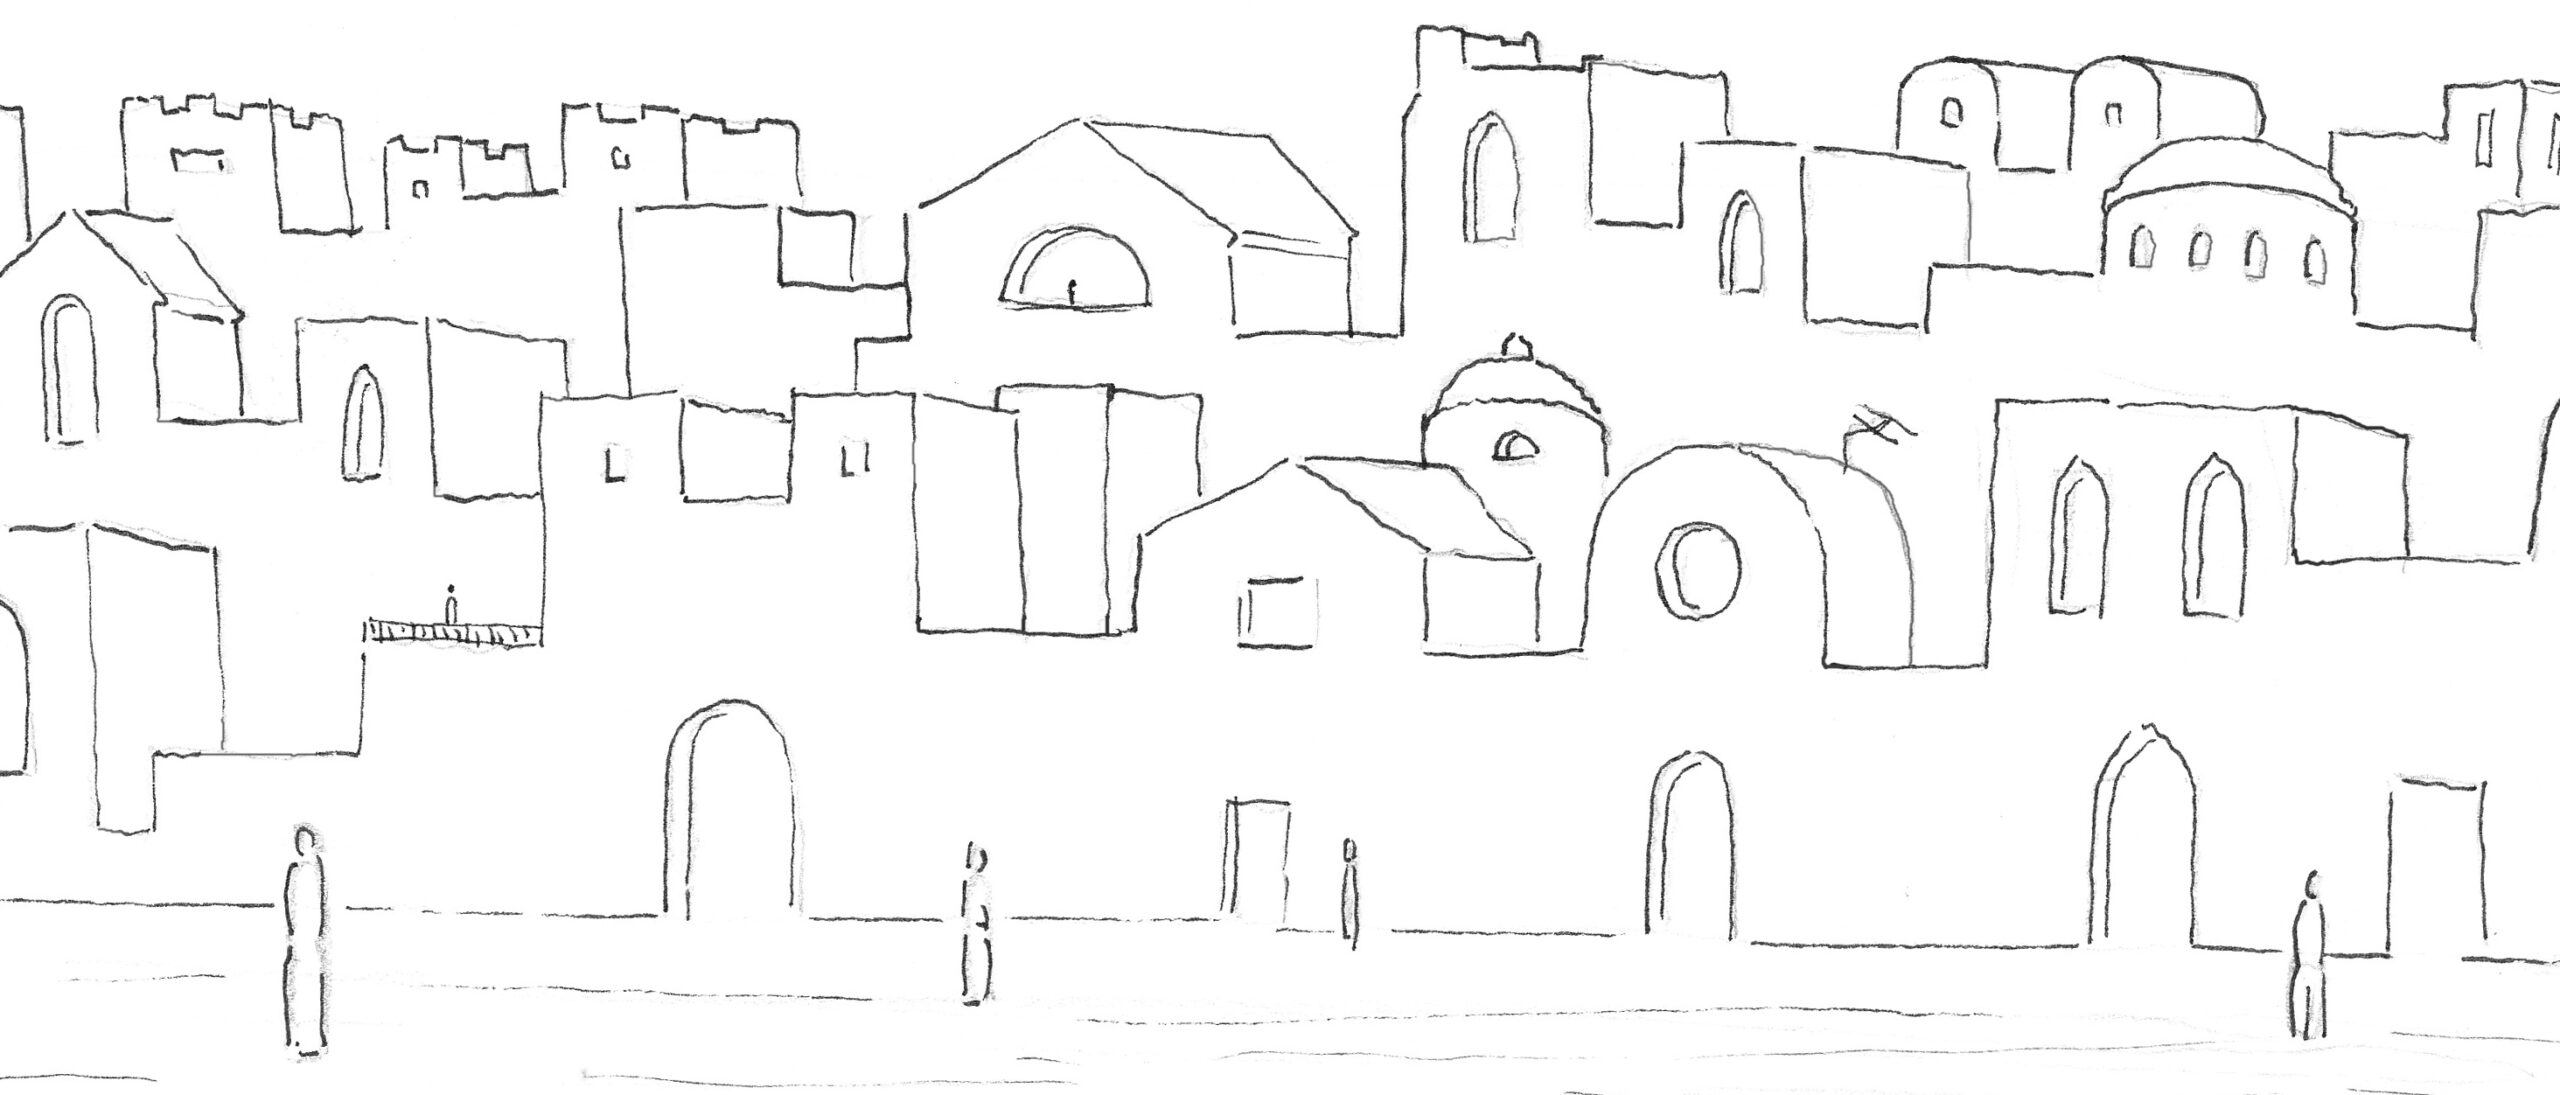
Exercise 3: Try to build a town like this too. Start with a bottom row. Leave some space underneath for a street, square or canal. If your town is built on a hill, or if the buildings are higher further away, you can place more and more rows or individual buildings behind it.
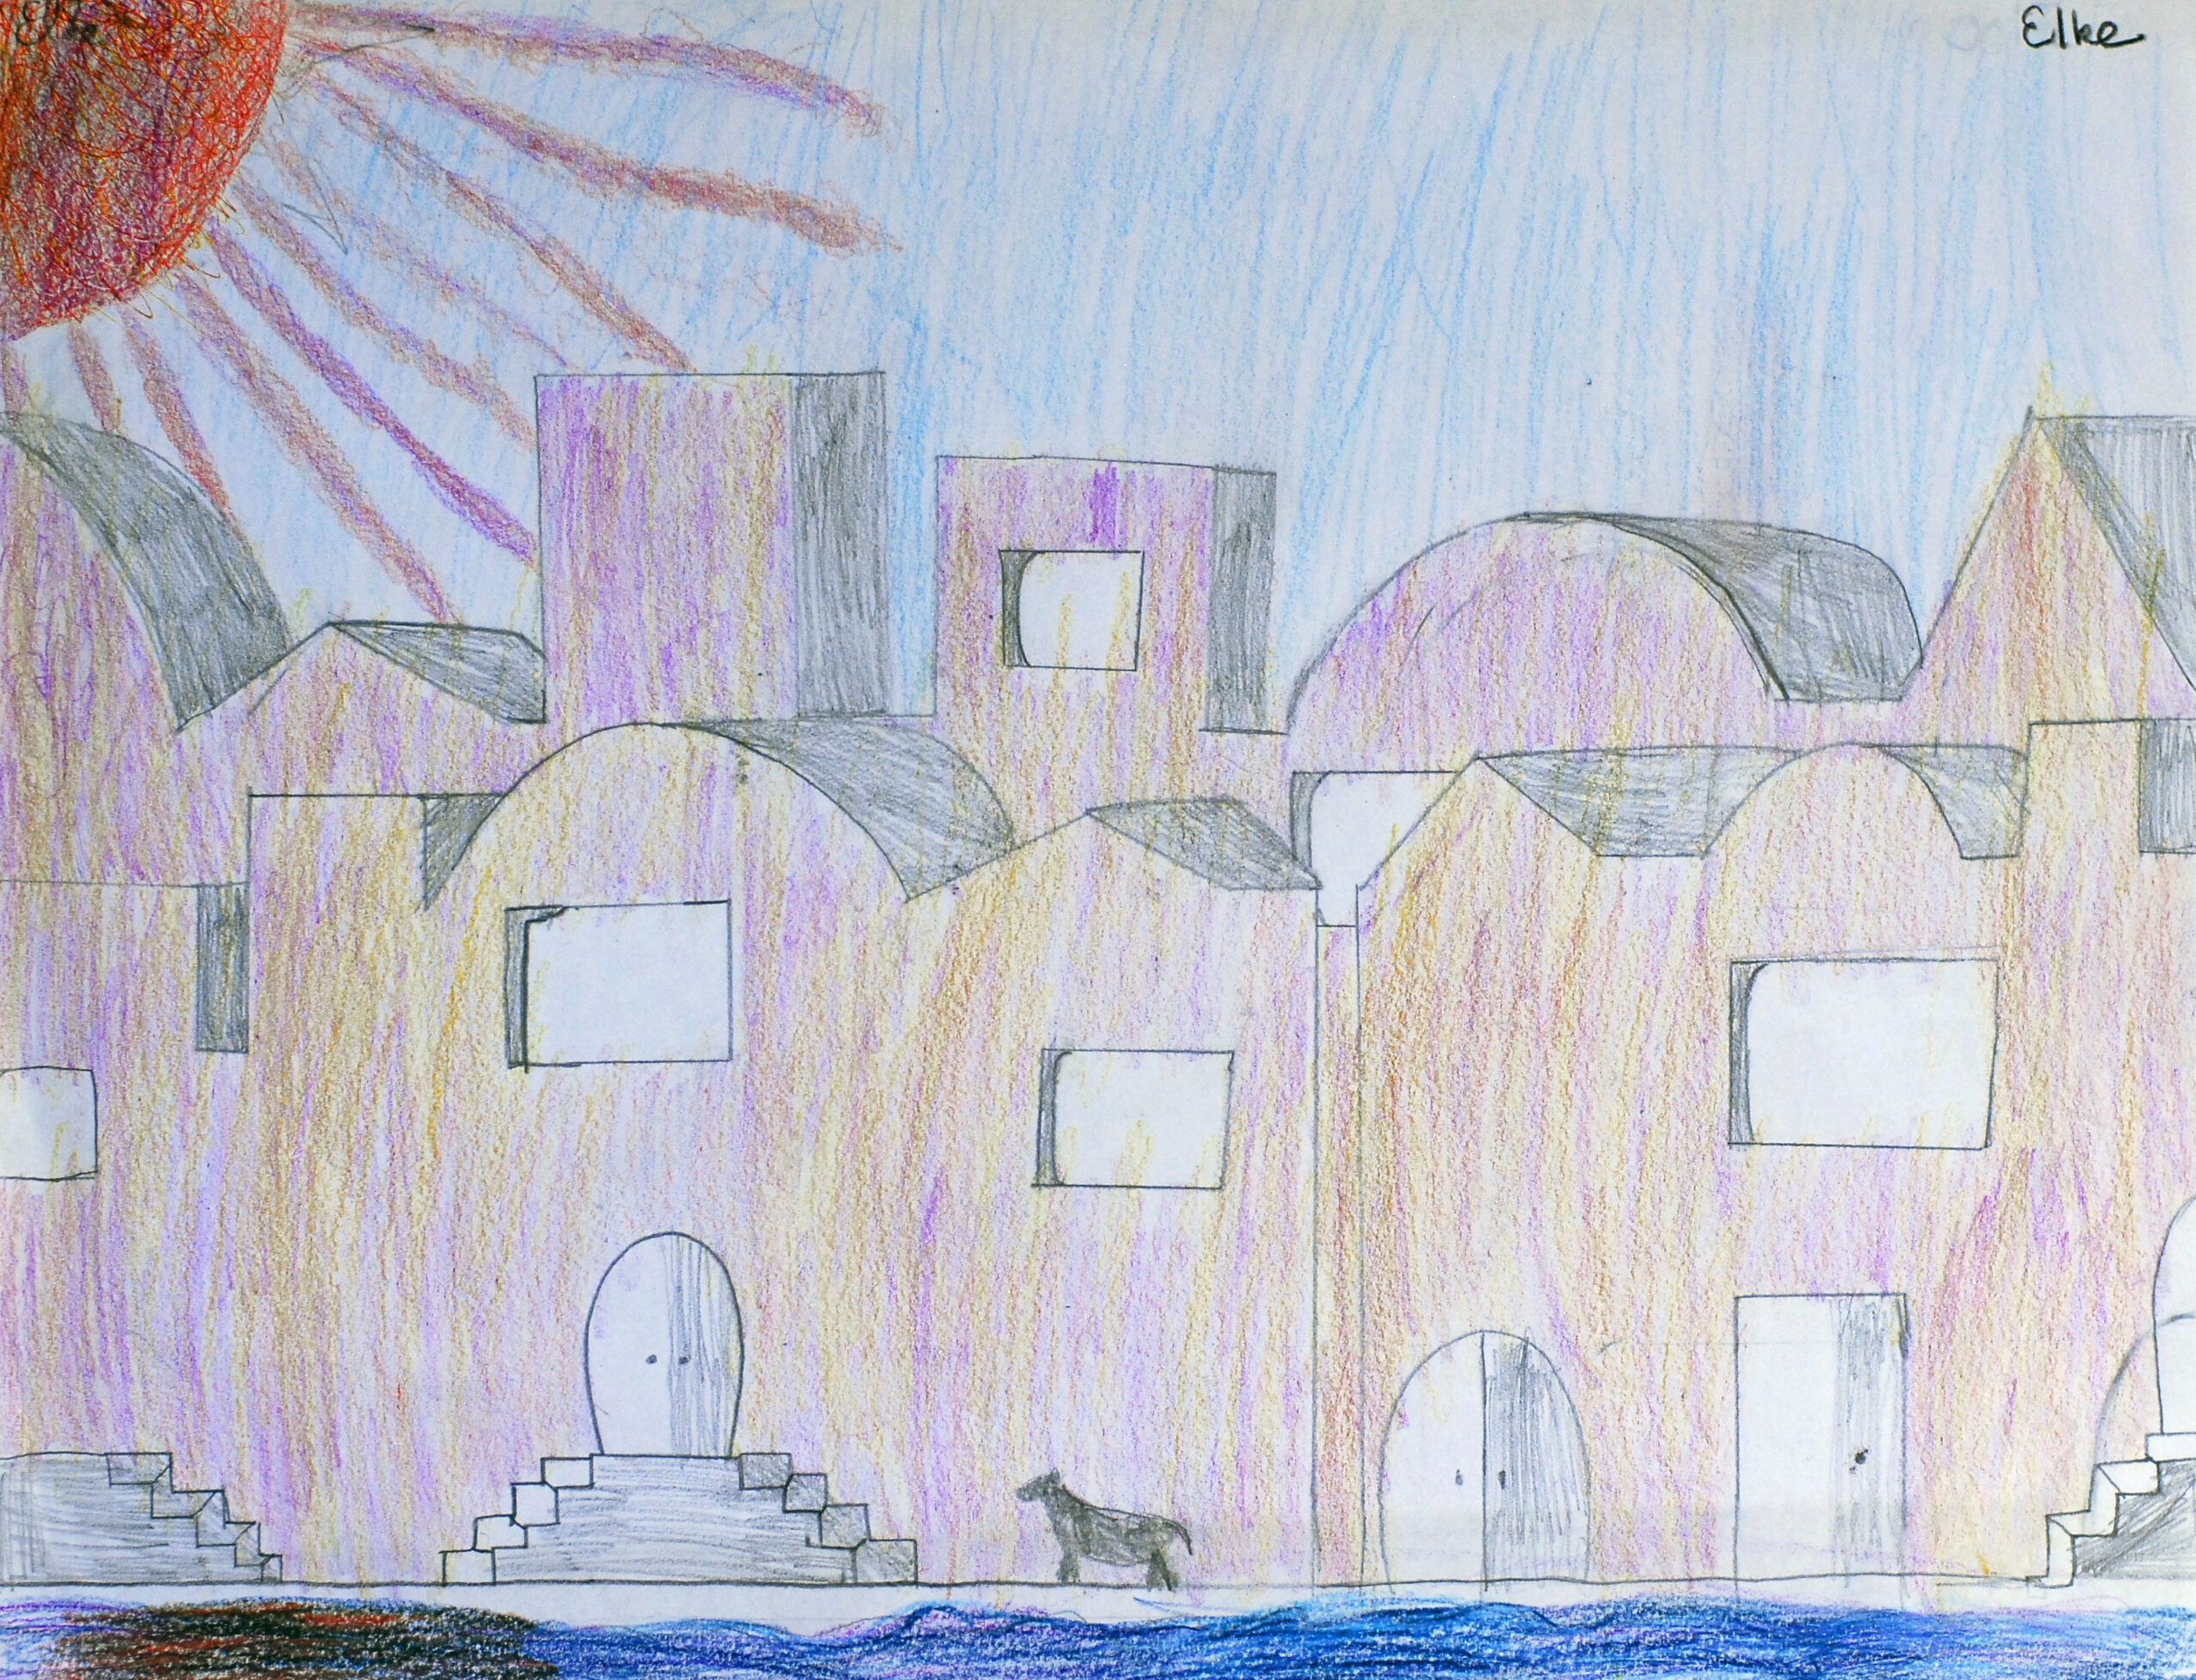
In a pupil’s drawing, the buildings are situated on a canal. It is evening and the sun is already low. A dog may be looking for its owner. The second row of buildings also runs all the way from left to right. Even the stairs and windows are a bit 3D made.
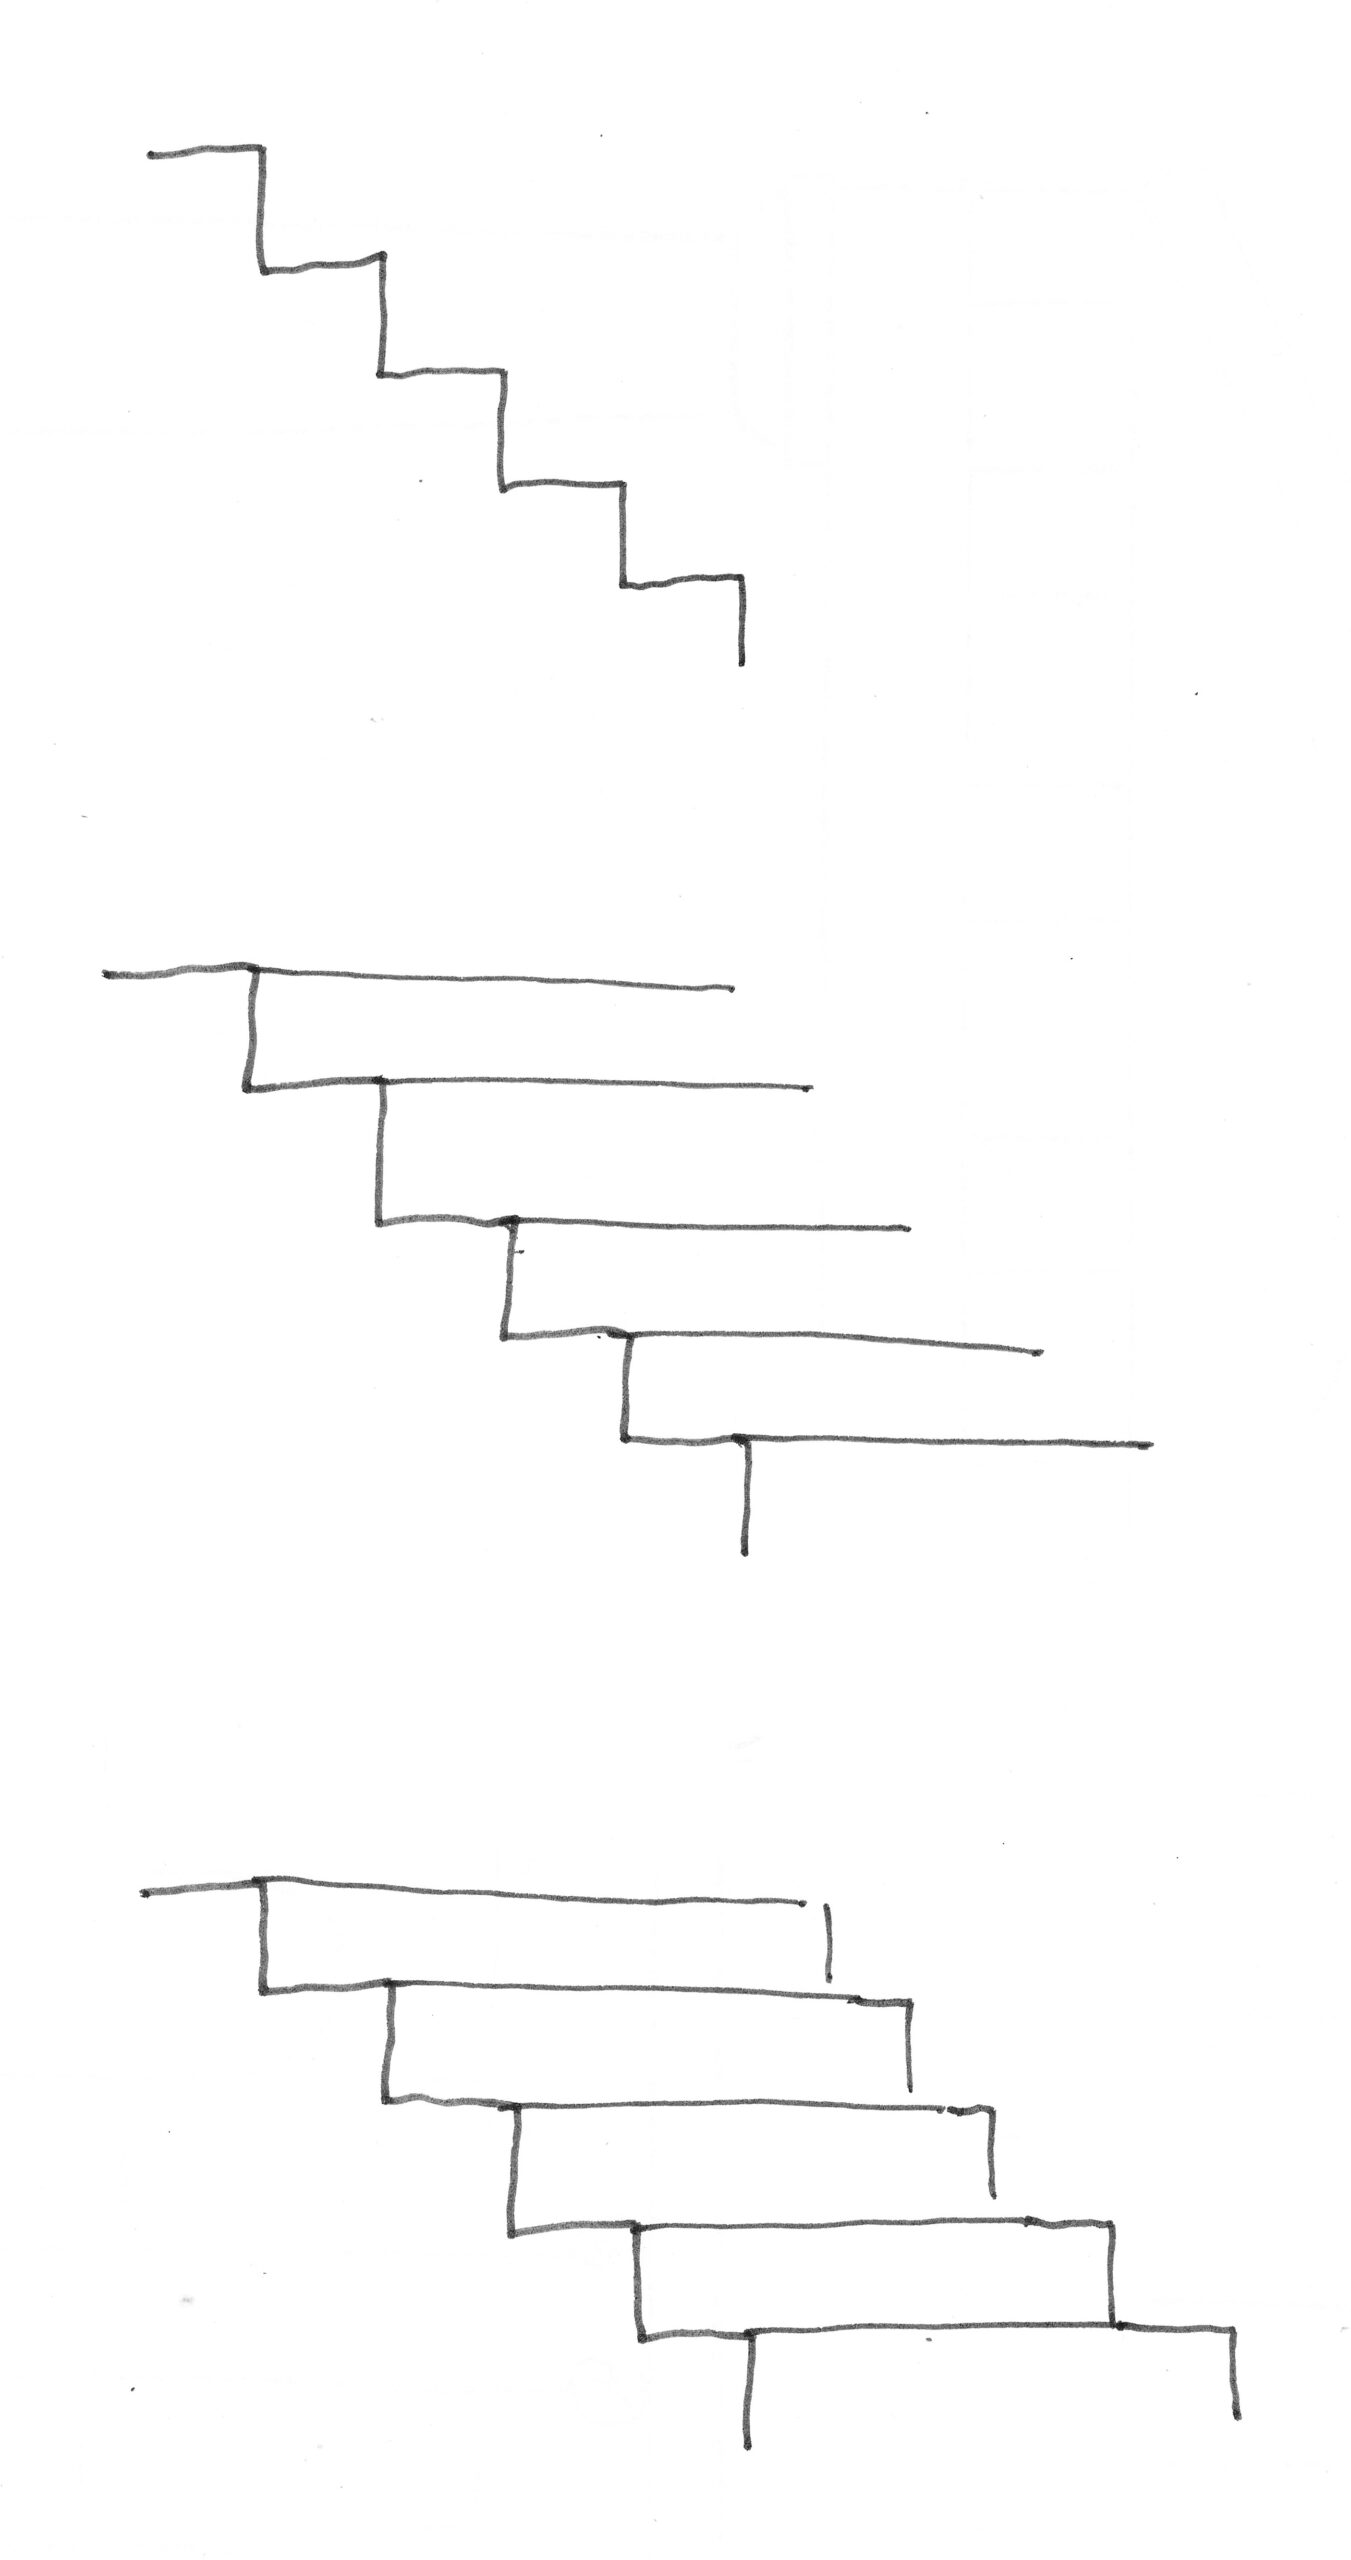
Finally, you can see in a few steps how to make a staircase to the left or to the right 3D.
Exercise 4: Draw one or more stairs to the left or to the right and maybe make up some figures sitting or standing.
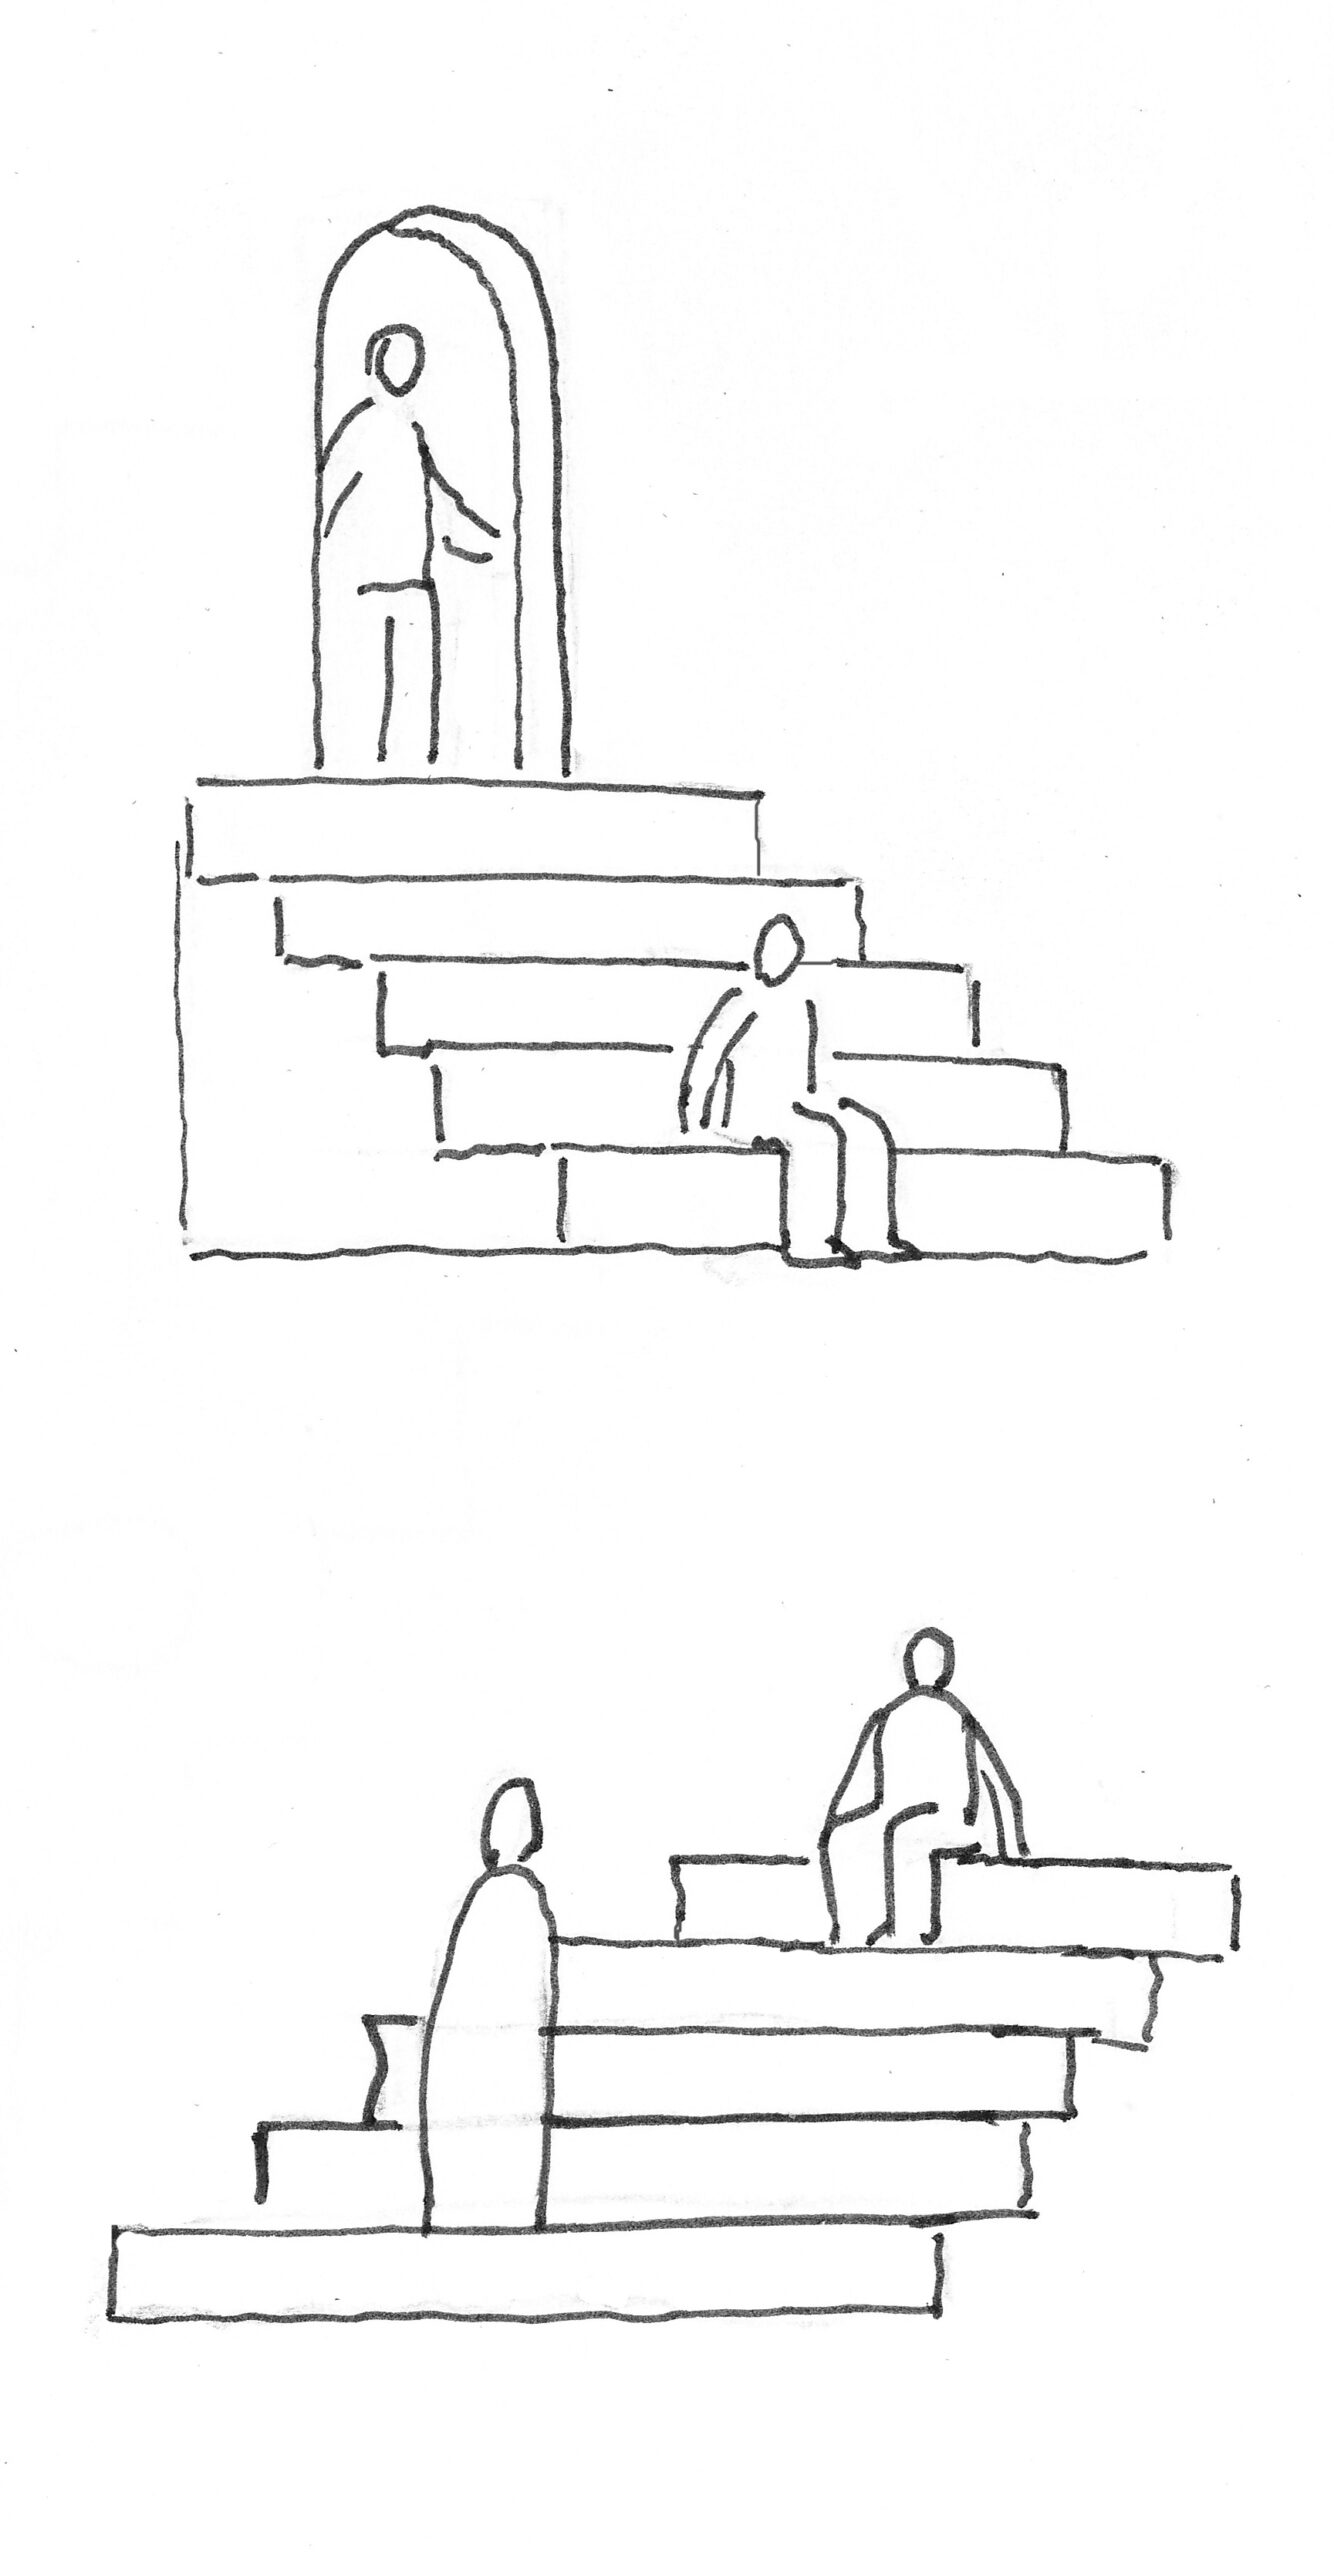
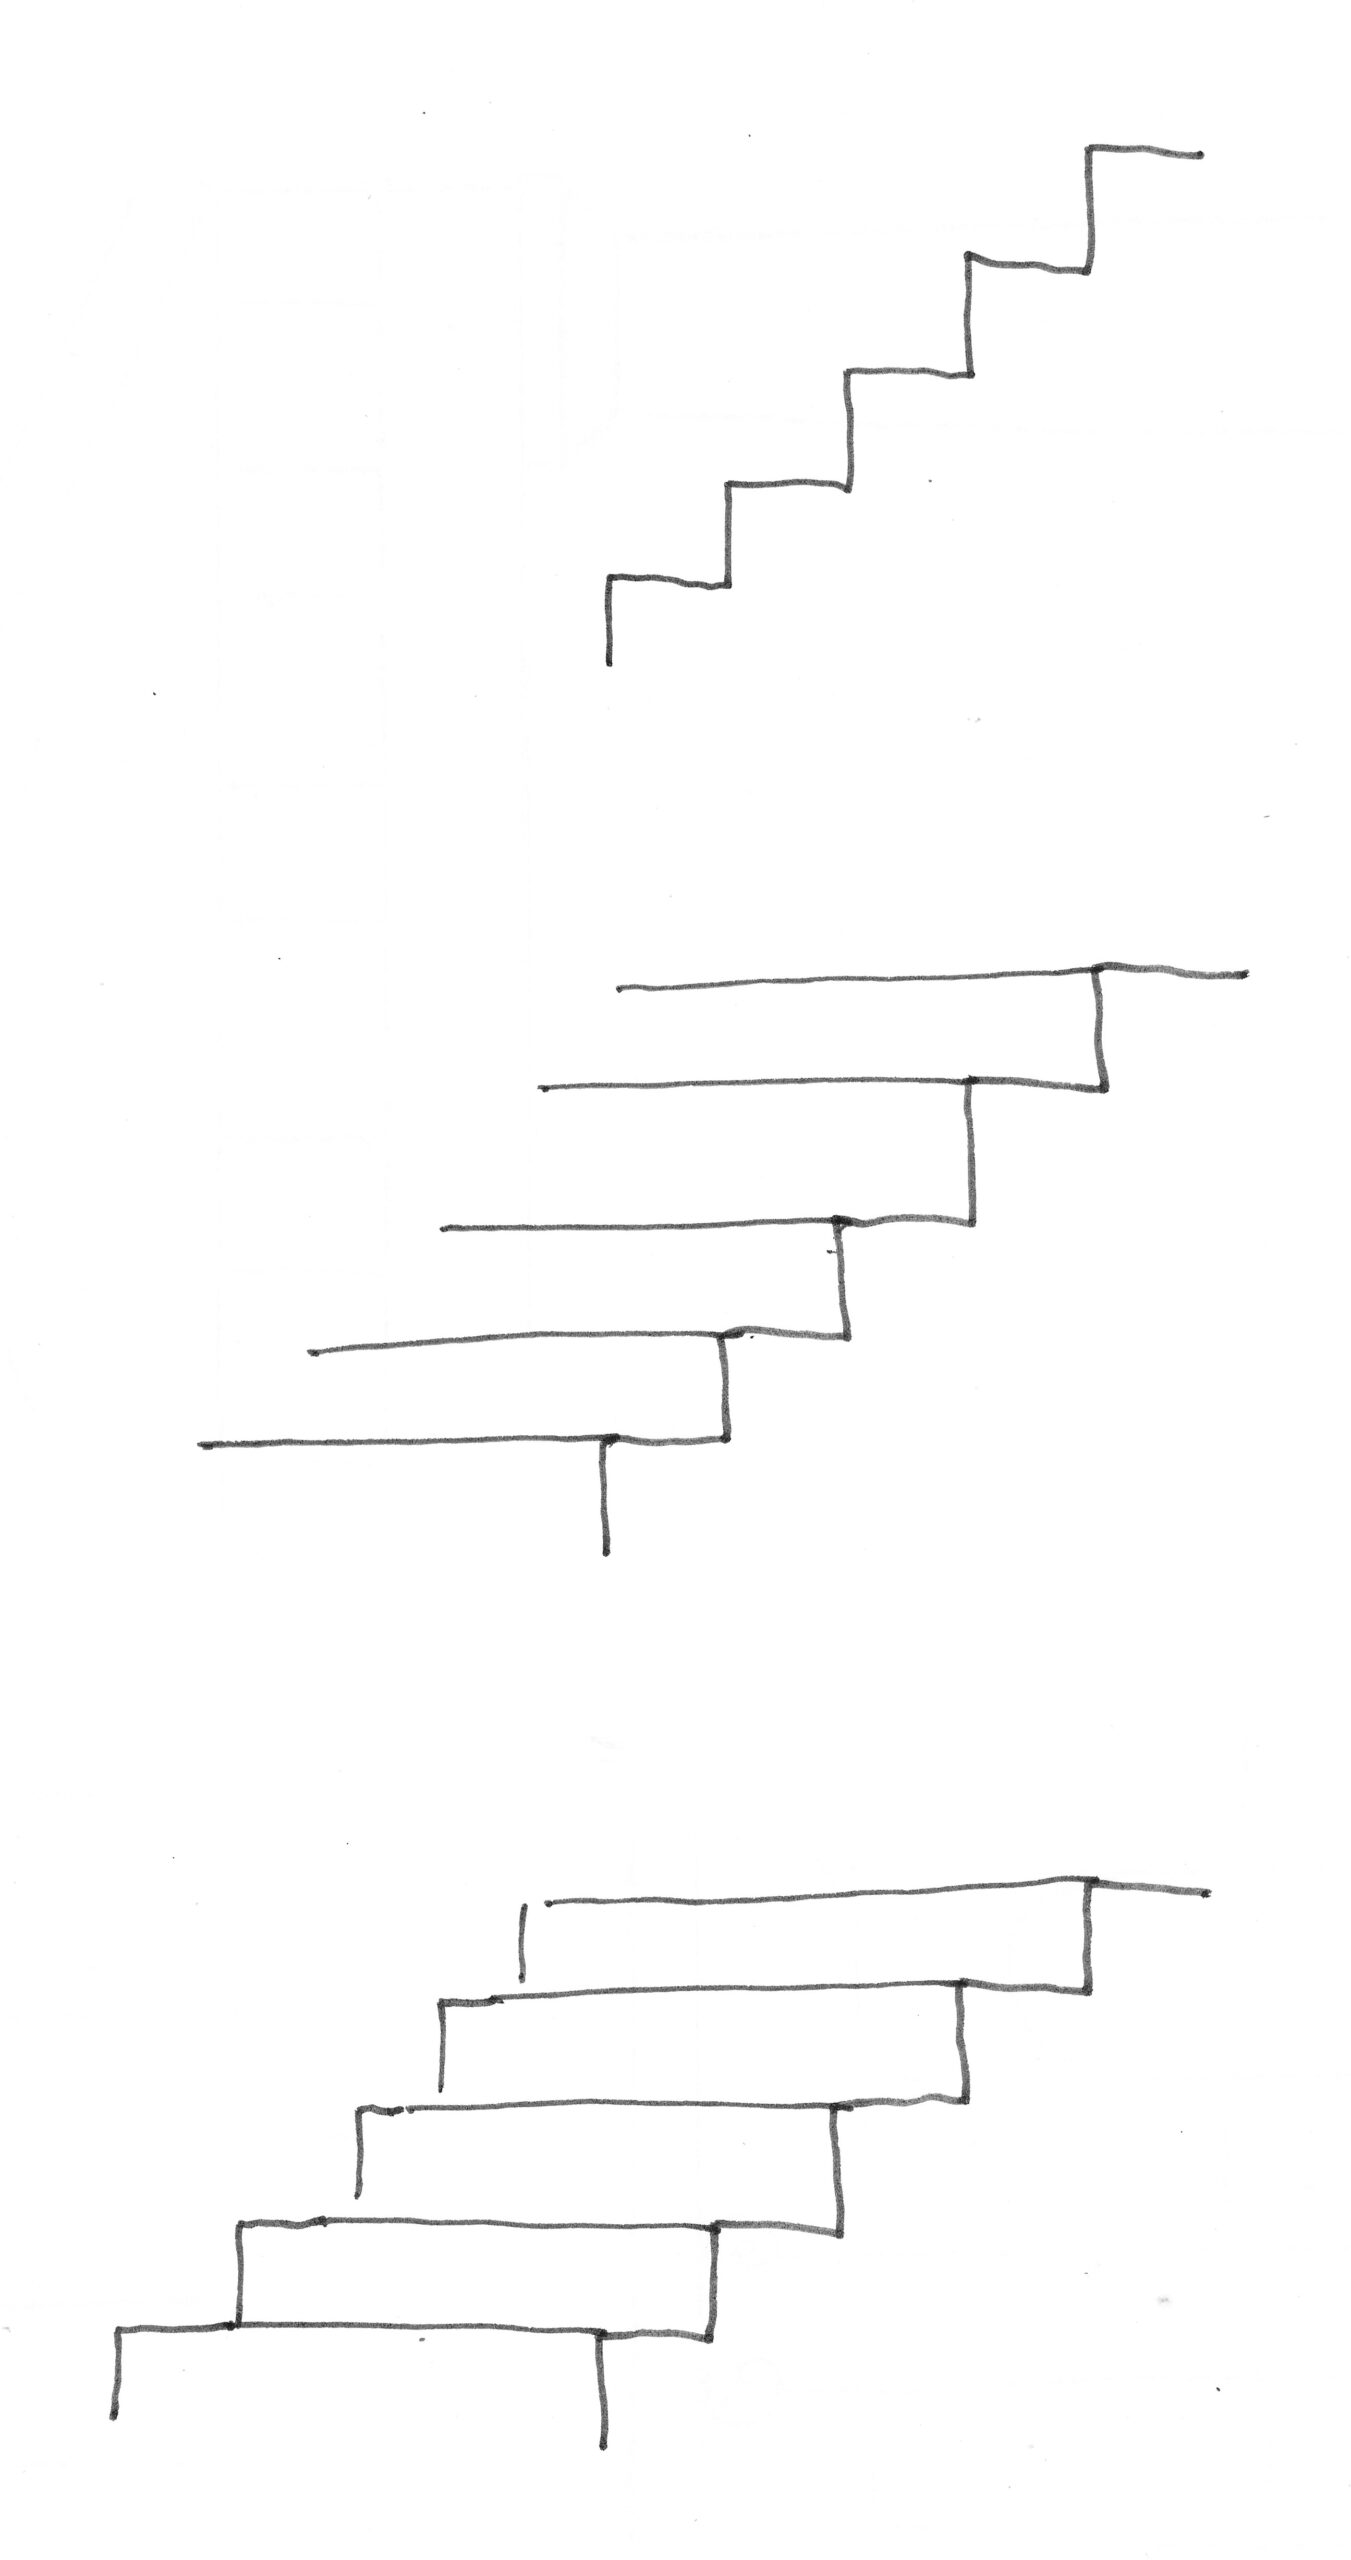
A staircase up to the left and up to the right
Possible elaboration of the exercise with dominoes from chapter 1:
